background image

8

 – English

General safety instructions

SAFETY INSTRUCTIONS

IMPORTANT INFORMATION

• The machine is only designed for cutting the edges of 

lawns.

• The only accessories to be used with the engine unit 

as a drive source are the cutting units we recommend 
in the chapter 

“Technical data”.

• The operator is responsible for accidents and the risk 

people and property are exposed to.

• Never use the machine if you are tired, if you have 

consumed alcohol, or if you are taking medicines that 
can affect your sight, your judgement or the control of 
your body.

• Do not operate when it's dark.

• Use personal protective equipment. See the section 

“Personal protective equipment”.

• Never use a machine that has been modi

fi

 ed so that it 

no longer corresponds with the original design.

• Never use a machine that is faulty. Follow the mainte-

nance, control and service instructions in this Opera-
tor

ʼ

s Manual. Some maintenance and service actions 

should be carried out by trained and quali

fi

 ed special-

ists. See the chapter 

“Maintenance”.

• All covers and guards must be 

fi

 tted before starting 

the machine. Check that the spark plug cap and HT 
lead are not damaged, otherwise you could get an elec-
tric shock.

Safety instructions before starting work

• Inspect the working area. Remove any objects, such as 

stones, broken glass, nails, steel wire, string, etc. that can be 
thrown or can wrap around the blade or blade guard.

• Keep others at a safe distance. Children, animals, onlookers 

and helpers should stand outside of the safety zone of 15 m 
(50 feet). Stop the machine immediately if any one should ap-
proach.

• Check the entire machine before starting work. Replace dam-

aged parts. Check for fuel leakage and that all safety guards 
and covers are complete and fastened securely. Check all 
nuts and bolts

• Check the blade for cracks or 

any other damage.

• Ensure the blade guard is 

mounted and not damaged.

• Check that the blade and blade guard are correctly secured.

• When adjusting the carburettor make sure the blade is held 

against the ground and that no one is in the immediate vicinity.

• Make sure the blade does not rotate when idling.

• Make sure the handle and safety features are in order. Never 

use a machine that has parts missing or has been changed in 
relation to the speci

fi

 cation.

• Only use the machine for the purpose it was intended for.

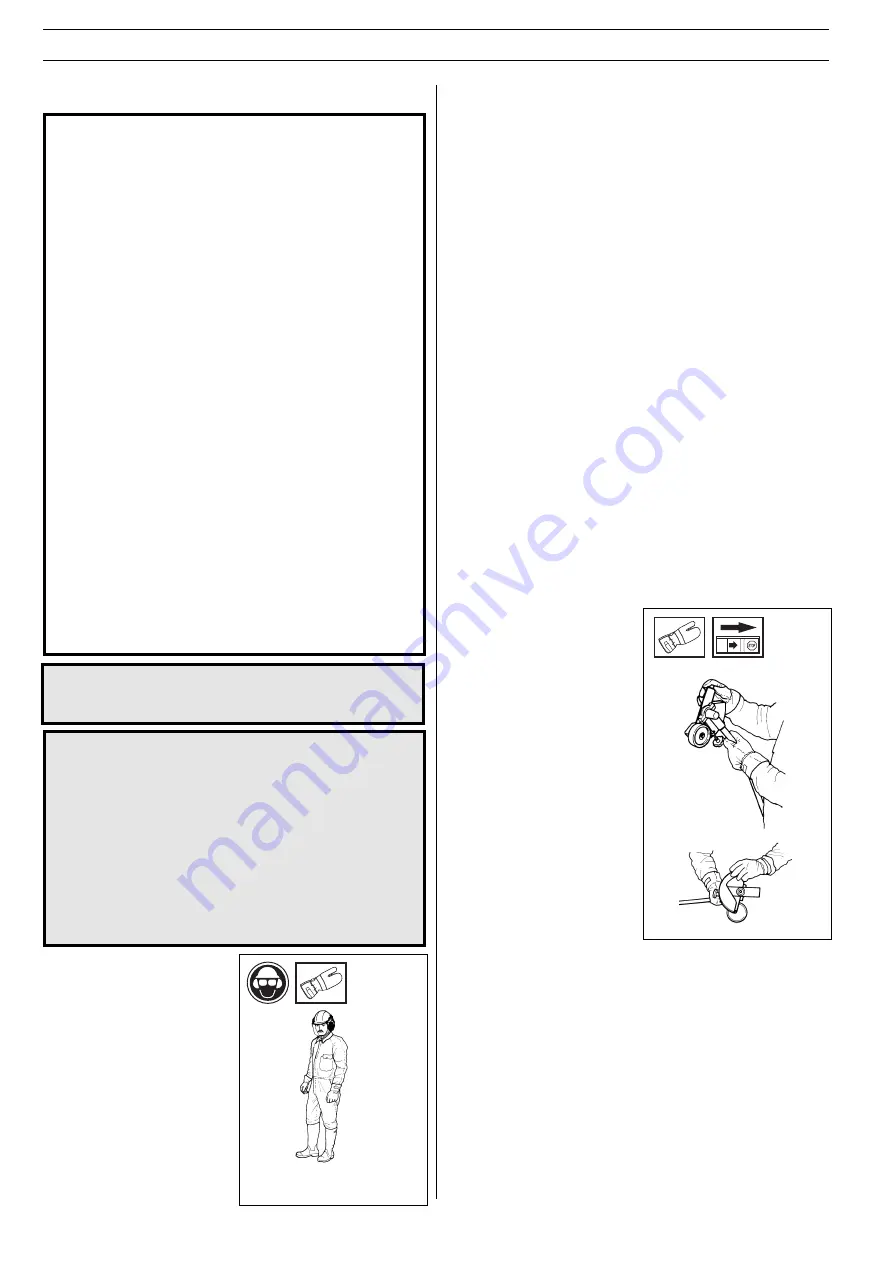
Personal protection

• Always wear boots and other 

equipment described in the 
section 

“Personal protective 

equipment”

.

• Always wear working clothes 

and heavy-duty long trousers.

• Never wear loose sitting 

clothes or jewellery.

• Persons with long hair 

should, for personal safety, 
put their hair up.

Safety instructions regarding the surround-
ings

• Never allow children to use the machine.

• Ensure no one comes closer than 15 metres when working.

• Never allow anyone else to use the machine without 

fi

 rst en-

suring that they have understood the contents of the Opera-
tor

ʼ

s Manual.

WARNING! 
Faulty cutting equipment  increases the risk 
of accidents. 

!

WARNING! Never allow children to use or 
be in the vicinity of the machine. As the 
machine is equipped with a spring-loaded 
stop switch and can be started by low 
speed and force on the starter handle, 
even small children under some circum-
stances can produce the force necessary 
to start the machine. This can mean a 
risk of serious personal injury. Therefore 
remove the spark plug cap when the ma-
chine is not under close supervision.

!

Summary of Contents for 325EX SERIES

Page 1: ...Operator s manual Please read these instructions carefully and make sure you understand them before using the machine English 323E 325EX series ...

Page 2: ...working Warning The blade continues to rotate even after the engine has stopped When the engine has stopped stop the blade from rotating by letting the blade come in contact with the ground Indicates the direction of rotation The engine is switched off by moving the stop switch to the stop position CAUTION The stop switch automatically returns to the start position In order to prevent unintentiona...

Page 3: ...cks before starting 15 Start and stop 15 MAINTENANCE Carburettor 16 Muffler and catalytic converter 18 Cooling system 18 Spark plug 18 Air filter 19 Angle gear 19 Lubricating the flexible drive shaft 19 Adjusting the edger s cutting depth 19 Maintenance schedule 20 TECHNICAL DATA 323E 22 325EX series 22 Husqvarna AB has a policy of continuous product development and therefore reserves the right to...

Page 4: ...hrottle and the throttle trigger lock return to their original positions This takes place via two independ ent return spring systems This means that the throttle is automatically locked in the idling position 2 Stop switch The stop switch should be used to stop the engine 3 Cutting attachment guard This guard is intended to pre vent objects from being thrown towards the operator and to protect the...

Page 5: ...p ing system reduces the trans fer of vibrations between the engine unit cutting equipment and the machineʼs handle unit WARNING Over exposure to vibrations can result in blood vessel or nerve injury to persons suf fering with blood circulation problems Seek medical attention if you experience physical symptoms that can be related to over exposure to vibrations Examples of such symptoms are numbne...

Page 6: ... the machine and apply full throttle Release the throttle and check that the cutting equipment stops and remains at a standstill If the cutting equipment rotates with the throttle in the idling position then the carburettorʼs idling setting must be checked See chapter Maintenance 2 Stop switch Start the engine and make sure that the engine stops when the stop switch is moved to the stop position 3...

Page 7: ... Tighten the nut using a socket spanner 35 50 Nm 3 5 5 kpm WARNING Always stop the engine before starting work on any part of the cutting equipment This continues to rotate even after the throttle has been released Ensure that the cutting equip ment has stopped completely and remove the cable from the spark plug before you start to work on it WARNING Never use a machine with defective safety equip...

Page 8: ... machine before starting work Replace dam aged parts Check for fuel leakage and that all safety guards and covers are complete and fastened securely Check all nuts and bolts Check the blade for cracks or any other damage Ensure the blade guard is mounted and not damaged Check that the blade and blade guard are correctly secured When adjusting the carburettor make sure the blade is held against the...

Page 9: ...contact with the cutting equipment Place the machine on the ground make sure the blade is free from branches and stones Press the machine body against the ground using your left hand NOTE Do not use your foot Grip the starter handle with your right hand and pull the starter cord Fuel safety Always use a fuel container with an anti spill valve Never fill the machine while the engine is running Stop...

Page 10: ...he blade close to the ground Always drop to idling speed after each working operation Longer periods running at full throttle without loading the engine that is without resistance which the engine feels from the cutting equipment when trimming can lead to serious engine damage Be especially careful when pulling the edger towards you dur ing work If heavy vibrations occur stop the engine Remove the...

Page 11: ...sure the blade has stopped before cleaning car rying out repairs or an inspec tion Remove the spark plug cable from the spark plug Wear heavy duty gloves when carrying out repairs on the edger Store the machine out of reach of children Only use original spare parts with repair ...

Page 12: ...itch 9 Throttle trigger lock 10 Cylinder cover 11 Starter handle 12 Fuel tank 13 Choke 14 Air purge 15 Air filter cover 16 Clutch cover 17 Handlebar adjustment 18 Locking nut 19 Support flange 20 Drive disc 21 Locking handle 22 Socket spanner 23 Operator s Manual 24 Locking pin 25 Allen key 26 Carburettor screwdriver 27 Spark plug cap and spark plug ...

Page 13: ...and threads The tightening torque of the locknut is 35 50 Nm 6 Remove the locking pin Assembling the loop handlebar NOTE Do not forget to remove the locking pin before using the machine WARNING Under no circumstances may the edge cutter blade be used without the blade guard fitted Assembling the angle gear Assemble the angle gear back on the supporting tube Turn the blade so that the drive shaft e...

Page 14: ...outboard motors so called outboard motor oil Never use oil intended for four stroke engines Mixture Always mix petrol and oil in a clean container intended for petrol Always start by filling half the quantity of petrol required Then add the entire oil quantity Mix shake the fuel mixture Fill the remaining quantity of petrol Mix shake the fuel mixture carefully before filling in the machineʼs fuel ...

Page 15: ...e safety distance is 15 metres STARTING PRIMER BULB Press the primer bulb repeatedly until fuel begins to fill the bulb The bulb need not be completely filled Hold the body of the machine on the ground using your left hand CAUTION Not with your foot Grip the starter handle slowly pull out the cord with your right hand until you feel some resistance the starter pawls grip now quickly and powerfully...

Page 16: ...g is adjusted using the L and H needles Turning the needles clockwise gives a leaner fuel mixture less fuel and turning them anticlockwise gives a richer fuel mixture more fuel A leaner mixture gives high revs while a richer mixture give less revs The T screw regulates the position of the throttle while the engine is idling Turning the screw clockwise gives a higher idling speed while turning it a...

Page 17: ...peed needle slowly the minimum amount clockwise until the engine runs smoothly The high speed needle H is correctly set when the machine 4 cycles a little If the machine whistles the setting is too lean If there is too much smoky exhaust gas at the same time as the machine 4 cycles much the setting is too rich MAINTENANCE CAUTION Contact your servicing dealer if the idle speed setting cannot be ad...

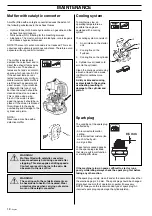
Page 18: ...protective gloves when carrying out service work on the catalytic converter WARNING Mufflers fitted with catalytic converters become extremely hot during use and after stopping This also applies at idling speeds Contact can result in burns to the skin Be observant to the risk of fire Cooling system To maintain as low an operating temperature as possible the engine is equipped with a cooling system...

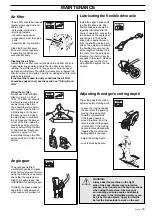
Page 19: ...nt quantity of grease at the factory However before using the machine you should check that the angle gear is filled to 3 4 with grease Use HUSQVARNA special grease Normally the grease does not need to be changed except when repairs are carried out Air filter The air filter should be cleaned regularly removing dust and dirt to avoid carburettor malfunction starting problems reduced engine power un...

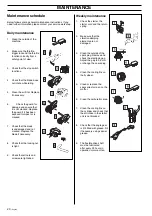
Page 20: ... air intake in the starter unit is not blocked 8 Check that the angle gear is 3 4 filled with grease Fill if necessary using special grease 9 The flexible drive shaft must be lubricated after every 30 hours in operation or more often Daily maintenance 1 Clean the outside of the machine 2 Make sure the throttle trigger lock and the throttle function correctly from a safety point of view 3 Check tha...

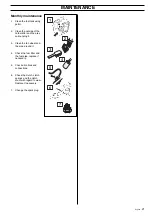
Page 21: ...he carburettor and the area surrounding it 3 Clean the fan wheel and the area around it 4 Check the fuel filter and the fuel pipe replace if necessary 5 Check all cables and connections 6 Check the clutch clutch springs and the clutch drum with regard to wear Replace if necessary 7 Change the spark plug ...

Page 22: ...s measured according to EN ISO 11806 and ISO 10884 dB A Vibration level Vibration levels on the handles measured according to EN ISO 11806 and ISO 11789 m s2 When idling rear front handles At max speed rear front handles Cutting equipment Blade Blade guard 323E 1 50 24 5 1 34 34 1 06 27 11 000 11 700 2 700 8 300 0 9 kW 9 000 rpm No Yes Walbro MB 21 Champion RCJ 7Y 0 02 0 5 Zama C1Q 1 06 0 5 10 8 4...

Page 23: ...rds or other normative documents following the provisions in the COUNCILʼS DIRECTIVES of June 22 1998 relating to machinery 98 37 EC annex IIA of May 3 1989 relating to electromagnetic compatibility 89 336 EEC and applicable supplements The following standards have been applied EN292 2 CISPR 12 1997 ISO 11789 SMP Svensk Maskinprovning AB Fyrisborgsgatan 3 SE 754 50 Uppsala Sweden has carried out v...

Page 24: ...2004W47 114 03 40 26 z HB 6 z HB 6 ...

Reviews: