

English
–
5
WHA
T IS
WHA
T?
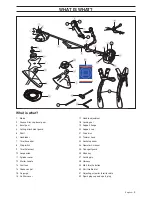
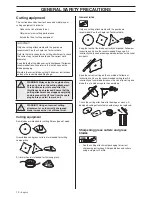
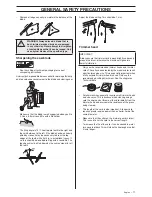
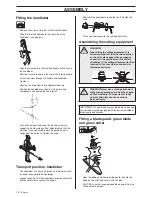
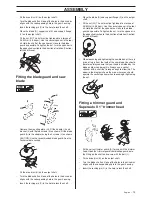
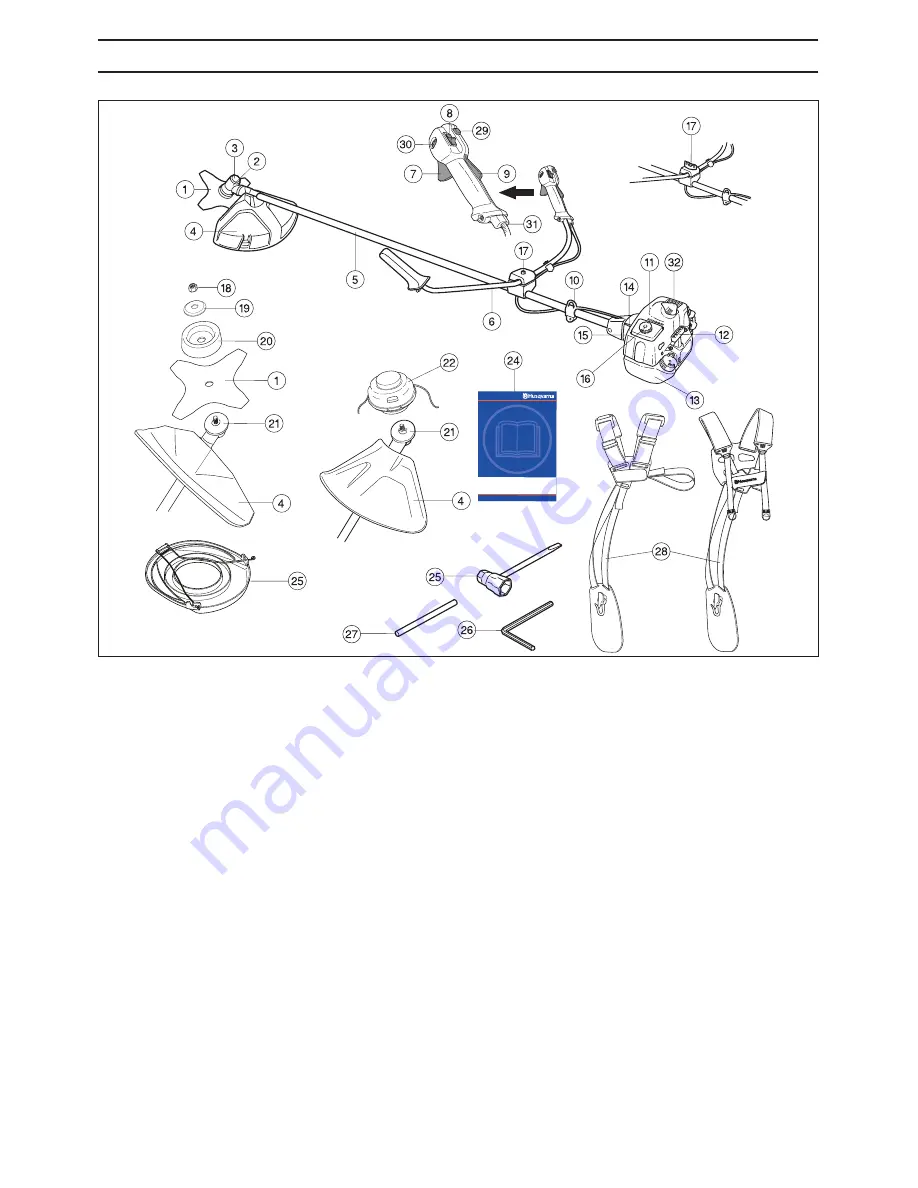
What is what?
1
Blade
2
Grease filler cap, bevel gear
3
Bevel gear
4
Cutting attachment guard
5
Shaft
6
Handlebar
7
Throttle control
8
Stop switch
9
Throttle lockout
10 Suspension
11 Cylinder cover
12 Starter handle
13 Fuel tank
14 Choke control
15 Air purge
16 Air filter cover
17 Handle adjustment
18 Locking nut
19 Support flange
20 Support cup
21 Drive disc
22 Trimmer head
23 Socket spanner
24 Operator’s manual
25 Transport guard
26 Allen key
27 Locking pin
28 Harness
29 Start throttle button
30 Part throttle dial
31 Adjusting screw for throttle cable
32 Spark plug cap and spark plug
Summary of Contents for 326R X-SERIES
Page 32: ......
Page 33: ... Clic 1 2 3 5 6 7 10 11 8 5 m 28 4 8 4 2 m 14 2 4 2 7 mm 095 106 10 cm 4 6 15 cm S35 ...
Page 34: ... z RC 5v z RC 5v 1 2 4 3 2 4 2 7 mm 095 106 4 25 m 14 4 25 m 14 B 6 15 cm A 6 15 cm S35 5 ...
Page 35: ...T35 Clic 1 2 3 5 6 7 9 8 5 m 28 4 8 4 3 m 14 2 4 2 7 mm 095 106 10 cm 4 6 15 cm ...


