background image

MAINTENANCE

20 – English

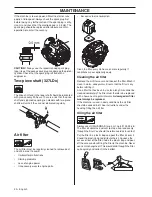
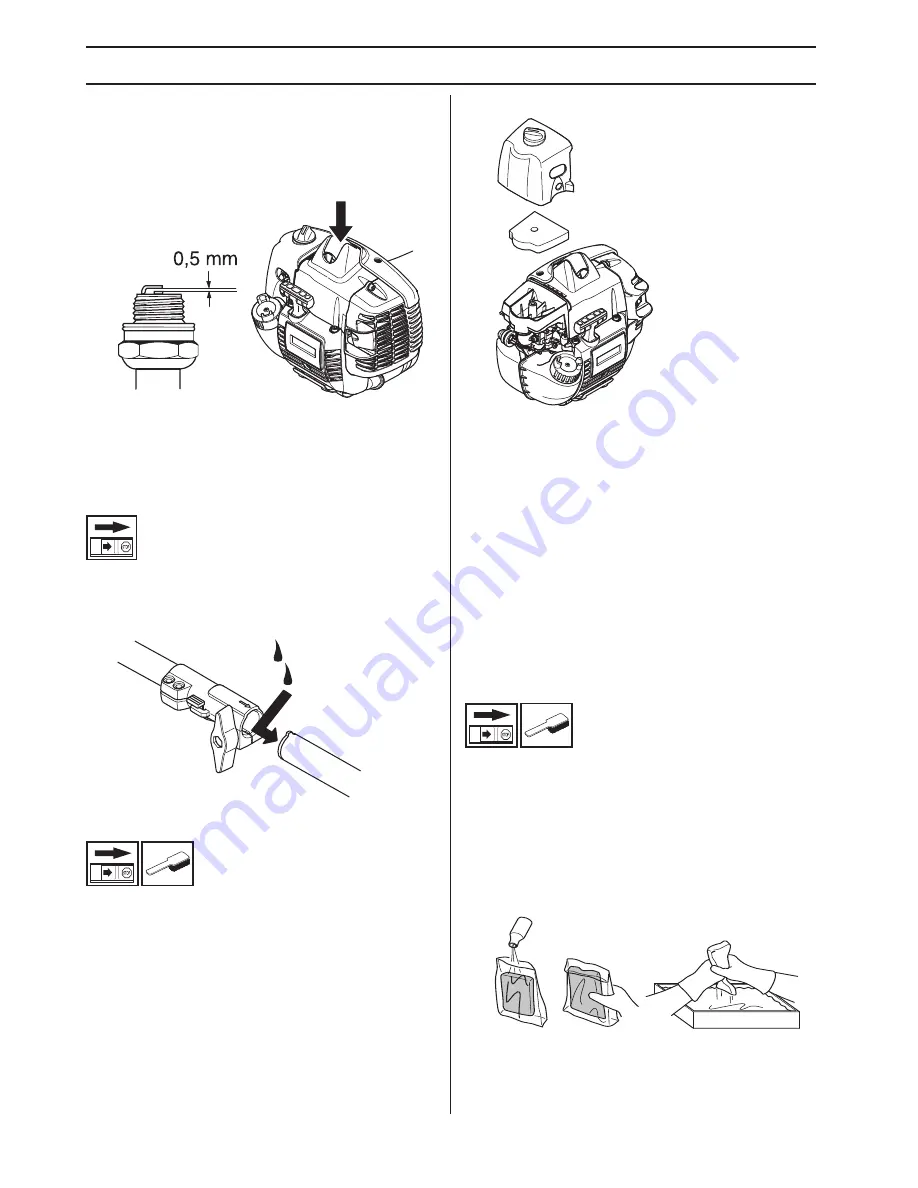
If the machine is low on power, difficult to start or runs 
poorly at idle speed: always check the spark plug first 
before taking any further action. If the spark plug is dirty, 
clean it and check that the electrode gap is 0.5 mm. The 
spark plug should be replaced after about a month in 
operation or earlier if necessary.

CAUTION! 

 Always use the recommended spark plug 

type! Use of the wrong spark plug can damage the piston/
cylinder. Check that the spark plug is fitted with a 
suppressor.

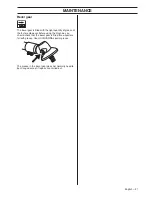
Two-piece shaft (327LDx)

The drive shaft end in the lower shaft should be lubricated 
with grease every 30 hours. There is a risk that the drive 
shaft ends (splined coupling) on models with two-piece 
shafts will seize if they are not lubricated regularly.

Air filter

The air filter must be regularly cleaned to remove dust 
and dirt in order to avoid:

Carburettor malfunctions

Starting problems

Loss of engine power

Unnecessary wear to engine parts.

Excessive fuel consumption.

Clean the filter every 25 hours, or more regularly if 
conditions are exceptionally dusty.

Cleaning the air filter

Remove the air filter cover and take out the filter. Wash it 
clean in warm, soapy water. Ensure that the filter is dry 
before refitting it. 

An air filter that has been in use for a long time cannot be 
cleaned completely. The filter must therefore be replaced 
with a new one at regular intervals. 

A damaged air filter 

must always be replaced.

If the machine is used in dusty conditions the air filter 
should be soaked in oil. See instructions under the 
heading Oiling the air filter.

Oiling the air filter

Always use HUSQVARNA filter oil, art. no. 531 00 92-48. 
The filter oil contains a solvent to make it spread evenly 
through the filter. You should therefore avoid skin contact.

Put the filter in a plastic bag and pour the filter oil over it. 
Knead the plastic bag to distribute the oil. Squeeze the 
excess oil out of the filter inside the plastic bag and pour 
off the excess before fitting the filter to the machine. Never 
use common engine oil. This would drain through the filter 
quite quickly and collect in the bottom.

Summary of Contents for 327LS

Page 1: ...E E E En n n ng g g gl l l li i i is s s sh h h h 327LS 327LDX series Operator s manual Please read the operator s manual carefully and make sure you understand the instructions before using the machine ...

Page 2: ...ontact with a fixed object This is called blade thrust The blade is capable of amputating an arm or leg Always keep people and animals at least 15 metres from the machine Arrows which show limits for handle positioning Always wear approved protective gloves Wear sturdy non slip boots Only use non metallic flexible cutting attachments i e trimmer heads with trimmer cord Noise emission to the enviro...

Page 3: ...S General working instructions 16 MAINTENANCE Carburettor 18 Muffler 18 Cooling system 19 Spark plug 19 Two piece shaft 327LDx 20 Air filter 20 Maintenance schedule 22 TECHNICAL DATA Technical data 23 EC declaration of conformity 24 WARNING Long term exposure to noise can result in permanent hearing impairment So always use approved hearing protection WARNING Under no circumstances may the design ...

Page 4: ...dustry Husqvarna s aim is also to be in the front edge according to ergonomics usability security and environmental protection That is the reason why we have developed many different features to provide our products within these areas We are convinced that you will appreciate with great satisfaction the quality and performance of our product for a very long time to come The purchase of one of our ...

Page 5: ...el gear 4 Cutting attachment guard 5 Shaft 6 Shaft coupling 327LDx 7 Loop handle 8 Throttle control 9 Stop switch 10 Throttle lockout 11 Spark plug cap and spark plug 12 Cylinder cover 13 Starter handle 14 Fuel tank 15 Air filter cover 16 Air purge 17 Choke control 18 Handle adjustment 19 Drive disc 20 Operator s manual 21 Allen key 22 Locking pin ...

Page 6: ...ser than 15 metres while working When several operators are working in the same area the safety distance should be at least twice the tree height and no less than 15 metres WARNING This machine produces an electromagnetic field during operation This field may under some circumstances interfere with active or passive medical implants To reduce the risk of serious or fatal injury we recommend person...

Page 7: ...ependent return springs This arrangement means that the throttle control is automatically locked at the idle setting Make sure the throttle control is locked at the idle setting when the throttle lockout is released Press the throttle lockout and make sure it returns to its original position when you release it Check that the throttle control and throttle lockout move freely and that the return sp...

Page 8: ...it Regularly check the vibration damping units for cracks or deformation Check that the vibration damping element is undamaged and securely attached Muffler The muffler is designed to keep noise levels to a minimum and to direct exhaust fumes away from the user A muffler fitted with a catalytic converter is also designed to reduce harmful exhaust gases In countries that have a warm and dry climate...

Page 9: ...intact This is used to cut the cord to the correct length To increase the life of the cord it can be soaked in water for a couple of days This will make the line tougher so that it lasts longer WARNING Mufflers fitted with catalytic converters get very hot during use and remain so for some time after stopping This also applies at idle speed Contact can result in burns to the skin Remember the risk...

Page 10: ...ion Tighten the bolt knob Assembling and dismantling the two piece shaft 327LDx Assembly Loosen the coupling by turning the knob Align the tab of the attachment A with the arrow on the coupling B Push the attachment into the coupling until the attachment snaps into place Before using the unit tighten the knob securely Dismantling Loosen the coupling by turning the knob at least 3 times Push and ho...

Page 11: ... lock the shaft Screw on the trimmer head plastic blades H in the opposite direction to the direction of rotation To dismantle follow the instructions in the reverse order WARNING When fitting the cutting attachment it is extremely important that the raised section on the drive disc support flange engages correctly in the centre hole of the cutting attachment If the cutting attachment is fitted in...

Page 12: ...re that the correct mixture is obtained When mixing small amounts of fuel even small inaccuracies can drastically affect the ratio of the mixture Petrol CAUTION Always use a quality petrol oil mixture at least 90 octane RON If your machine is equipped with a catalytic converter see chapter onTechnical data always use a good quality unleaded petrol oil mixture Leaded petrol will destroy the catalyt...

Page 13: ... Contamination in the tank can cause operating problems Ensure that the fuel is well mixed by shaking the container before filling the tank WARNING The catalytic converter muffler gets very hot during and after use This also applies during idling Be aware of the fire hazard especially when working near flammable substances and or vapours WARNING Taking the following precautions will lessen the ris...

Page 14: ...chine on the ground using your left hand CAUTION Not with your foot Grip the starter handle slowly pull out the cord with your right hand until you feel some resistance the starter pawls grip now quickly and powerfully pull the cord Never twist the starter cord around your hand Repeat pulling the cord until the engine starts When the engine starts return choke control to run position and apply ful...

Page 15: ... Contact can result in burns to the skin or electrical shock if the spark plug cap has been damaged Always use gloves Do not use a machine with damaged spark plug cap Stopping Stop the engine by switching off the ignition CAUTION The stop switch automatically returns to the start position In order to prevent unintentional starting the spark plug cap must be removed from the spark plug when assembl...

Page 16: ... before moving 9 Never put the machine down with the engine running unless you have it in clear sight IMPORTANT This section takes up the basic safety precautions for working with a trimmer If you encounter a situation where you are uncertain how to proceed you should ask an expert Contact your dealer or your service workshop Avoid all usage which you consider to be beyond your capability You must...

Page 17: ...s the wear on the cord The cord wears quicker and must be fed forward more often when working against stones brick concrete metal fences etc than when coming into contact with trees and wooden fences When trimming and clearing you should use less than full throttle so that the cord lasts longer and to reduce the wear on the trimmer head Cutting The trimmer is ideal for cutting grass that is diffic...

Page 18: ...es a lower idle speed Basic setting The basic carburettor settings are adjusted during testing at the factory The basic setting is richer than the optimal setting and should be maintained for the first few hours the machine is in use The carburettor should then be finely adjusted Fine adjustment should be carried out by a skilled technician CAUTION If the cutting attachment rotates when the engine...

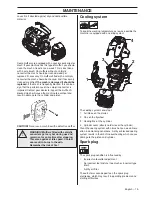
Page 19: ... a defective muffler Cooling system To keep the working temperature as low as possible the machine is equipped with a cooling system The cooling system consists of 1 Air intake on the starter 2 Fins on the flywheel 3 Cooling fins on the cylinder 4 Cylinder cover directs cold air over the cylinder Clean the cooling system with a brush once a week more often in demanding conditions A dirty or blocke...

Page 20: ...Excessive fuel consumption Clean the filter every 25 hours or more regularly if conditions are exceptionally dusty Cleaning the air filter Remove the air filter cover and take out the filter Wash it clean in warm soapy water Ensure that the filter is dry before refitting it An air filter that has been in use for a long time cannot be cleaned completely The filter must therefore be replaced with a ...

Page 21: ... quantity of grease at the factory However before using the machine you should check that the bevel gear is filled three quarters full with grease Use HUSQVARNA special grease The grease in the bevel gear does not normally need to be changed except if repairs are carried out ...

Page 22: ...rews are tight X Check that there are no fuel leaks from the engine tank or fuel lines X Check the starter and starter cord X Check that the vibration damping elements are not damaged X Clean the outside of the spark plug Remove it and check the electrode gap Adjust the gap to 0 5 mm or replace the spark plug Check that the spark plug is fitted with a suppressor X Clean the machine s cooling syste...

Page 23: ... 327LS Engine Cylinder displacement cm3 24 5 24 5 Cylinder bore mm 34 34 Stroke mm 27 27 Idle speed rpm 2700 2700 Recommended max speed rpm 11000 11700 11000 11700 Speed of output shaft rpm 8300 8300 Max engine output acc to ISO 8893 kW rpm 0 9 8400 0 9 8400 Catalytic converter muffler Yes Yes Speed regulated ignition system Yes Yes Ignition system Spark plug Champion RCJ 6Y Champion RCJ 6Y Electr...

Page 24: ... The certificates are numbered SEC 09 2170 327LDx SEC 09 2170 327LS Furthermore conformity with Appendix V of Council Directive 2000 14 EG is certified The certificates have the numbers 01 164 064 327LDx 01 164 066 327LS Huskvarna 8 April 2013 Per Gustafsson Development manager Authorized representative for Husqvarna AB and responsible for technical documentation Approved accessories Type Cutting ...

Page 25: ......

Page 26: ... Clic 1 2 3 5 6 7 10 11 8 5 m 28 4 8 4 2 m 14 2 4 2 7 mm 095 106 10 cm 4 6 15 cm S35 ...

Page 27: ...1 2 4 3 2 4 2 7 mm 095 106 4 25 m 14 4 25 m 14 B 6 15 cm A 6 15 cm S35 5 ...

Page 28: ...T35 T35x Clic 1 2 3 5 6 7 9 8 5 m 28 4 8 4 3 m 14 2 4 2 7 mm 095 106 10 cm 4 6 15 cm ...

Page 29: ... Clic 1 2 3 5 6 7 9 6 0 m 18 4 8 3 05 m 9 2 0 2 4 mm 079 095 10 cm 4 6 15 cm T25 ...

Page 30: ......

Page 31: ......

Page 32: ......

Page 33: ......

Page 34: ......

Page 35: ......

Page 36: ...Original instructions z Wb 6q z Wb 6q 2013 09 26 1155663 26 ...

Reviews: