background image

For Husqvarna Parts Call 606-678-9623 or 606-561-4983

www.mymowerparts.com

Summary of Contents for 33

Page 1: ...Husqvarna 33 Workshop Manual 507 43 36 22 For Husqvarna Parts Call 606 678 9623 or 606 561 4983 www mymowerparts com ...

Page 2: ... saw will function always use our special tools In order to make sure that the use Husqvarna 33 original spare parts and acces series 1 2 3 4 5 6 7 8 9 10m 11 Servicedata Servicetools Technicalspecification Safetyequipment Starterdevice Electronicsystem Centrifugalclutch Lubricationsystem Fuelsystem Engineunit Trouble shootingchart For Husqvarna Parts Call 606 678 9623 or 606 561 4983 www mymowerp...

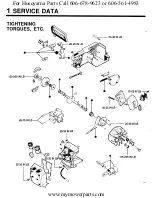
Page 3: ...1 SERVICE DATA TIGHTENING TORQU 0 40IN LB ak 25 35IN LB 4 Q IFAL 15 25INLB r 45 55IN LB v For Husqvarna Parts Call 606 678 9623 or 606 561 4983 www mymowerparts com ...

Page 4: ... 20 30INLB J 25 35IN LB A OIL GREASE RTV SEALANT t IN LB INCH POUNDS 15 25IN LB TORQUE LB 20 30IN 25 35INLB For Husqvarna Parts Call 606 678 9623 or 606 561 4983 www mymowerparts com ...

Page 5: ...26814 507433302 P 507475606 50743360 502516701 A 502 510801 Loctite 290 502510901 Loctite601 502505101 lo 507474329 502514602 502500601 502510201 502510601 la 507 43357 507475467 1 For Husqvarna Parts Call 606 678 9623 or 606 561 4983 www mymowerparts com ...

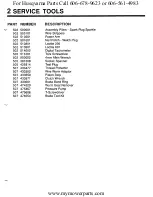
Page 6: ...507 475606 507 476554 DESCRIPTION Assembly Pliers Spark Plug Sparkie Wire Strippers Power Arm Nail Polish Welch Plug Loctite 290 Loctite 601 Digital Tachometer Torx Screwdriver 4mm Allen Wrench Socket Spanner Test Plug Thread Protector WireWormAdaptor Piston Stop Clutch Wrench Brake Band Ring W ormGear Remover Pressure Pump T Screwdriver Brake Tool Kit For Husqvarna Parts Call 606 678 9623 or 606 ...

Page 7: ... 0 6000 rpm Walbro WT 67 0 3 63 0 15 0 31 Gear type positive 1 displacement IGNITION SYSTEM 7 8 LJ 8 No loadfreespeed Sparkplug Electrodegap Ignition system Air gap rpm Champion mm mm inch inch 12 000 RCJ 7 Y 0 6 CDl 0 3 024 PHELON 012 BAR AND CHAIN 7 L Chainspeed mtsec 15 0 4 Bar length inch cm J 000 1 1 II II Chainpitch Drivelink gauge Weight Weightwith guide barandchain kg Ibs inch kg Ibs mm in...

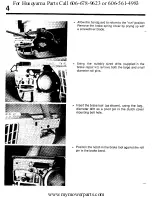
Page 8: ...e handguard Remove the guide bar clamping nut and rear screw Remove the clutch cover and clean the chain brake mechanism Pull back on the handguard to band tension Insert the band fully release brake ring tool For Husqvarna Parts Call 606 678 9623 or 606 561 4983 www mymowerparts com ...

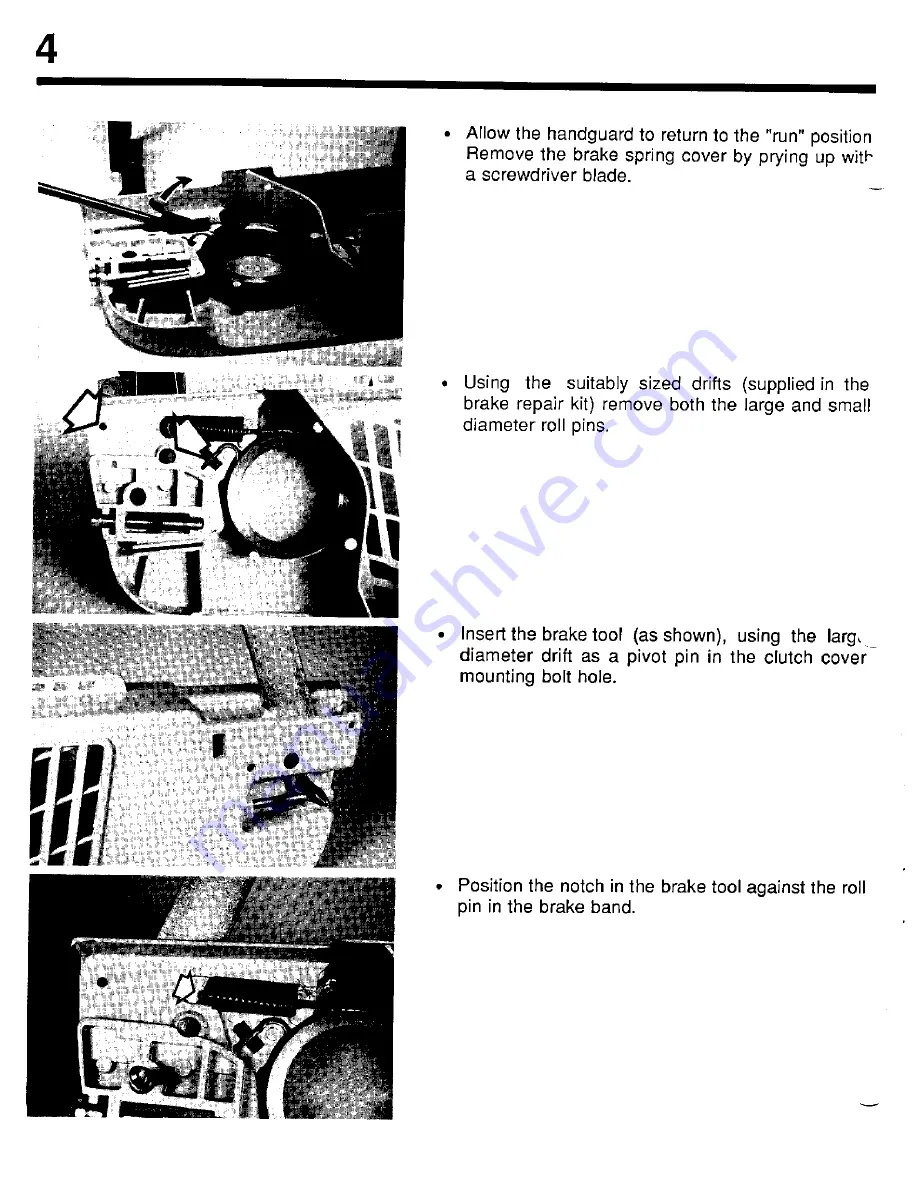
Page 9: ... supplied in the brake repair kit remove both the large and small diameter roll pins Insert the brake tool as shown using the lar9 diameter drift as a pivot pin in the clutch cover mounting bolt hole c Position the notch in the brake tool against the roll pin in the brake band For Husqvarna Parts Call 606 678 9623 or 606 561 4983 www mymowerparts com ...

Page 10: ...and Check the brake band for wear Replace the band if worn to less than 020 thickness at the point of heaviest wear Clean and check all brake pads for wear of damage Lubricate the brake spring with grease Install the brake band and spring NOTE Position the band anchor roll pin with the slot facing up in the casting pocket to ensure secure installation Using the brake tool to enlarge the band openi...

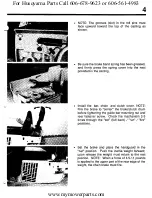
Page 11: ...eter roll pin with the slot facing the top of the casting and tap into place flush with the face of the casting NOTE Be sure the knee link hole is centered by the small diameter drift Position the large diameter roll pin with the slot facing the top of the clutch cover and tap into place flush with the casting face To connect the knee link to the guide pin on the brake band pull back on the hand g...

Page 12: ...utch drum before tightening the guide bar mounting nut and rear fastener screw Check the machanism 2 3 times through the set full back run 1 fire positions Set the brake and place the handguard in the run position Push the inertia weight forward upon release the weight must return to the rest position NOTE When a force of 4 5 11 pounds is applied to the upper part of the rear edge of the weight th...

Page 13: ...4 Ww m B THROTTLE CONT LOCKOUT For Husqvarna Parts Call 606 678 9623 or 606 561 4983 www mymowerparts com ...

Page 14: ...e the mechanism handle cover and screws Torque the cover screws to spec see Section 2 Service Data Connect the onloff switch flag terminals and snap the switch assembly into position NOTES For Husqvarna Parts Call 606 678 9623 or 606 561 4983 www mymowerparts com ...

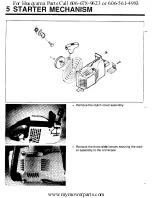
Page 15: ...TARTER MECHANISM Remove the three side screws er assembly to the crankcase I 1 Remove the clutch cover assembly securing the start For Husqvarna Parts Call 606 678 9623 or 606 561 4983 www mymowerparts com ...

Page 16: ...rope in the notch of the starter pulley and slowly unwind the starter tension until the rewind spring is fully relaxed Remove the pulley securing screw and washer Gently move the pulley to ensure that the inner rewind spring anchor is disengaged Lift out the starter pulley Remove the rewind spring cassette Clean and check all parts for wear or damage For Husqvarna Parts Call 606 678 9623 or 606 56...

Page 17: ...enter post to engage the inner spring anchor in the slot in the pulley Install the center post screw and washer Torque to spec see section 2 Service Data Pull the starter handle to the full rope extension Using your thumb to control the pulley wind two turns pretension on the pulley and slowly let the rope rewind NOTE With the rope fully extended be sure the pulley can be rotated at least 1 2 turn...

Page 18: ...5 Assemble the starter to the saw NOTE Ioctite 242 to the screws NOTES Apply For Husqvarna Parts Call 606 678 9623 or 606 561 4983 www mymowerparts com ...

Page 19: ...d well away from the spark plug hole in the cylinder and the exhaust outlet to prevent a fire from the escaping gases while turning the engine over Rapidly pull the starter handle and watch for a spark between the spark plug electrodes If there is no spark try another spark plug For Husqvarna Parts Call 606 678 9623 or 606 561 4983 www mymowerparts com ...

Page 20: ...nect the switch wire at the module and replace the starter two screws should hold the starter in place while trying this procedure Rapidly pull the starter If spark is now observed the switch wire is at fault If no spark is observed check the high tension lead to the spark plug Using the plastic air gap tool check the air gap between the flywheel magnet and the ignition module laminates The gap sh...

Page 21: ...ss the module against the flywheel and tighten the module mounting screws Check for spark If no spark occurs and the flywheel s magnetic flux appears adequate replace the ignition module DISASSEMBLY Disconnect the spark plug lead and the on off switch wires Remove the 3 module mounting screws Remove the spark plug and insert the piston stop tool as shown For Husqvarna Parts Call 606 678 9623 or 60...

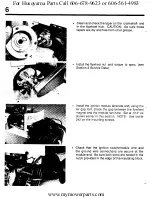
Page 22: ...nut to pop the flywheel off the crankshaft taper Using a suitable size drift drive out the pawl pivot pins to allow for the replacement of either the pawls or the pawl springs ASSEMBLY Install the new pawls and pawl return springs Be sure the pawl pivot pins are bottomed and still allow free movement of the pawls For Husqvarna Parts Call 606 678 9623 or 606 561 4983 www mymowerparts com ...

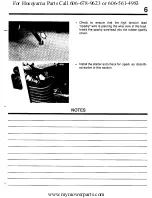
Page 23: ...nd using the air gap tool check the gap between the flywheel magnet and the module laminate Set at 012 as shown earlier in this section NOTE Use Ioctite 242 on the mounting screws Check that the ignition switch module wire and the ground wire connections are secure at the module end Be sure both wires are nested in the notch provided in the edge of the insulating block For Husqvarna Parts Call 606...

Page 24: ...re is piercing the wire core in the lead Insert the sparky wire lead into the rubber sparky cover Install the starter and check for spark as ed earlier in this section NOTES describ For Husqvarna Parts Call 606 678 9623 or 606 561 4983 www mymowerparts com ...

Page 25: ...k off holes provided Tap in the direction stamped on the clutch driver face The clutch assembly consists of a top hat wash er a driver two shoes and two springs NOTE The correct spring position is as shown to ensure that the springs do not touch the clutch drum For Husqvarna Parts Call 606 678 9623 or 606 561 4983 www mymowerparts com ...

Page 26: ...drag at idle speed Spin the clutch assembly onto the crankshaft and tighten by tapping on a drift inserted in one of the holes provided in the clutch driver CAUTION Do not start the engine without the guide bar chain and clutch cover in place NOTES L For Husqvarna Parts Call 606 678 9623 or 606 561 4983 www mymowerparts com ...

Page 27: ...apsed gasket will restrict oil flow Slide the oil pump worm over the crankshaft and using a suitable tube style aluminum drift tap the gear down to within 025 of the crankcase seal face Apply grease to the worm gear teeth Continue assembly in reverse order to disassembly NOTE Apply Ioctite 242 to the pump securing screws NOTES d For Husqvarna Parts Call 606 678 9623 or 606 561 4983 www mymowerpart...

Page 28: ...moving the fuel oil tank cover screws A fouled filter will restrict fuel flow and must be replaced The end of the fuel hose should butt tightly to the filter body Remove the air filter cover For Husqvarna Parts Call 606 678 9623 or 606 561 4983 www mymowerparts com ...

Page 29: ...nd remove the inlet lever inlet needle inlet spring and fulcrum pin Check the inlet needle for wear or damage Al ways replace a worn or damaged needle Check for inlet lever wear at the points shown Always replace a worn or malformed lever Remove the central screw securing the pump section cover Lift off the cover For Husqvarna Parts Call 606 678 9623 or 606 561 4983 www mymowerparts com ...

Page 30: ...igh speed nozzle cup and pry it out This will allow access to the nozzle screen clip and discharge port into the venturi Install new discharge port screen clip and cup NOTE A little clear lacquer nail polish is an effective means of ensuring a seal after installa tion Remove the choke and throttle valve shaft assem blies Check for wear or damage that would effect engine idle NOTE 1 Always replace ...

Page 31: ...roughly clean and blow out all orifices As semble the carburetor components in the reverse order to disassembly NO TE lever tension spring is correctly pocket in the carburetor body Be sure the inlet located in the cast Set the inlet areas cast in lever pocket lever flush level with the raised the body at the edge of the inlet NOTE An inlet lever set too low will deliver too little fuel An inlet l...

Page 32: ...uel inlet nipple has not changed during servicing The nipple should form a slight upward angle from being parallel to the carburetor mounting face Check that the pressure vacuum impulse pas sage is clear in the insulating block and cylinder For Husqvarna Parts Call 606 678 9623 or 606 561 4983 www mymowerparts com ...

Page 33: ...k up hose onto the carburetor in let nipple Install the carburetor insulating block gasket car buretor and air filter body Be sure to align all components Insert the 2 long carburetor mounting screws and torque to spec see Section 2 Service Data Install the air filter element For Husqvarna Parts Call 606 678 9623 or 606 561 4983 www mymowerparts com ...

Page 34: ...urn rapidly accelerate to full throttle Too lean a setting will result in hesitation on acceleration and hard starting NEEDLE ADJUSTMENT start the saw and warm it up rev the engine in short bursts to max RPM CAUTION Operate the engine at max RPM only for a short period of time or the engine could be damaged Open the H needle approximately 1 4 turn until a distinct 4 stroke rich exhaust sound is no...

Page 35: ...ate turn the screw counter clockwise until the chain stops the correct idle speed is 2500 RPM LEAKAGE Carburetor TEST Pressure test Recommended pressure 7 1 P S I No leakage permitted 507475467 Pressure tester NOTES For Husqvarna Parts Call 606 678 9623 or 606 561 4983 www mymowerparts com ...

Page 36: ... system and oil pump Remove the muffler mounting bolts fler cover body and spacer tubes and the muf DISASSEMBLY NOTE 1 The cylinder bore is chrome plated and must be replaced if scuffed or scored 2 The crankshaft is a one piece forging replaced if damaged J and must be For Husqvarna Parts Call 606 678 9623 or 606 561 4983 www mymowerparts com ...

Page 37: ...10 d Remove the fuel oil tank g d Remove the crankcase end cap and remove the crankshaft corm rod piston assembly For Husqvarna Parts Call 606 678 9623 or 606 561 4983 www mymowerparts com ...

Page 38: ...he ring do not clip a port openingin the cylinder Slide the needle type main bearings onto the crankshaft NOTE The lettered ends of the bearing should face the crankshaft counterweight Place the clip rings on the crankshaft Oil the engine seals and carefully slide them over the ends of the crankshaft watch that the ignition side seal lip is not cut by the sharp edges of the crankshaft keyway Thoro...

Page 39: ... to ensure restriction free oil inlet and delivety Install the 4 crankcase fuel tank securing bolts and torque to spec see Section 2 Service Data torque the boltsdown evenly in an X pattern Thread the end of the fuel pick up hose throug the tank casting and pull the hose to the point where the fuel pick up head is sweeping the tank floor without kinking the fuel hose Install the guide bar mounting...

Page 40: ...ng upper screw and short lower screw in position and torque to spec see Section 2 Service Data Insert the flywheel key and press to depth NOTE The top of the key should be parallel to the center axis of the crankshaft and not the taper Carefully position the flywheel keyway over the key and torque the flywheel nut to spec see Section 2 Service Data Using the plastic air gap setting tool as a space...

Page 41: ...ffer resistance during both the removal and assembly procedures Assemble the air filter element and the air filter cover NOTE The on off switch wiring nests in the notch provided in the lower rear edge of the top cover Install the spark plug Position and secure the starter assembly Assemble the spark plug access cover to the starter housing shown For Husqvarna Parts Call 606 678 9623 or 606 561 49...

Page 42: ...inder Torque the muffler bolts to spec see Section 2 Service Data Install the clutch drum and clutch assembly as discussed in an earlier section Fit the guide bar chain and clutch cover to complete the assembly NOTES For Husqvarna Parts Call 606 678 9623 or 606 561 4983 www mymowerparts com ...

Page 43: ... B Fueldrippingfromcarburetor L Engine stopswhen closingthrottle C Floodsenginewhen not runnng M Over richacceleration IDLE Lowspeed D E F G H J HIGH SPEED Will notidle Richidle N Will notrunatfullthrottle Idleswithneedle closed O Lowpower Ewaticidle P Willnot4 cycle no richdropoff L needleneedsfrequent adjustment Loadsup whileidling For Husqvarna Parts Call 606 678 9623 or 606 561 4983 www mymowe...

Page 44: ...nthrottleassembly Incorrectthrottleassembly Loosethrottlevalvescrew Throttleshafttoo tight Bentthrottlelinkage Defectivethrottlespring Bentthrottlestop lever Choke notfunctioningproperly Wornchokeshaft Wornchokevalve Wornthrottlevalve METERING SYSTEM 26 27 28 29 30 31 32 33 34 35 36 37 38 39 40 41 Wornlever Set too high Settoo low Notfree Distorted Improperlyinstalled Leaking air fuel Worn button ...

Page 45: ...NOTES For Husqvarna Parts Call 606 678 9623 or 606 561 4983 www mymowerparts com ...

Reviews: