7. Examine the stop switch.
8. Examine the product for fuel leaks.
To start a cold engine
WARNING: Before you start the product,
install the complete clutch cover and shaft.
The loose clutch can cause injury. Use
gloves.
WARNING: Move the product away from the
refuelling area and the power. Put it on a flat
surface. Make sure that no objects touch the
cutting attachment.
WARNING: Make sure that no unauthorised
persons are in the work area. Or it can
cause a risk of dangerous injury. The safety
distance is 15 m.
1. Put the stop switch to the start position.
2. Press the air purge ten times. (Fig. 45)
3. Move choke control to the choke position. (Fig. 46)
4. Hold the product to the ground. Pull out the cord
slowly with your right hand until you feel some
resistance. Pull the cord quickly and with force. Keep
doing it until you hear the engine start. (Fig. 47)
Note: Do not twist the starter rope around your hand.
CAUTION: Do not pull all the starter rope
out. Hold the starter rope handle when it
is fully extended. Failure to obey these
instructions can cause damage to the
engine.
5. Set the choke control to the run position, then pull
the start rope until the engine starts.
6. Pull the throttle trigger lightly and run at low speed
for 60 seconds.
WARNING: Do not touch the cover. It
can burn your skin and cause electrical
shock if the spark plug cap is damaged.
Do not use a product with damaged
spark plug cap.
To start a warm engine
1. Put the stop switch to the start position.
2. Press the air purge ten times. (Fig. 45)
3. Set the choke control to the run position, then pull
the start rope until the engine starts.
To stop
• Push the stop switch to stop the engine. (Fig. 19)
To operate the grass trimmer
CAUTION: Make sure that you slow the
engine to idle speed after each operation. A
long period at full throttle without a load on
the engine can cause damage to the engine.
Note: Clean the cover of the trimmer head when you
attach a new trimmer line to prevent vibrations. Examine
other parts of the trimmer head and clean if it is
necessary.
General work instructions
WARNING: Be careful when you cut a tree
that is in tension. It can spring back to its
normal position before or after the cut and
hit you or the product, and cause injury.
• Clear an open space at one end of the work area,
and start the work from there.
• Move in a regular pattern across the work area. (Fig.
48)
• Move the product fully to the left and right, to clear a
width of 4–5 m (13-16 ft) on each turn.
• Clear a length of 75 m (250 ft) before you turn and
go back. Move the fuel can along with you as you
continue.
• Move in a direction where you do not go across
ditches and obstacles more than necessary.
• Move in a direction where the wind makes the cut
vegetation fall in the cleared area. (Fig. 49)
• Move along slopes, not up and down.
To clear grass with a grass blade
1. Keep your feet apart during operation of the product.
Make sure feet are tightly against the ground.
2. Put the support cup lightly on the ground. This
prevents the blade from touching the ground.
3. Use a sideway movement from right to left for a clear
stroke. Use the left side of the blade (between 8 and
12 o'clock) to cut. (Fig. 50)
4. Angle the blade to the left when you clear grass.
Note: The grass collects easily in a line.
5. Use a sideway movement from left to right for the
return stroke.
6. Do the work rhythmically.
7. Move forward and keep feet tightly against the
ground.
8. Stop the engine.
9. Remove the product from the clip on the harness.
10. Put the product on the ground.
11. Collect the cut material.
14
1542 - 002 - 17.07.2020
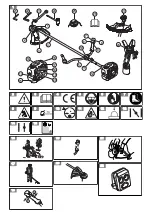
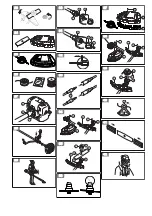
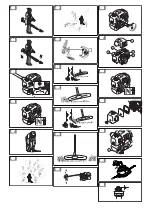
Summary of Contents for 333R Mark II
Page 4: ...43 44 45 46 47 48 49 50 51 52 53 54 55 56 C A E D B 57 58 59 A 60 61 62 ...
Page 5: ...63 ...
Page 36: ...Stödkopp Fast 36 1542 002 17 07 2020 ...
Page 120: ...Tête de dés herbage 593707601 593 70 66 01 Bol de garde au sol Fixe 120 1542 002 17 07 2020 ...
Page 439: ...593707601 1 2 4 6 8 3 5 7 ...
Page 440: ...T35 T35X Clic 8 5 m 28 4 3 m 14 2 4 2 7 mm 095 106 10 cm 4 6 15 cm 1 2 4 5 6 9 7 8 3 ...
Page 441: ......
Page 442: ......
Page 443: ......


