
19
3
Fuel system
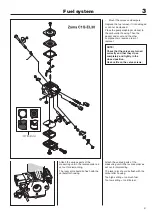
531 03 03-98
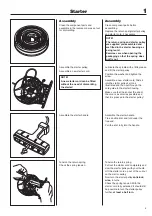
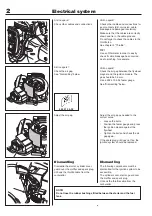
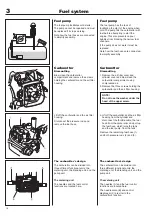
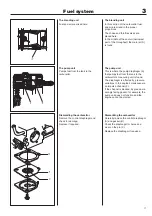
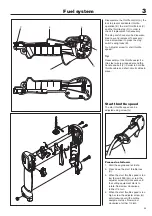
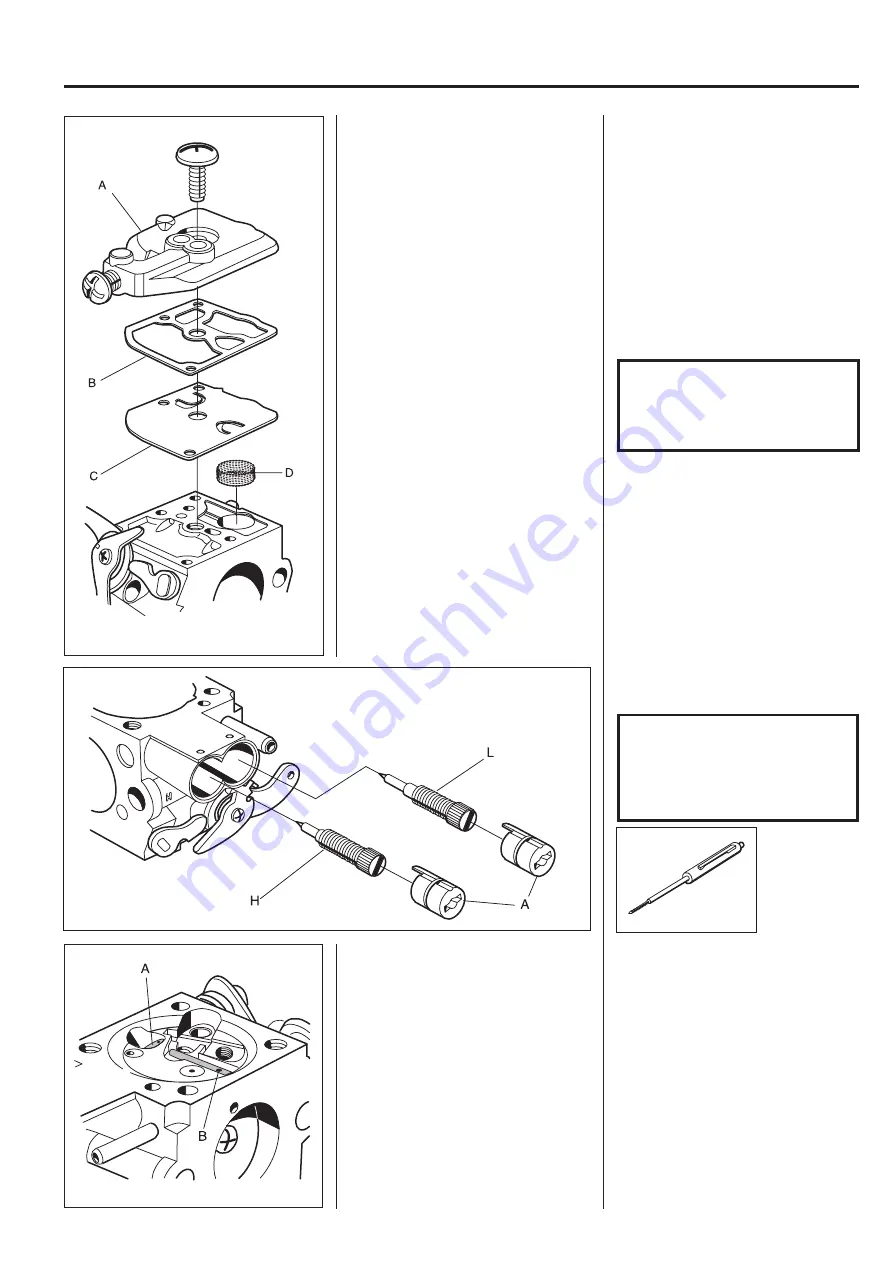
Pull the locking plugs (A) off over the jet
needles with the help of special tool
531 03 03-98 (left-hand threads) or
screw 503 21 29-10 that holds the
guard that is screwed on the cylinder
cover.
Unscrew the jet needles.
NOTE!
Note how the jets are
positioned.
(For example, the H-needle is a
little shorter than the L-needle).
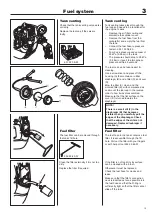
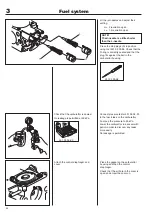
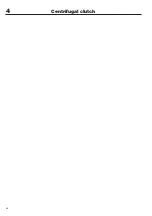
Remove the pump diaphragm.
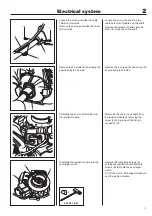
Check the diaphragm for damage.
Remove the fuel screen and clean it or
attach a new one.
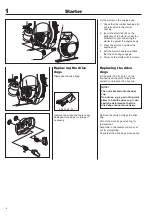
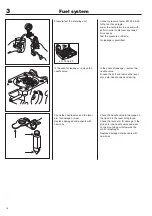
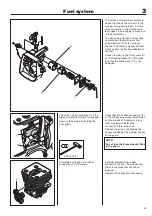
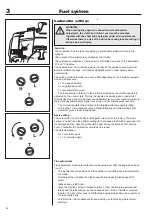
Remove the bolt holding the cover over
the pump diaphragm.
Lift off the cover (A), the gasket (B) and
the diaphragm (C).
Check the diaphragm for damage to the
valve tongues. If the valve tongues are
bent, the pump will not function in a
satisfactory manner.
Hold it up to a light as well to discover
any holes in the material.
Carefully remove the fuel screen (D),
using a needle for example. Clean or
replace the fuel screen.
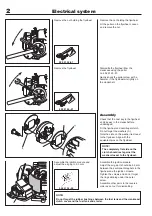
NOTE!
During assembly the pump
diaphragm should lie closest
to the carburettor housing.
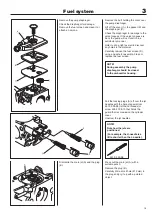
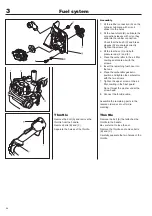
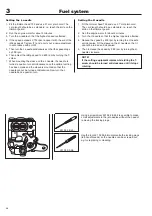
Dismantle the main jet (A) and the plug
(B).
Press out the main jet (A) with a
suitable punch.
Remove the plug (B).
Carefully drill a small hole (Ø 2 mm) in
the plug and pry it up with a pointed
object.
Summary of Contents for 333R
Page 1: ...Workshop manual 333R 335R English ...
Page 2: ......
Page 36: ...34 4 Centrifugal clutch ...
Page 40: ...38 5 Angle gear ...
Page 50: ...48 6 Cylinder and piston ...
Page 60: ......
Page 61: ......
Page 62: ...2005W23 115 00 92 26 ...


