5.6
Assembling the finger throttle
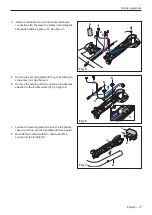
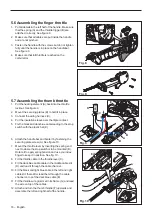
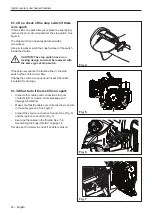
1. Put all details in the left half of the handle. Make sure
that the spring (A) and the throttle trigger (B) are
attached correctly. See figure 8.
2. Make sure that all cables are put inside the handle
and are not pinched.
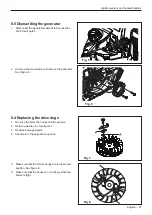
3. Fasten the handle with the screws but do not tighten
fully until the handle is in place on the handlebar.
See figure 9.
4. Make sure that full throttle is reached on the
carburettor.
Fig. 8
A
5.7 Assembling the thumb throttle
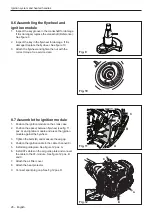
1.
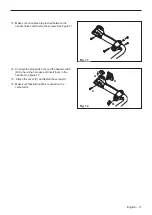
Put the heating element (A) back into the throttle
lockout. See figure 9.
2.
Mount the securing plates (B) to hold it in place.
3.
Connect the wiring harness (C).
4. Put the insulation sleeve over the triple contact.
5. Fix the black and dark blue cable leading to the stop
switch with the plastic hat (E)
D
B
B
A
C
E
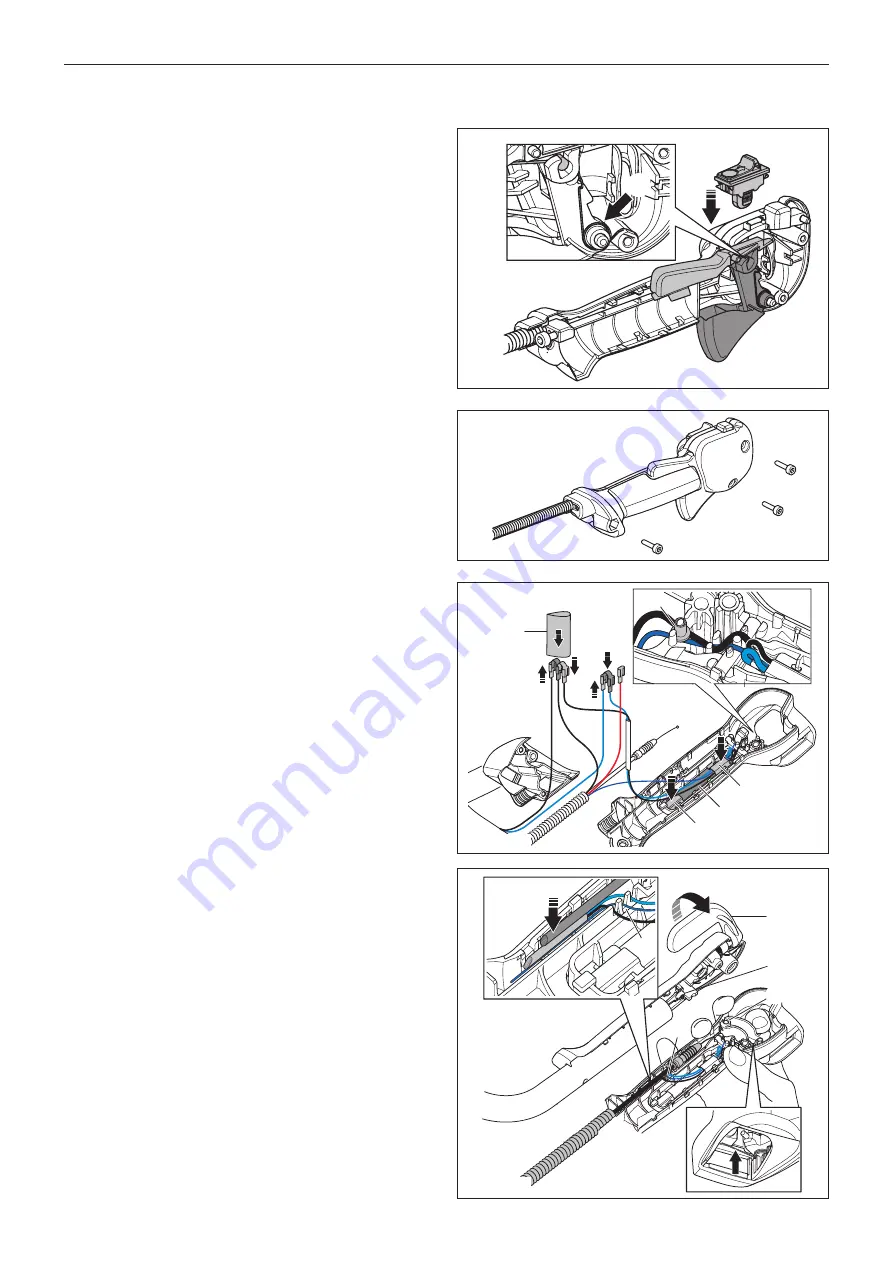
6.
Attach the handle bar and fixate it by fastening the
securing plate screw (A). See figure 10.
7. Mount the throttle lever by inserting the spring end
next to where the stop switch is to be mounted (B).
Rotate it to apply spring tension and use you index
finger to keep it in position. See fig. 10.
8.
Fit the throttle cable in the throttle lever (C).
9. Fit the dark blue cable cable in the middle cable slit
(D) and lead it through the cable channel.
10. Fit the black and light blue cable in the left and right
cable slit, there after lead them through the cable
channel on top of the dark blue cable (E).
11.
Fit the throttle wire grommet in its frame (G) and lead
the wire on top of the cables.
12.
Attach and turn the thumb throttle (F) upwards and
assemble the left and right half of the handle.
B
F
G
A
D
E
C
Fig. 9
Fig. 9
Fig. 10
16 – English
Summary of Contents for 545FX AT
Page 1: ...Workshop manual English 545RXT AT 545FX AT 545FXT AT 545FX 545FXT 545RX 545RXT ...
Page 2: ......
Page 79: ...English 79 ...
Page 80: ...2018 10 04 115 88 11 26 ...


