7.3 Assembling
CAUTION: Open the package with the
return spring (Fig. 6) carefully. It has high
tension and can eject.
CAUTION: Use protective glasses when
working on the starter. The return spring
has high tension and can cause injury.
1.
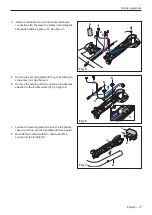
Attach the spring cassette and tighten the 2 bolts (A).
See figure 7.
2. Lubricate the bearing journal with a little grease and
attach the starter pulley.
3. Put the washer in place and tighten the bolt.
4. To attach the new starter cord, push it into the track
of the starter pulley and then out through the cord
guide in the starter cover.
Note: Make sure that the knot at the end of the cord is as
small as possible.
Fig. 6
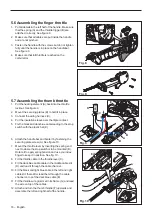
5. Thread the starter cord through the starter handle
and anchor it with a knot. See figure 8.
6. Fold down the free end and pull the knot into the
handle.
Note: A new starter cord can be attached without
dismantling the starter.
7. Tighten the return spring.
8. Lift up the starter cord when the return spring is
completely loose and the starter cord pulled out
completely.
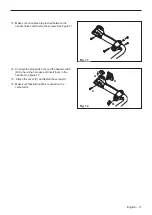
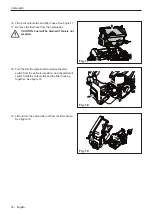
9. Turn the starter pulley counterclockwise 7
revolutions. See figure 9.
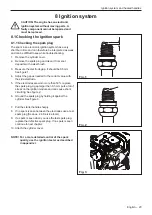
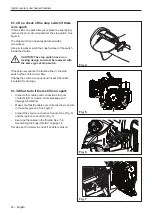
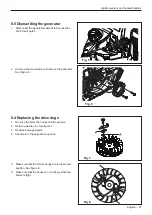
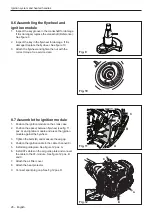
10. Do a check of the spring tension. With the cord
completely pulled out the cord pulley should be able
to be turned at least another half revolution.
11. Mount the starter onto the engine.
12. Pull out the starter cord a little.
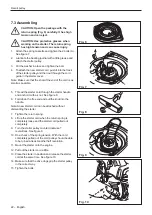
13. Place the starter in position and release the starter
cord at the same time. See figure 10.
14. Make sure that the drive dogs grip the starter pulley
in the correct way.
15. Tighten the bolts.
Recoil pulley
Fig. 7
Fig. 8
Fig. 9
Fig. 10
22 – English
Summary of Contents for 545FX AT
Page 1: ...Workshop manual English 545RXT AT 545FX AT 545FXT AT 545FX 545FXT 545RX 545RXT ...
Page 2: ......
Page 79: ...English 79 ...
Page 80: ...2018 10 04 115 88 11 26 ...


