14.3 Pressure testing the cylinder
At minimum, dismantle the following components
• Cylinder cover
• Heat protector
•
Muffler
•
Air filter cover and frame
• Spark plug
• Valve housing assembly
•
Carburettor (with air filter and filter holders)
B
A
G
B
A
G
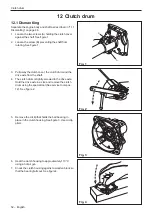
1.
Attach the cover plug (A) and the cover plate (B) to
the inlet channels. See fig. 1
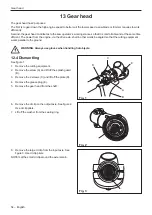
2.
Place the rubber wedge (D) between the muffler (E)
and the cylinder, leaving out the heat shield and
gasket (C). Attach the muffler and tighten the screws
(F). See fig. 2
D
C
F
E
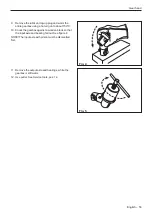
3.
Screw the pressure testing plug (G) in the sparkplug
hole and tighten with a block key.
See fig. 3.
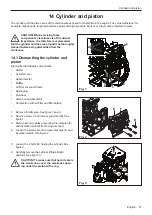
4.
Connect the Pressure testing tool (H) to the air
nozzle and use your thumb to hold the cover plug in
place (I). See figure 4.
5. Apply a pressure of 80 kPa and wait 30 seconds.
The pressure should not be lower than 60 kPa.
Assemble all parts in reverse order as set out for
dismantling.
H
I
Fig. 1
Fig. 2
Fig. 3
Fig. 4
English – 59
Summary of Contents for 545FX AT
Page 1: ...Workshop manual English 545RXT AT 545FX AT 545FXT AT 545FX 545FXT 545RX 545RXT ...
Page 2: ......
Page 79: ...English 79 ...
Page 80: ...2018 10 04 115 88 11 26 ...


