background image

2

OPERATION 

•   Do not allow hands, feet, or other body parts or cloth-

ing near the rotating tines or any other moving part. 

The tines begin to rotate once the engine/motor is 

started and the activating device is engaged. The tines 

may momentarily rotate after the activating device is 

released.

•   Exercise extreme caution when crossing gravel sur-

faces. Stay alert for hidden hazards or traffic.

•   After striking a foreign object, stop the engine (motor), 

remove the wire from the spark plug (or disconnect) 

the cord for electric products), thoroughly inspect the 

machine for any damage, and repair the damage before 

restarting and operating the machine.

•  Exercise caution to avoid slipping or falling.
•  If the machine should start to vibrate abnormally, stop 

the engine (motor) and check immediately for the cause. 

Vibration is general a warning sign of trouble.

•  Stop the engine (motor) when leaving the operating 

position, before unclogging the tines, and when making 

any repairs, adjustments, and inspections.

•  Stop the engine (motor) when leaving the machine 

unattended.

•   Before cleaning, repairing, or inspecting, shut off the 

engine and make certain all moving parts have stopped. 

Disconnect the spark plug wire, and keep the wire away 

from the plug to prevent accidental starting. Disconnect 

the cord on electric motors.

•   Do not operate the engine in a confined space where 

dangerous carbon monoxide fumes can collect.

•   Never operate the machine without proper shields and 

guards or other safety protective devices in place.

•   Do not overload the machine capacity by attempting 

to till or cultivate too deep at too fast a rate.

•  Never operate the machine at high transport speeds 

on hard or slippery surfaces.

•  Never allow bystanders near the machine, especially 

small children.

• 

Use only attachments and accessories approved by the 

manufacturer of the machine (such as wheel weights, 

counterweights, and the like).

•   Never operate the tiller without good visibility or light.
•  Be careful when tilling in hard ground. The tines may 

catch in the ground and propel the tiller forward. If this 

occurs, let go of the handlebars and do not restrain the 

machine.

•   Use extreme caution when reversing or pulling the 

machine towards you. To avoid getting pinned against 

a structure, ensure adequate distance before revers-

ing near a wall or fence. For machines with powered 

reverse drive capability, familiarize yourself with the 

operation of the Emergency Stop Control. It provides 

a secondary means of stopping power to the tines and 

wheel drive in an emergency.

•   Do not change the engine governor settings or over 

speed the engine.

• 

Start the engine or switch on the motor carefully accord-

ing to instructions and with feet away from the tines.

SAFETY RULES

SAFE OPERATION PRACTICES FOR POWERED WALK-BEHIND ROTARY 

TILLERS AND HAND-SUPPORTED CULTIVATORS

TRAINING

•  Read, understand, and follow all instructions on the 

machine and in the manual(s) before starting. Be 

thoroughly familiar with the controls and the proper 

use of the equipment. Know how to stop the machine 

and disengage the controls quickly.

•   Never allow children to operate the equipment. Never 

allow adults to op er ate the equipment without proper 

instruction.

•   Keep the area of operation clear of all persons, par-

 tic u lar ly small children, and pets.

PREPARATION

•  Thoroughly inspect the area where the equipment is 

to be used and remove all foreign objects.

•   Disengage all clutches and shift into neutral before 

starting the engine (mo tor).

•  Do not operate in shorts or open toed shoes. Wear 

proper Personal Protective Equipment (PPE) at all 

times, such as gloves, proper footwear, and eye pro-

tection.

•  Use extension cords and receptacles as specified by 

the manufacturer for all machines with electric drive 

motor or electric starting motors.

•  Never attempt to make any adjustments while the 

engine (motor) is running (except where specifically 

recommended by the manufacturer).

SAFE HANDLING OF GASOLINE:

•  To avoid personal injury or property damage, use ex-

treme care in handling gasoline. Gasoline is extremely 

flammable and the vapors are explosive.

•  Extinguish all cigarettes, cigars, pipes, and other 

sources of ignition.

•  Use only an approved gasoline container.
•  Never remove gas cap or add fuel with the engine 

running.

•  Allow engine to cool before refueling.
•  Never refuel the machine indoors.
• 

Never store the machine or fuel container where there 

is an open flame, spark, or pilot light such as on a water 

heater or other appliance.

•  Never fill containers inside a vehicle of on a truck or 

trailer bed with a plastic liner. Always place containers 

on the ground away from your vehicle before filling.

•  Remove gas powered equipment from the truck or 

trailer and refuel it on the ground. If this is not possible, 

then refuel such equipment with a portable container, 

rather than from a gasoline dispenser nozzle.

• 

Keep the nozzle in contact with the rim of the fuel tank or 

container opening at all times until fueling is complete. 

Do not use a nozzle lock open device.

• 

If fuel is spilled on clothing, change clothing immediately.

•  Never overfill fuel tank. Replace gas cap and tighten 

securely.

• 

If fuel is spilled, do not attempt to start engine but move 

the machine away from the area of spillage and avoid 

creating any source of ignition until fuel vapors have 

dissipated.

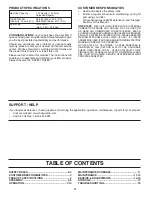
Summary of Contents for 96083001100

Page 1: ...line containing up to 10 ethanol E10 is acceptable for use in this machine The use of any gasoline exceeding 10 ethanol E10 will void the product warranty Please read the operator s manual carefully and make sure you understand the instructions before using the machine ...

Page 2: ... governor settings or over speed the engine Starttheengineorswitchonthemotorcarefullyaccord ing to instructions and with feet away from the tines SAFETY RULES SAFE OPERATION PRACTICES FOR POWERED WALK BEHIND ROTARY TILLERS AND HAND SUPPORTED CULTIVATORS TRAINING Read understand and follow all instructions on the machine and in the manual s before starting Be thoroughly familiar with the controls a...

Page 3: ...e tiller is to be stored for an extended period If the fuel tank has to be drained do this outdoors Follow the manufacturer s recommendations for safe loading unloading transport and storage of machine IMPORTANT CAUTIONS IMPORTANTS AND NOTES ARE A MEANS OF ATTRACTING ATTENTION TO IMPORTANT OR CRITICAL INFORMATION IN THIS MANUAL IMPORTANT USED TO ALERT YOU THAT THERE IS A POSSIBILITY OF DAMAGING TH...

Page 4: ...intain your tiller properly Always observe the SAFETY RULES CUSTOMER RESPONSIBILITIES Read and observe the safety rules Follow a regular schedule in maintaining caring for and using your tiller Followinstructionsunder Maintenance and Storage sections of this Manual IMPORTANT THIS UNIT IS EQUIPPED WITH AN INTERNAL COMBUSTION ENGINE AND SHOULD NOT BE USED ON OR NEAR ANY UNIMPROVED FOREST COVERED BRU...

Page 5: ...liers 2 1 2 wrenches Your new tiller has been assembled at the factory with exception of those parts left unassembled for shipping purposes To ensure safe and proper operation of your tiller all parts and hardware you assemble must be tightened securely Use the correct tools as necessary to insure proper tightness Fig 1 overhead_views_8 LEFT OPERATOR S POSITION RIGHT FRONT 4 Washers 3 8 x 7 8 x 14...

Page 6: ...in the Service and Adjustments section of this manual UNPACK CARTON INSTALL HANDLE See Fig 2 CAUTION Becarefulofexposedstaples when handling or disposing of carton ing material IMPORTANT WHEN UNPACKING AND ASSEMBLING TILLER BE CAREFUL NOT TO STRETCH OR KINK CABLE S Cut cable ties securing handles Slowlylifthandleassemblyup routecable s asshown andalignhandleholeswithhandlepanelholeandslot Loosely ...

Page 7: ...m to the safety standards of the American National Standards Institute CHOKE CONTROL Used when starting a cold engine DEPTH STAKE Controls forward speed and the depth at which the tiller will dig FORWARD TINE CONTROL Engages tines in forward direction FUEL VALVE The fuel valve opens and closes the pas sage between the fuel tank and the carburetor REVERSE TINE CONTROL Engages tines in reverse RECOI...

Page 8: ... tine control to handle REVERSE With forward tine control in the OFF up position Squeeze reverse tine control to handle HOW TO USE YOUR TILLER Know how to operate all controls before adding fuel and oil or attempting to start engine depth_stake_4 WHEELS HAIRPIN CLIP AND CLEVIS PIN HAIRPIN CLIP AND CLEVIS PIN DEPTH STAKE STAKE SPRING Fig 6 Fig 5 The operation of any tiller can result in foreign obj...

Page 9: ...er to desired location AROUND TOWN Disconnect spark plug wire Drain fuel tank Transport in upright position to prevent oil leakage BEFORE STARTING ENGINE IMPORTANT BE VERY CAREFUL NOT TO ALLOW DIRT TO ENTER THE ENGINE WHEN CHECKING OR ADDING OIL OR FUEL USE CLEAN OIL AND FUEL AND STORE IN APPROVED CLEAN COVERED CONTAINERS USE CLEAN FILL FUNNELS CHECK ENGINE OIL LEVEL See Fig 7 1 Remove hangtag fro...

Page 10: ...ive bounce and difficult handling of your tiller Hard soil should be moistened before tilling however extremely wet soil will ball up or clump during tilling Wait until the soil is less wet in order to achieve the best results When tilling in the fall remove vines and long grass to prevent them from wrapping around the tine shaft and slowing your tilling operation You will find tilling much easier...

Page 11: ...es and belts for wear A new spark plug and clean air filter assure proper air fuel mixture and help your engine run better and last longer BEFORE EACH USE Check engine oil level Check tine operation Check for loose fasteners LUBRICATION Keep unit well lubricated See LUBRICATION CHART MAINTENANCE SCHEDULE FILL IN DATES AS YOU COMPLETE REGULAR SERVICE Check Engine Oil Level Change Engine Oil Oil Piv...

Page 12: ...arefully remove air cleaner cartridge Be careful Do not allow dirt or debris to fall into carburetor Clean by tapping gently on a flat surface If very dirty or damaged replace cartridge Clean and replace cover Tighten screws securely CAUTION Petroleumsolvents suchas kerosene are not to be used to clean cartridge Theymaycausedeterioration of the cartridge Do not oil cartridge Do not use pressurized...

Page 13: ...serviced CLEANING Do not clean your tiller when the engine and transmission are hot We do not recommend using pressurized water garden hose etc to clean your unit unless the gasket area around the transmission and the engine muffler air filter and carburetor are covered to keep water out Water in engine will shorten the useful life of your tiller Clean engine wheels finish etc of all foreign matte...

Page 14: ...ter tines Fig 18 tine_6 INNER TINES ONLY TINE ARRANGEMENT Youroutertinescanbeassembledinseveraldifferentways to suit your tilling or cultivating needs CAUTION Tinesaresharp Weargloves orotherprotectionwhenhandlingtines NORMAL TILLING 26 INCH PATH See Fig 16 Assemble holes A in tine hubs to holes B in tine shaft tine_4 OUTER TINE HAIRPIN CLIP A B A B Fig 16 INNER TINE CLEVIS PIN NOTE When reassembl...

Page 15: ...e slack without extending spring on end of cable and retighten cable clip FINAL CHECK OFF POSITION With tine control OFF up push down on handle to raise tines off the ground Slowly pull recoil starter handle while observing tines Tines should not rotate If tines rotate inner wire of control cable is too tight which is extending lower spring and engaging tines Loosencableclipandpushdownoncableonlye...

Page 16: ...NSIDE V BELT ENGINE PULLEY BELT GUIDE REVERSE IDLER ARM REVERSE IDLER PULLEY IDLER ARM PIN TRANSMISSION PULLEY FORWARD IDLER PULLEY REVERSE OUTSIDE V BELT BELT GUARD BOLT ENGINE TO ADJUST CARBURETOR The carburetor has been preset at the factory and cannot be adjusted IMPORTANT NEVERTAMPERWITHTHEENGINEGOVERNOR WHICHISFACTORYSETFORPROPERENGINESPEED OVER SPEEDING THE ENGINE ABOVE THE FACTORY HIGH SPE...

Page 17: ...eplace belts if necessary See belt re placementinstructionsintheServiceandAdjustments section of this manual Lubricate as shown in the Maintenance section of this manual Be sure that all nuts bolts and screws are securely fastened Inspect moving parts for damage breakage and wear Replace if necessary Touch up all rusted or chipped paint surfaces sand lightly before painting ENGINE FUEL SYSTEM IMPO...

Page 18: ...nd clean carburetor 6 Stale or dirty fuel 6 Empty fuel tank and refill tank with fresh clean gasoline 7 Water in fuel 7 Empty fuel tank and carburetor refill tank with fresh gasoline 8 Clogged fuel tank 8 Remove fuel tank and clean 9 Spark plug wire loose 9 Connect and tighten spark plug wire 10 Dirty engine air screen 10 Clean engine air screen 11 Dirty clogged muffler 11 Clean replace muffler 12...

Page 19: ...19 SERVICE NOTES ...

Page 20: ...05 09 18 SR Printed in U S A ...

Reviews: