OPERATION
Gasoline Engine Models:
Refer to the engine operating manual for proper engine
operation.
FUEL:
See engine operation manual for more information.
OIL:
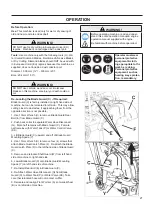
Check that engine oil level is correct using the
Engine Oil Dipstick (Z). When checking the engine oil
level, the Engine Oil Dipstick (Z) should not be screw into
the port. Because the engine often operates at an angle,
check oil level with engine horizontal. Check frequently to
ensure that oil level never falls below lower mark on dip-
stick. 0W0 oil is recommended. See engine operation
manual for more information.
All Models:
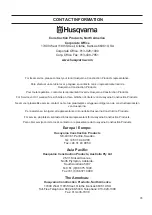
Front Pointer (A) must be checked for alignment with
blade. Lay a straight edge along Inner Flange (I). Align
Front Pointer (A) to straight edge. If required, adjust Front
Pointer (A) by loosening nuts that hold Guide Wheel (B)
in place. Align Guide Wheel (B) to straight edge and re-
tighten nuts.
Check that water tubing in the Blade Guard (C) is open
and that each side of blade has an adequate supply of
water.
Test the water supply for pressure and quantity (flow)
before starting the saw.
Saw only as deep as the job specifications require. Saw
-
ing deeper than required will add excessive wear the
blade and machine.
Cut in increments of 0mm ( inches) deep until cutting
depth specification is reached. This is known as “step
cutting”.
Saw only in a straight line. Mark cutting line clearly so
saw operator can follow line without difficulty. Saw should
NOT be twisted from side to side to force blade back on
line.
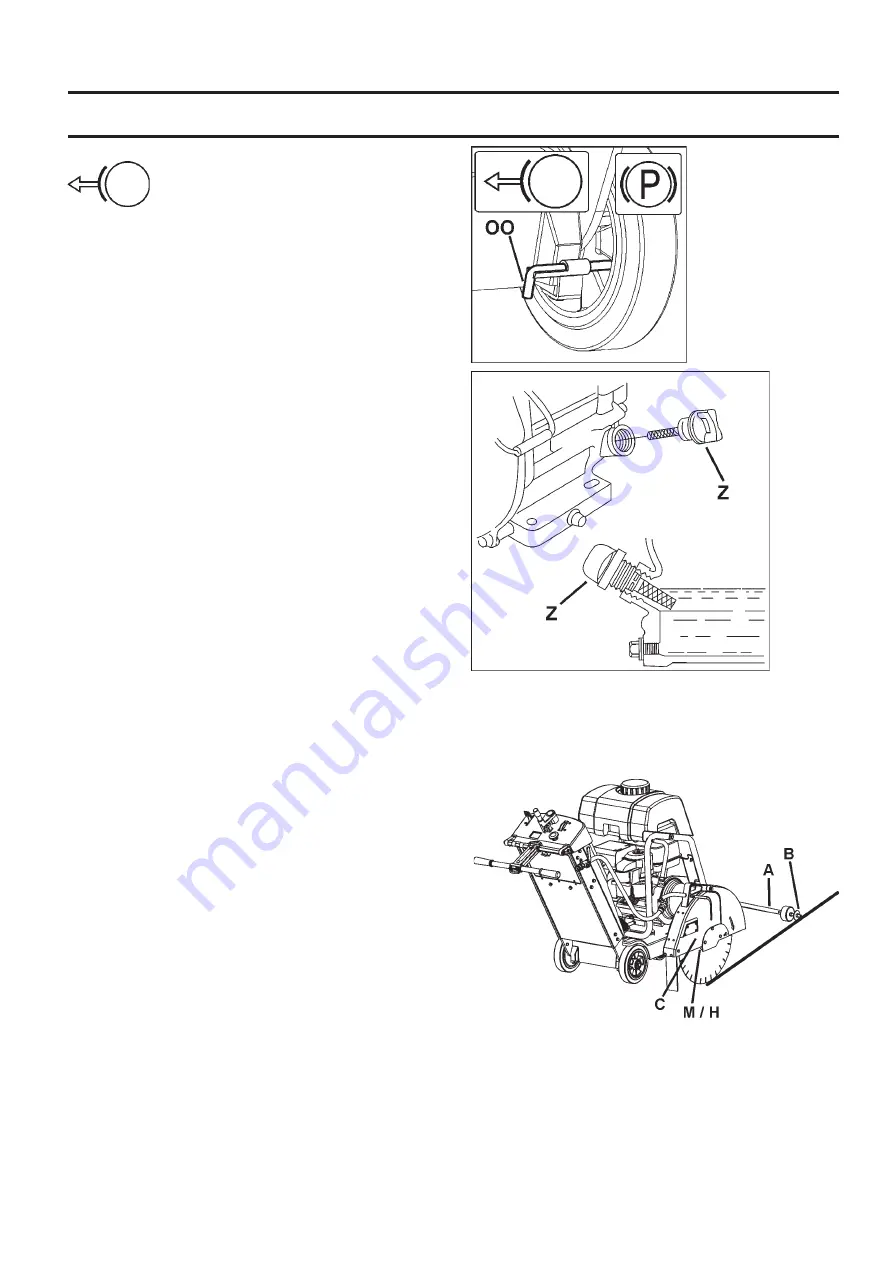
Parking Brake - Dis-engage (See Dia
gram)
: Parking brake must be dis-engaged
to operate machine.
. Pull lever (OO) toward center of machine.
. Rotate lever (OO) downward 80 degrees and release
to lock in position.
Summary of Contents for FS 410 D
Page 2: ... ...
Page 13: ...13 NOTES ...
Page 30: ...30 WIRING DIAGRAM See Engine Operation Manual ...
Page 31: ......
Page 36: ...36 ...
Page 47: ...47 NOTAS ...
Page 64: ...64 DIAGRAMA DE CABLEADO Consulte el manual de operación del motor ...
Page 65: ......
Page 70: ...70 ...
Page 81: ...81 NOTES ...
Page 98: ...98 SCHÉMA DE CÂBLAGE Voir le manuel d utilisation du moteur ...
Page 99: ......
Page 104: ... ...
Page 115: ...13 NOTIZEN ...
Page 132: ...30 SCHALTBILD Siehe Betriebsanleitung des Motors ...
Page 133: ......
Page 138: ...36 ...
Page 149: ...47 AANTEKENINGEN ...
Page 166: ...64 BEDRADINGDIAGRAM Zie bedieningshandleiding van motor ...
Page 167: ......
Page 172: ...70 ...
Page 183: ...81 ANNOTAZIONI ...
Page 200: ...98 SCHEMA CIRCUITALE Consultare il manuale del motore ...
Page 201: ......
Page 206: ...104 ...
Page 218: ...116 NOTAS ...
Page 235: ...133 DIAGRAMA DAS LIGAÇÕES Consultar o manual de funcionamento do motor ...
Page 236: ......
Page 251: ...149 ANTECKNINGAR ...
Page 268: ...166 KOPPLINGSCHEMA Se motorns bruksanvisning ...
Page 269: ......
Page 274: ......
Page 275: ......


