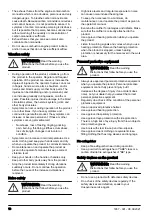
• Only do the maintenance as given in this operator's
manual. Let an approved service center do all other
servicing.
• Remove all tools from the product before you start
the engine after maintenance. Loose tools or tools
attached to rotating parts can eject and cause injury.
• Let an approved service center do servicing on the
product regularly.
Operation
Introduction
WARNING:
Read and understand the
safety chapter before you use the product.
To do before you operate the product
WARNING:
The product can easily tilt
rearward and cause injury or damage. Be
careful when you tilt the product rearward or
lift the product.
WARNING:
Be careful when you
operate the product on rough level surface
or on slopes. The product can easily tilt
rearward or start to move and cause injury
or damage. Stay behind the product until the
product is on a level surface.
WARNING:
Do not move the product
down a ramp in freewheel position. Always
move the product forward down ramps and
slopes. Do not walk beside or stay below the
ramp when you move the product down a
ramp.
• Read this operator's manual carefully and make sure
that you understand the instructions.
• Read the engine manual that is supplied by the
engine manufacturer.
• Read the instructions that are supplied with the
cutting blade by the cutting blade manufacturer.
• Before you start the product for the first time, do
these steps:
a) Install a new battery and connect the battery
.
Note:
For some markets, the battery is
installed when you purchase the product.
b) Set the correct language and do other necessary
settings on the display. Refer to
settings in the submenus on page 25
.
• Before each operation of the product, do these
steps:
a) Do the daily maintenance. Refer to
schedule on page 27
.
b) Make line marks for all cuts. Prepare the
operation sequence carefully to prevent injury
and damage.
c) Adjust the operation handles to an applicable
operation position. Refer to
of the operation handles on page 14
.
d) Lower the adjustable pointer and make sure that
it aligns with the rear pointer, the cutting blade
and the line mark on the surface. Refer to
a check of the pointers on page 13
if the
pointers and the cutting blade do not align.
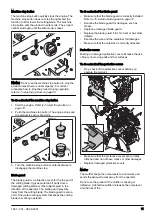
A
B
e) If it is necessary, adjust the length of the
adjustable pointer with the screw (A) on the
adjustable pointer. Adjust the width of the
adjustable pointer with the screw (B).
To do a check of the pointers
1. Put a long straight metal bar or equivalent against
the cutting blade.
2. Make sure that the rear pointer, the cutting blade
and the adjustable pointer align.
a) Adjust the adjustable pointer with the screws.
Refer to
To do before you operate the product on
page 13
.
b) To adjust the rear pointer, loosen the screw on
the rear pointer.
1657 - 001 - 08.09.2021
13
Summary of Contents for FS 4600 G II
Page 165: ...1657 001 08 09 2021 165 ...
Page 166: ...166 1657 001 08 09 2021 ...
Page 167: ...1657 001 08 09 2021 167 ...


