HYDRAULIC AND PARK BRAKE SYSTEMS
Park Brake System
Page 5-24
2005 HUV4420 Gasoline and HUV4420-D Diesel Vehicle Maintenance and Service Manual
5
PARK BRAKE CABLE ADJUSTMENT
ý
CAUTION
• Perform the following procedure only on a level surface. To avoid injury or property damage,
ensure that the path of the vehicle is clear before the vehicle is pushed.
NOTE:
Adjust rear brake calipers and park brake before adjusting park brake cable.
1. Chock the wheels, release the park brake, and place the Forward/Reverse handle in the NEUTRAL posi-
tion.
2. With the park brake released, tighten the conical nut (23) until significant resistance is observed in the
park brake cable
(Figure 5-23, Page 5-25)
.
3. With the vehicle on flat ground and the Forward/Reverse handle in the NEUTRAL position, push the park
brake pedal seven clicks.
4. Push the vehicle by hand. If the wheels move easily when the vehicle is pushed, continue tightening the
conical nut until the vehicle resists rolling easy and firm resistance is achieved.
5. Release the park brake pedal, and push it again to eight clicks. The vehicle should not be movable with
one person pushing.
6. Tighten the equalizer jam nut against the conical nut and tighten to 55 in-lb (6.3 N·m).
NOTE:
The park brake should not allow the vehicle to roll when pushed with the park brake pedal in the
eighth click (eight clicks from the top of the pedals travel).
7. Inspect the brake system to ensure that both the hydraulic brake system and the park brake system are
adjusted and operating correctly before the vehicle is returned to service.
See Brake System Inspec-
tion on page 5-1.
PARK BRAKE WHEEL CABLES
Right Rear Cable Removal
1. Chock the rear wheels, and release the park brake.
2. Remove the cable bracket from the air cleaner mounting bolt.
3. Remove the wire tie securing the cable to the frame.
4. Remove the C-clip from the right rear cable sheath adjacent to the caliper.
5. Slide the cable forward to release the sheath ferrule from the caliper bracket.
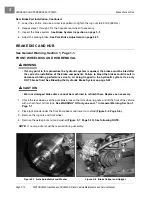
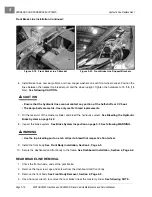
6. Move the cable up and toward the rear of the vehicle, and remove the cable from the caliper arm
(Figure 5-22, Page 5-25)
.
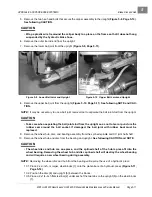
7. Disconnect the threaded end of the cable from the frame bracket, and remove the cable
(Figure 5-23,
Page 5-25)
.
Summary of Contents for HUV4420
Page 1: ... 5 5 2 4 56 56 3 3 6 3 4 3 26 5 ...
Page 2: ......
Page 16: ...Page xiv 2005 HUV4420 Gasoline and HUV4420 D Diesel Vehicle Maintenance and Service Manual ...
Page 20: ...1 ...
Page 38: ...4 ...
Page 68: ...5 ...
Page 74: ...6 ...

