background image

11

ASSEMBLING

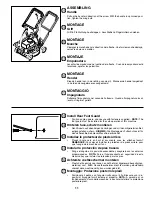
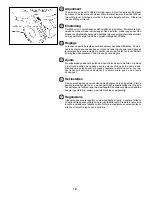
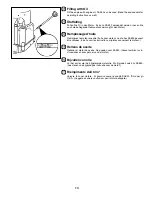
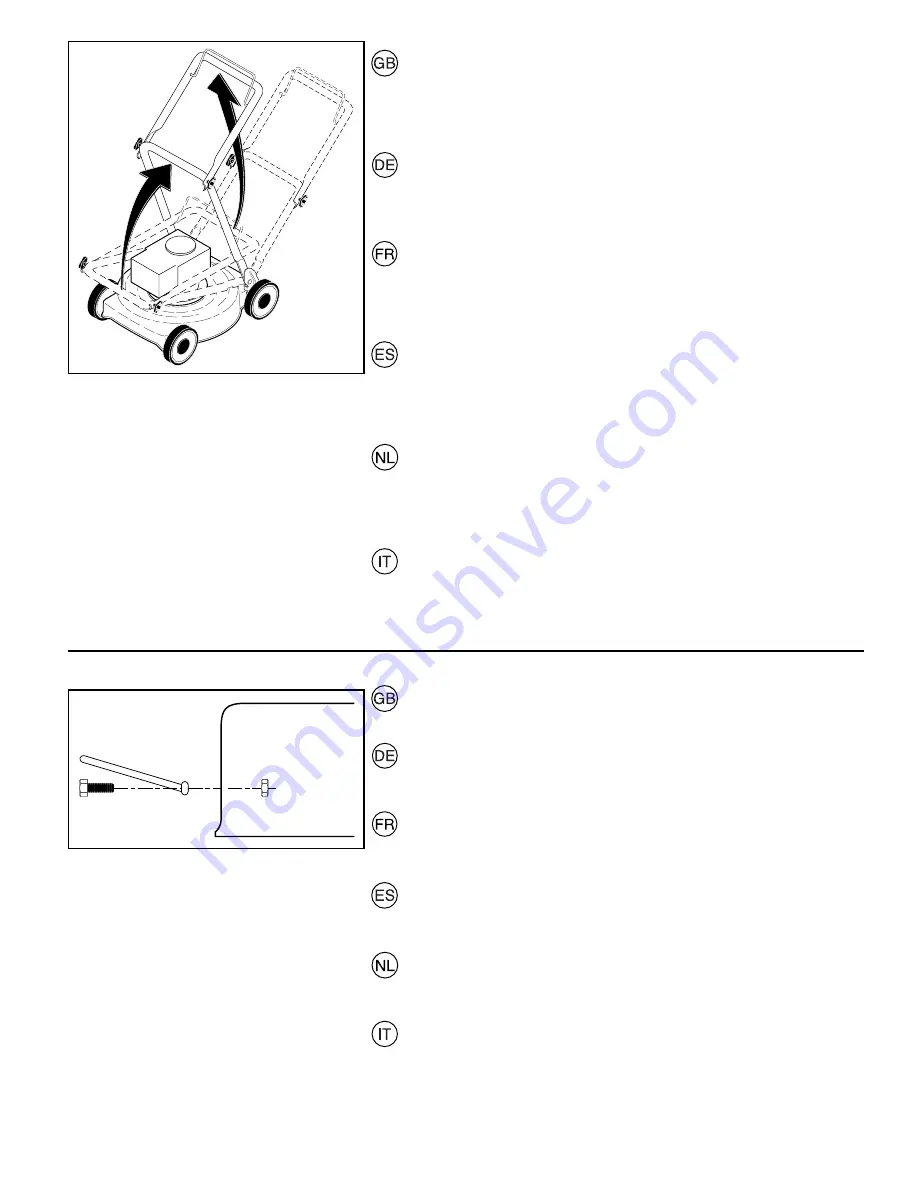
Handle

Pull up the handle in direction of the arrow.  With the handle in up-turned posi-
tion, tighten the wing-nuts.

MONTAGE

Griff

Griff in Pfeilrichtung hochklappen.  Anschließend Flügelmuttern anziehen.

MONTAGE

Manche

Déployez le manche dans la direction de la fl èche.  Une fois le manche déployé, 
serrez les écrous à oreilles.

MONTAJE

Empuñadura

Levantar le empuãdura en el sentido de la fl echa.  Cuando la empuãdura esté 
levantada, apretar las palomillas.

MONTAGE

Hendel

Klap de hendel om, in de richting van de pijl.  Wanneer de hendel omgeklapt 
is, worden de veugelmoeren aangedraaid.

MONTAGGIO

Impugnatura

Sollevare l'impugnatura nel senso dell afreccia.  Quando l'impugnatura è sol-
levato, stringere i galletti.

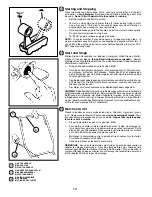
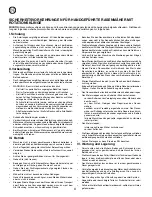
Install Rear Foot Guard

•      Position angle upward and secure with fasteners supplied.  

NOTE:

 The 

foot guard must be installed for the safe operation of this machine.

Hinteren fuss-schutz montieren

•       Den Winkel nach oben zeigend anbringen und mit den mitgelieferten Bef-

estigungsteilen sichern.  

HINWEIS:

 Die Montage des Fußschutzes ist für 

den sicheren Betrieb dieser Maschine erforderlich.

Installez le protecteur de pieds arrière 

•      Placez l’angle vers en haut et assurez-le avec les attaches fournit. 


REMARQUE: 

Vous devez installer le protecteur de pieds arrière pour 

que l’usage de la machine soit sûr.

Instalar la protección de pies trasera 

•      Ponga el ángulo en la posición ascendente y asegúrelo con las amarras 

proporcionadas.  

NOTA:

 Para el funcionamiento en seguridad de esta 

máquina hay que instalar la protección para los pies.

Achterste voetbeschermer monteren

•      Plaats het hoekstuk naar boven en zet het met bijgeleverd bevestigings-

materiaal vast.  

N.B.:

 De voetbeschermer dient te worden geïnstalleerd 

voordat deze machine veilig kan worden gebruikt.

Montaggio: Protezione posteriore piedi

•      Posizionare il pezzo con l’angolo rivolto verso l’alto. Bloccare con i dis-

positivi di fi ssaggio forniti insieme al prodotto.  

NOTA: 

A garanzia di un 

funzionamento sicuro della macchina, è basilare installare la protezione 
posteriore piedi.

Summary of Contents for J50

Page 1: ...n Manuel d instructions Lisez très attentivement et soyez certain de comprende ces instructions avant d utiliser cette machine Manual de las instrucciones Por favor lea cuidadosamente y com prenda estas intrucciones antes de usar esta maquina Instructieboekje Lees deze instructies aandachtig en zorg dat u ze begrijpt voordat u deze machine gebruikt Manuale di istruzioni Prima di utilizzare la macc...

Page 2: ...ONTAGGIO 11 REGOLAZIONE 12 13 AVVIAMENTO ED ARRESTO 14 15 USO DELLA FALCIATRICE 16 MANUTENZIONE 17 19 INFORMAZIONE GENERICHE 19 CONTENTS PAGE SAFETY RULES 3 8 TECHNICAL DATA 9 OVERVIEW 10 ASSEMBLY 11 ADJUSTMENTS 12 13 START AND STOP 14 15 USE 16 MAINTENANCE 17 19 GENERAL INFORMATION 19 INHALTSVERZEICHNIS SEITE SICHERHEITSREGELN 3 8 TECHNISCHE DATEN 9 ÜBERSICHT 10 MONTIEREN 11 EINSTELLUNG 12 13 STA...

Page 3: ... the fire hazard keep the engine silencer battery compartment and petrol storage area free of grass leaves or excessive grease Check the grass catcher frequently for wear or deterioration Replace worn or damaged parts for safety If the fuel tank has to be drained this should be done outdoors instructions could result in serious injury or death I Training Read the instructions carefully Be familiar...

Page 4: ... häufig auf Abnutzung oder Verschleiß prüfen Abgenutzte oder beschädigte Teile zur Sicherheit immer sofort ersetzen Falls der Kraftstofftank entleert werden muß sollte dies im Freien getan werden I Schulung Die Anleitungen sorgfältig durchlesen Mit den Bedienungsele menten und der vorschriftsmäßigen Bedienung der Maschine vertraut machen Auf keinen Fall Kindern oder Erwachsenen die mit der Bedien ...

Page 5: ...e haut en bas Soyez très prudents lorsque vous changez de direction sur les pentes Ne tondez pas excessivement les pentes escarpées Soyez extrêmement prudents lorsque vous faites marche arrière ou tirez la tondeuse à gazon vers vous Utilisez une butée d arrêt afin de maintenir la lame immobile si la tondeuse à gazon doit être inclinée pour le transport lorsqu elletraversedessurfacesautresquelegazo...

Page 6: ...o guarde el motor el silen ciador el comportamiento de la batería limpios de césped hojas y de demasiado grasa Verifique frecuentemente el recogedor del césped para ver si hay uso o deterioración Para la seguridad reemplace las partes que estén usadas o dañadas Si el tanque del combustible debe ser vaciado hágalo afuera I Instrucción Lea todas las instrucciones cuidadosamente Familiarícese complet...

Page 7: ...rij van gras bladeren of een overmaat aan smeervet Controleer de opvangzak vaak op slijtage of verwering Vervangversletenofbeschadigdeonderdelenomveiligheidsre denen Als de brandstoftank afgetapt moet worden moet dit buiten worden gedaan I Training Lees de instructies aandachtig Zorg dat u vertrouwd bent met de bedieningselementen en het juiste gebruik van de machine Laatkinderenofmensendienietbek...

Page 8: ...iberi da erba foglie o quantità eccessive di grasso Controllare spesso il raccoglitore dell erba tagliata per individuare eventuali segni di usura o di danneggiamento Per maggiore sicurezza sostituire le parti usurate o danneggiate Ilserbatoiodelcarburantevavuotatoall aperto qualoranecessario I Addestramento All uso Studiare attentamente le istruzioni Acquisire dimesti chezza con i comandi e conos...

Page 9: ...trouver sur votre machine ou dans les publications fournies avec le produit Apprenez à comprendre la signification de ces symboles Estos símbolos pueden aparecer sobre su unidad o en la literatura proporcionada con el producto Aprenda y comprenda sus significados Simboli utilizzati sull apparato di taglio o nella documentazione fornita unitamente al prodotto E importante conoscerne bene il signifi...

Page 10: ...10 5 2 3 1 6 4 8 7 ...
Page 11: ...el nach oben zeigend anbringen und mit den mitgelieferten Bef estigungsteilen sichern HINWEIS Die Montage des Fußschutzes ist für den sicheren Betrieb dieser Maschine erforderlich Installez le protecteur de pieds arrière Placez l angle vers en haut et assurez le avec les attaches fournit REMARQUE Vous devez installer le protecteur de pieds arrière pour que l usage de la machine soit sûr Instalar l...

Page 12: ... doivent être réglées identiquement sinon la coupe sera inégale Ajuste El cortacésped puede ser ajustado a cinco alturas de corte distintas Ajústese a la altura de corte que se desee con la palanca situada junto a cada rueda Presiónese la palanca contra la rueda y regúlese la altura de corte Las rue das tienen que estar todas ajustadas a la misma altura pues si no el corte es desigual Het instelle...

Page 13: ... Les huiles SAE30 peuvent être utilisées Lisez aussi les instructions ci jointes concernant le moteur Relleno de aceite Rellenar el motor de aceite Se pueden usar SAE30 Léase también las in strucciones anexas para el uso del motor Bijvullen van olie Vul het carter met de bijgeleverde motorolie Multi grade zoals bijv SAE30 Lees tevens de bijgevoegde instructie voor de motor Riempimento dell olio Ve...

Page 14: ...ondern sich langsam wieder aufrollen lassen Der Motor wird durch Loslassen des Bedienungshebels abgestellt HINWEIS Beikaltem Wetter müssen die Bedienungsschritte für dieVorpumpe mögliicherweise wiederholt werden Bei warmem Wetter kann durch zu starke Betätigung der Vorpumpe der Motor Uuberflutet werden so daß der Motor infolgedessen nicht anspringt Solte der Motor überflutet sein einige Minuten wa...

Page 15: ...dieningshendel tegen het stuur en trek kort en krachtig aan de starthendel Laat het startsnoer langzaam vieren Schakel de motor uit door de bedieningshendel los te laten N B Bij koeler weer kan het nodig zijn om de voorinspuitstappen te herhalen Bij warmer weer kan te veel voorinspuiten ertoe leiden dat de motor verzuipt en niet start Als u de motor verzuipt moet u enkele minuten wachten alvorens ...

Page 16: ...s very long Mähen Sie das Gras bei starkem Wachstum zweimal wöchentlich Mähen Sie niemals mehr als 1 3 der Graslänge Dies gilt besonders für trockene Peri oden Mähen Sie danach das Resultat und stellen Sie dann die erwuunschte Schnitthöhe ein lst das Gras besonders hoch fahren Sie langsam mit dem Rasenmäher Mähen Sie gegebenenfalls zweimal Au cours de la période de croissance intensive coupez l he...

Page 17: ...ioni pulizie o lavori di menutenzione Dopo 5 ore di funzionamento stringere viti e dadi Controllare l olio Piegando la falciatrice sul fiancolare attenzione che la candela sia il punto più alto Regularly Stop the engine and unscrew the dipstick The level should be between FULL and ADD NOTE the dipstick must be screwed all the way down in order to indicate correct oil level Avoid filling with too m...

Page 18: ... Grinding and balancing the cutter blade Remove the spark plug lead Fit ting and removing the blade require the use of protective gloves Unscrew the cutter blade and deliver it to a service workshop for grinding and balancing Tighten the screw properly when reassembling Jährlich nach Beendigung der Saison Schleifen und Auswuchten des Messers Achtung Vor Demontage des Messers Zündkabel von der Zünd...

Page 19: ...R 3 GEHÄUSE 1 VIS 2 FILTRE 3 CORPS 1 TORNILLO 2 FILTRO 3 CUERPO 1 SCHROEF 2 FILTER 3 HUISSTE AFBEELDING 1 VITE 2 FILTRO 3 SEDE Cleaning of air filter Slacken the screw remove the lid and remove the filter cartridge Cleanse the filter in kerosene Add 2 3 spoonfuls of oil and spread it evenly throughout the filter ReinigungdesLuftfilters Schraubenlösen DeckelabnehmenundFiltereinsatz herausnehmen Net...

Page 20: ...ende Electrolux Home Products Mr Scott Kendall McRae Georgia 31055 USA Directeur Handtekening ___________________ productcertificatie ERKLÄRUNG ÜBER DIE KONFORMITÄT Der Hersteller Electrolux Home Products Highway 23 East McRae Georgia 31055 USA Hiermit erklärt dass die unten beschriebene Maschine Kategorie Rotationmäher Garantierter Ausführung Husqvarna Schalleistungspegel 100 dB A Typ J50 Gemesse...

Reviews: