English-
120
REPAIR INSTRUCTIONS
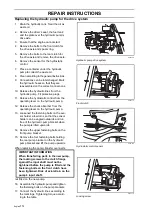
Replacing the lift cylinder
1.
Open the cover on the chequered floor
plate. Remove a circlip and knock out
the axle for the front mounting.
2.
Jack up and block the machine
3.
Place a container under the cylinder to
collect the waste oil.
4.
Clean according to the general
instructions.
5.
Release the hydraulic lines from the
cylinder. Fit protective plugs.
6.
Remove a circlip and knock out the axle
for the rear mounting. Remove the
cylinder.
7.
Assemble the cylinder in the reverse
order. Tightening torque for hydraulic
lines as set out in the table.
8.
Fill with hydraulic oil if necessary.
9.
Start the engine and run the cylinder to
its end positions to bleed.
10. Check for leakage.
11. Top up the hydraulic oil if necessary.
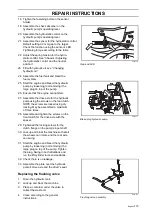
Replacing the steering cylinder
1.
Jack up and block the machine so that
the rear axle can swing.
2.
Place a container under the cylinder to
collect the waste oil.
3.
Clean according to the general
instructions.
4.
Release the hydraulic lines from the
cylinder. Fit protective plugs.
5.
Remove the screws in the linkage
bearing the both mountings.
6.
Remove the upper part of the cylinder
mountings (model year 2006 - 2007) and
lift off the cylinder.
7.
Assemble the cylinder in the reverse
order. Tightening torque for screws and
hydraulic lines as set out in the table.
8.
Fill with hydraulic oil if necessary.
9.
Start the engine and run the cylinder to
its end positions to bleed.
10. Check for leakage.
11. Top up the hydraulic oil if necessary.
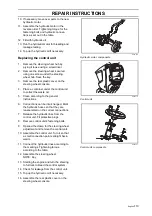
8043-128
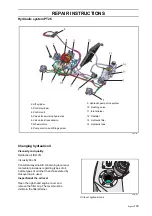
Lift cylinder
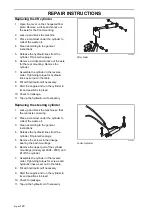
8043-123
Control cylinder
Summary of Contents for PT 26D
Page 1: ...Workshop manual PT26D English ...
Page 13: ...English 12 SPECIAL TOOLS ...
Page 94: ...English 93 REPAIR INSTRUCTIONS 8043 197 Cutting unit Combi 155 ...
Page 107: ...English 106 REPAIR INSTRUCTIONS ...
Page 123: ...English 122 REPAIR INSTRUCTIONS ...
Page 145: ......
Page 146: ...English 145 APPENDIXES Circuit diagram Circuit diagram 1 ...
Page 147: ...English 146 APPENDIXES Circuit diagram 2 ...
Page 148: ...English 147 APPENDIXES Circuit diagram 3 ...
Page 149: ...English 148 APPENDIXES Circuit diagram 4 ...
Page 150: ...English 149 APPENDIXES Circuit diagram 5 ...
Page 151: ...English 150 APPENDIXES Circuit diagram 6 ...
Page 152: ...English 151 APPENDIXES Circuit diagram 7 ...
Page 153: ...English 152 APPENDIXES Circuit diagram 8 ...
Page 154: ...English 153 APPENDIXES Circuit diagram 9 ...
Page 155: ...English 154 APPENDIXES Circuit diagram 10 ...
Page 156: ...English 155 APPENDIXES Circuit diagram 11 ...
Page 157: ...English 156 APPENDIXES ...
Page 161: ...English 160 APPENDIXES 8043 160 Circuit board placement ...
Page 162: ...English 161 APPENDIXES Hydraulic diagram 8043 247 Hydraulic diagram ...
Page 163: ...English 162 APPENDIXES ...
Page 167: ...2009W18 115 08 30 26 ...

