English-
95
REPAIR INSTRUCTIONS
Replacing the cutting unit belt
.
On these cutting units with “collision-proof”
blades, the blades are driven by one V-belt.
Do as follows to replace the V-belt:
1.
Dismantle the cutting unit. See “Side
shifting the cutting unit” on page 87.
2.
Remove the screws for the covers. Lift
off the protective covers from over the
belts.
3.
Pry off the old belt from the belt pulleys.
Use a jimmy bar, if necessary, in order to
release the belt tension.
4.
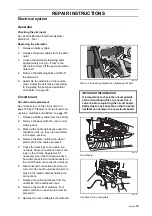
Slacken off two screws and remove the
three others for the gear housing. Turn
the gear housing so that the belts can be
moved under the pulley.
5.
Check that the belt tensioning equipment
is not jammed or binding and replace the
spring.
6.
Position the new belt and reinstall the
gear housing.
7.
Attach the new belt.
The belt position decal is on the cutting
unit under the protective cover.
8.
Install the protective covers.
9.
Attach the cutting unit to the machine.
Blade bearings
1.
Remove the cutting unit's upper covers,
see “Belt replacement”.
2.
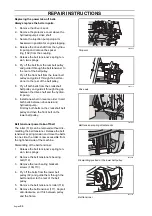
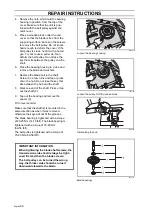
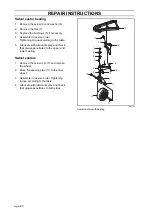
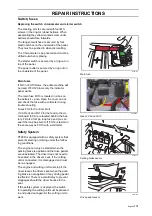
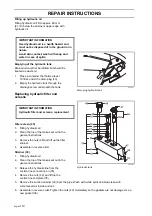
Loosen the spring (1) that tensions the
V-belt and pry off the belt.
3.
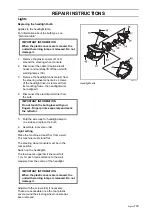
Loosen the screw (2) that holds the belt
pulley a few turns. Lock the blade with a
wooden block or hold the belt pulley in
place, with an oil filter wrench, for example.
8009-880
WARNING!
Protect your hands with gloves
when working with the blades.
There is a risk of crush injuries
when working with the belt.
8009-879
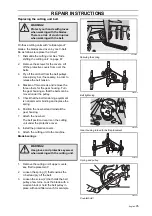
Belt tightening
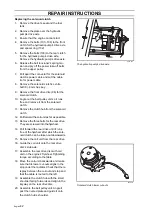
8043-055
Gear housing turned for belt replacement
WARNING!
Use gloves and protective eyewear
when working with the cutting unit.
8043-169
Spring and pulley
8009-292
Counterhold
l
Summary of Contents for PT 26D
Page 1: ...Workshop manual PT26D English ...
Page 13: ...English 12 SPECIAL TOOLS ...
Page 94: ...English 93 REPAIR INSTRUCTIONS 8043 197 Cutting unit Combi 155 ...
Page 107: ...English 106 REPAIR INSTRUCTIONS ...
Page 123: ...English 122 REPAIR INSTRUCTIONS ...
Page 145: ......
Page 146: ...English 145 APPENDIXES Circuit diagram Circuit diagram 1 ...
Page 147: ...English 146 APPENDIXES Circuit diagram 2 ...
Page 148: ...English 147 APPENDIXES Circuit diagram 3 ...
Page 149: ...English 148 APPENDIXES Circuit diagram 4 ...
Page 150: ...English 149 APPENDIXES Circuit diagram 5 ...
Page 151: ...English 150 APPENDIXES Circuit diagram 6 ...
Page 152: ...English 151 APPENDIXES Circuit diagram 7 ...
Page 153: ...English 152 APPENDIXES Circuit diagram 8 ...
Page 154: ...English 153 APPENDIXES Circuit diagram 9 ...
Page 155: ...English 154 APPENDIXES Circuit diagram 10 ...
Page 156: ...English 155 APPENDIXES Circuit diagram 11 ...
Page 157: ...English 156 APPENDIXES ...
Page 161: ...English 160 APPENDIXES 8043 160 Circuit board placement ...
Page 162: ...English 161 APPENDIXES Hydraulic diagram 8043 247 Hydraulic diagram ...
Page 163: ...English 162 APPENDIXES ...
Page 167: ...2009W18 115 08 30 26 ...


