English-
127
TROUBLE SHOOTING
Main power relay
The battery disconnector (Main power relay)
receives its voltage via an miniature circuit-
breaker of 1 A on the circuit board. If the cur-
rent out to the relay exceeds this current, the
voltage is automatically disconnected. Dis-
connect J35 (and the oil pressure switch) and
turn the ignition key to the ON position.
Measure that there is outgoing voltage 12 V
from the card between the pins on J35. If
there is voltage on J35, the cable out to the
relay is faulty or on the relay or that someone
has connected an extra load on this circuit.
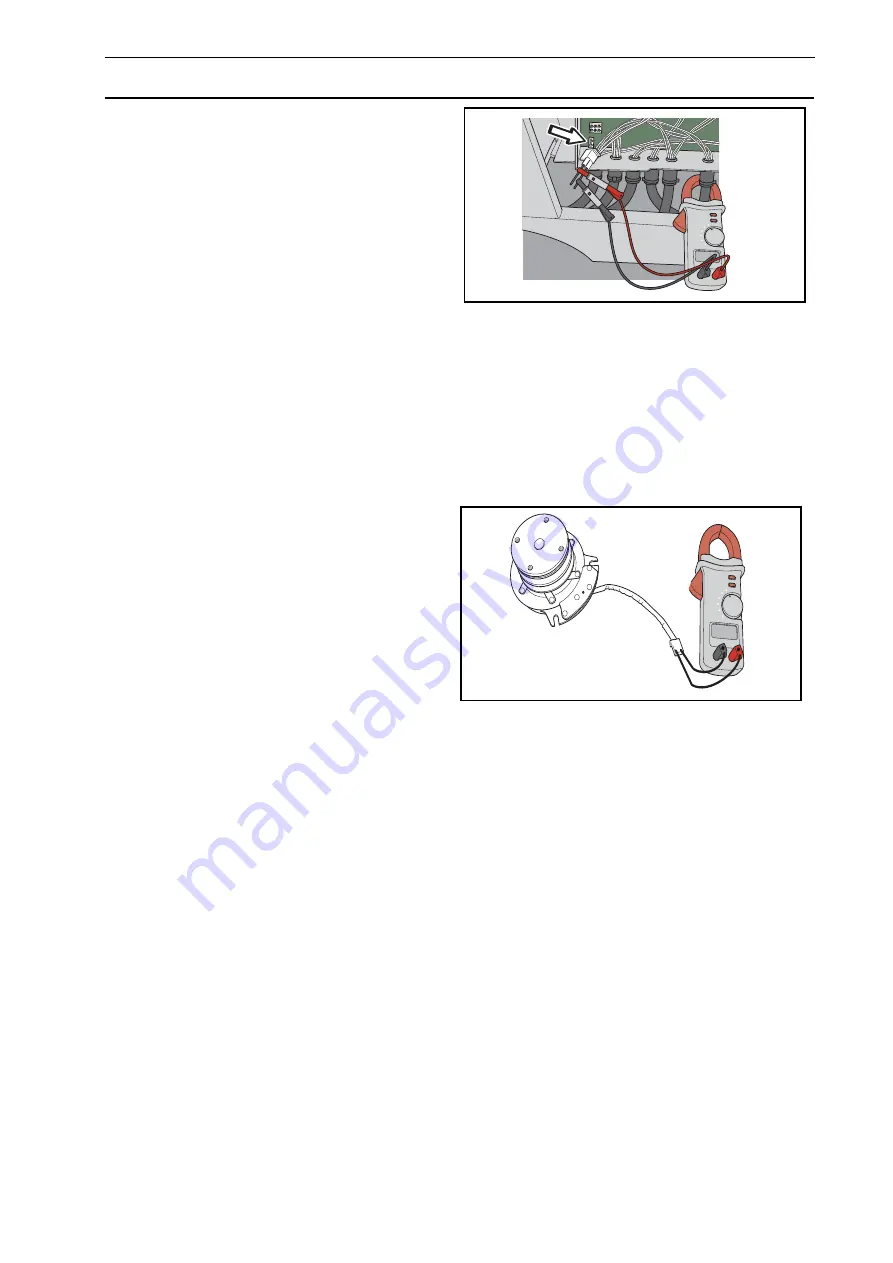
Measure the coil resistance on the main
power relay between J35:1 and J35:2, guide-
line value 19.5 - 20
Placement of J35, see “Circuit board” on
page 157.
Solenoid clutch
LEDs LD8 green and LD19 red. Fuse FU1.
Interlocking, see “Safety System” on page 40
and “Circuits” on page 37.
Split the connector to the solenoid clutch
behind the lower part of the radiator. Check
that no damage has been caused to the
cables by the moving parts. Measure with an
ohmmeter between the cables. Coil resist-
ance approx. 2 Ohm. Secure the cable with
plastic tie after measuring, so that it is not
subjected to abrasion.
If coil resistance is correct, but the LEDs indi-
cate a fault, check the cabling between the
connector and the circuit board with an ohm-
meter.
Lift function
When lifting, the two left-hand solenoid
valves in valve block 5 in hydraulic diagram,
see page 43, are actuated. LEDs LD5/LD16
will then indicate one of the solenoid valves.
To get the other valve to indicate, run to the
weight transfer position and check with LEDs
LD4/LD15.
Placement of LEDs, see Appendixes “Circuit
board” on page 157.
8043-182
Measuring coil resistance in J35
8043-195
Measuring coil resistance in solenoid clutch
Summary of Contents for PT 26D
Page 1: ...Workshop manual PT26D English ...
Page 13: ...English 12 SPECIAL TOOLS ...
Page 94: ...English 93 REPAIR INSTRUCTIONS 8043 197 Cutting unit Combi 155 ...
Page 107: ...English 106 REPAIR INSTRUCTIONS ...
Page 123: ...English 122 REPAIR INSTRUCTIONS ...
Page 145: ......
Page 146: ...English 145 APPENDIXES Circuit diagram Circuit diagram 1 ...
Page 147: ...English 146 APPENDIXES Circuit diagram 2 ...
Page 148: ...English 147 APPENDIXES Circuit diagram 3 ...
Page 149: ...English 148 APPENDIXES Circuit diagram 4 ...
Page 150: ...English 149 APPENDIXES Circuit diagram 5 ...
Page 151: ...English 150 APPENDIXES Circuit diagram 6 ...
Page 152: ...English 151 APPENDIXES Circuit diagram 7 ...
Page 153: ...English 152 APPENDIXES Circuit diagram 8 ...
Page 154: ...English 153 APPENDIXES Circuit diagram 9 ...
Page 155: ...English 154 APPENDIXES Circuit diagram 10 ...
Page 156: ...English 155 APPENDIXES Circuit diagram 11 ...
Page 157: ...English 156 APPENDIXES ...
Page 161: ...English 160 APPENDIXES 8043 160 Circuit board placement ...
Page 162: ...English 161 APPENDIXES Hydraulic diagram 8043 247 Hydraulic diagram ...
Page 163: ...English 162 APPENDIXES ...
Page 167: ...2009W18 115 08 30 26 ...

