background image

2. SAFETY INSTRUCTIONS

2.1 Installation

WARNING!

Only a qualified person must

install this appliance.

WARNING!

Risk of injury or damage to

the appliance.

• Remove all the packaging.

• Do not install or use a damaged

appliance.

• Follow the installation instructions

supplied with the appliance.

• Keep the minimum distance from

other appliances and units.

• Always take care when moving the

appliance as it is heavy. Always use

safety gloves and enclosed footwear.

• Seal the cut surfaces with a sealant to

prevent moisture from causing

swelling.

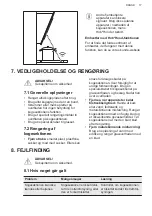
• Protect the bottom of the appliance

from steam and moisture.

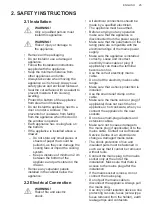
• Do not install the appliance next to a

door or under a window. This

prevents hot cookware from falling

from the appliance when the door or

the window is opened.

• Each appliance has cooling fans on

the bottom.

• If the appliance is installed above a

drawer:

– Do not store any small pieces or

sheets of paper that could be

pulled in, as they can damage the

cooling fans or impair the cooling

system.

– Keep a distance of minimum 2 cm

between the bottom of the

appliance and parts stored in the

drawer.

• Remove any separator panels

installed in the cabinet below the

appliance.

2.2 Electrical Connection

WARNING!

Risk of fire and electric

shock.

• All electrical connections should be

made by a qualified electrician.

• The appliance must be earthed.

• Before carrying out any operation

make sure that the appliance is

disconnected from the power supply.

• Make sure that the parameters on the

rating plate are compatible with the

electrical ratings of the mains power

supply.

• Make sure the appliance is installed

correctly. Loose and incorrect

electricity mains cable or plug (if

applicable) can make the terminal

become too hot.

• Use the correct electricity mains

cable.

• Do not let the electricity mains cable

tangle.

• Make sure that a shock protection is

installed.

• Use the strain relief clamp on the

cable.

• Make sure the mains cable or plug (if

applicable) does not touch the hot

appliance or hot cookware, when you

connect the appliance to the near

sockets.

• Do not use multi-plug adapters and

extension cables.

• Make sure not to cause damage to

the mains plug (if applicable) or to the

mains cable. Contact our Authorised

Service Centre or an electrician to

change a damaged mains cable.

• The shock protection of live and

insulated parts must be fastened in

such a way that it cannot be removed

without tools.

• Connect the mains plug to the mains

socket only at the end of the

installation. Make sure that there is

access to the mains plug after the

installation.

• If the mains socket is loose, do not

connect the mains plug.

• Do not pull the mains cable to

disconnect the appliance. Always pull

the mains plug.

• Use only correct isolation devices: line

protecting cut-outs, fuses (screw type

fuses removed from the holder), earth

leakage trips and contactors.

ENGLISH

25

Summary of Contents for QHIK850P

Page 1: ...USER MANUAL DA Brugsanvisning 2 Kogesektion EN User Manual 22 Hob FI Käyttöohje 42 Keittotaso QHIK850P ...

Page 2: ...mere så du kan få det bedste ud af det Besøg vores hjemmeside for at Få rådgivning brochurer fejlfinding service og reparationsinformation www husqvarna electrolux se support Få bedre service ved at registrere dit produkt www husqvarna electrolux se Køb tilbehør forbrugsvarer og originale reservedele til dit produkt www husqvarna electrolux se shop KUNDEPLEJE OG SERVICE Brug altid originale reserv...

Page 3: ... 8 år og personer med omfattende og komplekst handicap skal holdes på afstand af apparatet medmindre de overvåges konstant Børn på under 3 år skal holdes på afstand af apparatet med mindre de overvåges konstant Børn må ikke lege med apparatet Opbevar al emballage utilgængeligt for børn og bortskaf det korrekt ADVARSEL Lad ikke børn og husdyr komme tæt på apparatet når det er i drift eller mens det...

Page 4: ...apparatet Efter brug skal der slukkes for kogesektionen med funktionsvælgeren stol ikke på gryderegistreringen Hvis glaskeramikken glasoverfladen er revnet skal du slukke for apparatet og afbryde det fra ledningsnettet Hvis apparatet er tilsluttet til ledningsnettet direkte ved hjælp af en samledåse skal du fjerne sikringen for at afbryde apparatet fra stømforsyningen Kontakt i begge tilfælde det ...

Page 5: ...pparatet tages i brug skal du sørge for at det er koblet fra strømforsyningen Sørg for at parametrene på typeskiltet er kompatible med nettilslutningens elektriske mærkeværdier Sørg for at apparatet installeres korrekt En løs eller forkert netledning eller stik hvis relevant kan gøre terminalen for varm Brug den korrekte netledning Netledningerne må ikke være viklet sammen Sørg for at der installe...

Page 6: ...sage selvantændelse Brugt olie der kan indholde madrester kan forårsage brand ved en lavere temperatur end olie der bruges for første gang Undlad at bruge brændbare produkter eller ting der er fugtet med brændbare produkter i apparatet eller i nærheden af eller på dette ADVARSEL Risiko for beskadigelse af apparatet Opbevar ikke varmt kogegrej på betjeningspanelet Stil ikke et varmt grydelåg på kog...

Page 7: ...tlerne om sikkerhed 3 1 Inden installationen Notér følgende oplysninger fra typeskiltet før du installerer kogesektionen Typeskiltet sidder i bunden af kogesektionen Serienummer 3 2 Indbygningskogesektioner Brug først indbygningskogesektionerne når kogesektionen er samlet i de korrekte indbygningsenheder og bordplader der opfylder kravene 3 3 Tilslutningskabel Kogesektionen leveres med netkabel Fo...

Page 8: ... Kontrolpanel Få detaljerede oplysninger om kogezonernes størrelser i Tekniske data 4 2 Oversigt over betjeningspanel 7 8 5 2 4 3 9 1 12 10 11 6 Brug sensorfelterne til at betjene apparatet Display kontrollamper og signaler viser de funktioner der er i brug www husqvarna electrolux se 8 ...

Page 9: ...et 6 Kogezoneindikatorer for ti mer Viser den kogezone som du har tidsindstil let 7 Timerdisplay Viser tiden i minutter 8 Hob Hood Aktiverer deaktiverer funktionens manuelle tilstand 9 Vælger kogezone 10 Øger eller mindsker tiden 11 PowerBoost Aktiverer funktionen 12 Betjeningspanel Indstilling af et varmetrin 4 3 Display for varmetrin Display Beskrivelse Kogezonen er slukket Kogezonen er tændt Pa...

Page 10: ...ukning Funktionen slukker automatisk for kogesektionen hvis alle kogezoner deaktiveres du ikke indstiller varmetrinnet når kogesektionen er aktiveret du spilder noget eller lægger noget på betjeningspanelet i mere end 10 sekunder en gryde pande en klud osv Der udsendes et lydsignal og kogesektionen slukkes Fjern genstanden eller rengør betjeningspanelet kogesektionen bliver for varm f eks når sovs...

Page 11: ...ftning af gryden deaktiverer SenseBoil 5 4 Brug af kogezonerne Sæt kogegrejet i midten af den valgte kogezone Induktionskogezoner tilpasser sig automatisk til størrelsen af kogegrejets bund 5 5 Opkogningsautomatik Aktiver denne funktion for at få et ønsket varmetrin på kortere tid Når den er slået til er zonen tændt ved den højeste indstilling i starten og fortsætter derefter tilberedningen ved de...

Page 12: ...ke hurtigt Displayet viser hvor længe zonen har været tændt Sådan slår du funktionen fra Indstil kogezonen med og tryk på eller Kontrollampen for kogezonen slukkes Minutur Du kan bruge timeren som et Minutur når kogesektionen er tændt og kogezonerne ikke betjenes Displayet viser varmetrinnet Sådan aktiveres funktionen Tryk på Tryk på eller på timeren for at indstille tiden Når nedtællingen er slut...

Page 13: ...unktionen fordeler effekten mellem de kogezoner der er tilsluttet til den samme fase Funktionen aktiveres når den samlede elektriske belastning for de kogezoner der er tilsluttet til en enkelt fase overskrider 3700 W Funktionen reducerer effekten til de andre kogezoner der er tilsluttet til den samme fase Varmetrinsvisningen af de reducerede zoner skifter mellem det valgte varmetrin og det reducer...

Page 14: ...e emhætten direkte på emhættepanelet Når du er færdig med madlavningen og slukker for kogepladen kan emhætteblæseren stadigvæk være tændt i et stykke tid Efter denne tid deaktiverer systemet automatisk blæseren og forhindrer en utilsigtet aktivering af blæseren i de næste 30 sekunder Manuel betjening af blæserhastigheden Du kan også betjene funktionen manuelt For at gøre dette skal du berøre når k...

Page 15: ...ur brummen du bruger et højt varmetrin klikken der opstår elektrisk omskiftning hvislen summen bæseren kører Lydene er normale og betyder ikke at der er noget galt 6 3 Råd til SenseBoil Funktionen er bedst til kogning af vand og kartofler Det virker ikke med støbejern og nonstick kogegrej fx keramisk coating En emaljeret stålpande anbefales til at koge kartofler Kontroller at den gryde du vælger e...

Page 16: ...k kød 20 45 Tilsæt et par spsk væske 7 9 Dampning af kartofler 20 60 Brug højst l vand til 750 g kartofler 7 9 Kogning af større portioner sammenkogte retter og sup per 60 150 Op til 3 l væske plus ingredi enser 9 12 Nænsom stegning schnitzler cordon bleu kalvekød kote letter frikadeller pølser lever æg pandekager æbleskiver efter be hov Vendes undervejs 12 13 Kraftig stegning brasede kar tofler t...

Page 17: ...astfolie sukker og mad med sukker Ellers kan snavs forårsage skader på kogesektionen Vær forsigtig for at undgå forbrændinger Brug en specialskraber til kogesektioner på glasoverfladen og bevæg bladet hen over overfladen Fjernes når apparatet er kølet tilstrækkeligt ned Rande af kalk eller vand fedtstænk og metalskinnende misfarvning Rengør kogesektionen med en fugtig klud og et ikke slibende opva...

Page 18: ...Flyt genstanden fra tasterne Restvarmeindikator tæn der ikke Kogezonen er ikke varm for di den kun har været tændt i kort tid eller sensoren er be skadiget Kontakt et autoriseret service center hvis kogezonen har været i drift tilstrækkelig længe til at være varm Hob Hood virker ikke Du har tildækket betjenings panelet Fjern genstanden fra betje ningspanelet Du bruger en meget høj gry de som bloke...

Page 19: ... skiftevis Gryden er tom eller indehol der lidt væske som ikke er vand f eks olie Brug ikke funktionen med an den væske end vand og vises skiftevis Der er for meget eller for lidt vand i gryden Du har kogt madvarer som ikke er vand og kartofler Ko gepunktet er ændret og Sen seBoil virker ikke Kog kun vand og kartofler med brug af SenseBoil Se Nyttige oplysninger og råd Du hører et bip og indika to...

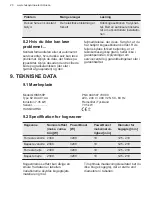
Page 20: ... ikke i garantiperioden Oplysninger om servicecenter og garantibetingelser står i garantihæftet 9 TEKNISKE DATA 9 1 Mærkeplade Model QHIK850P PNC 949 597 799 00 Type 62 D4A 01 AA 220 240 V 400 V 2N 50 60 Hz Induktion 7 35 kW Fremstillet i Tyskland Serienr 7 35 kW HUSQVARNA 9 2 Specifikation for kogezoner Kogezone Nominel effekt maks varme trin W PowerBoost W PowerBoost maksimal va righed min Diame...

Page 21: ... til måling af ydeevne 10 2 Energibesparelse Du kan spare energi ved madlavning i hverdagen hvis du følger nedenstående råd Når du opvarmer vand bør du kun bruge den nødvendige mængde Læg altid låg på kogegrejet hvis det er muligt Inden du aktiverer kogezonen skal du stille kogegrejet på den Sæt det mindre kogegrej på de mindre kogezoner Sæt kogegrejet direkte i midten af kogezonen Brug restvarmen...

Page 22: ...get the very best from it Visit our website to Get usage advice brochures trouble shooter service and repair information www husqvarna electrolux se support Register your product for better service www husqvarna electrolux se Buy Accessories Consumables and Original spare parts for your appliance www husqvarna electrolux se shop CUSTOMER CARE AND SERVICE Always use original spare parts When contac...

Page 23: ...ards involved Children between 3 and 8 years of age and persons with very extensive and complex disabilities shall be kept away from the appliance unless continuously supervised Children of less than 3 years of age should be kept away from the appliance unless continuously supervised Do not let children play with the appliance Keep all packaging away from children and dispose of it appropriately W...

Page 24: ...talling it in the built in structure Do not use a steam cleaner to clean the appliance After use switch off the hob element by its control and do not rely on the pan detector If the glass ceramic surface glass surface is cracked switch off the appliance and unplug it from the mains In case the appliance is connected to the mains directly using junction box remove the fuse to disconnect the applian...

Page 25: ...st be earthed Before carrying out any operation make sure that the appliance is disconnected from the power supply Make sure that the parameters on the rating plate are compatible with the electrical ratings of the mains power supply Make sure the appliance is installed correctly Loose and incorrect electricity mains cable or plug if applicable can make the terminal become too hot Use the correct ...

Page 26: ... oil releases can cause spontaneous combustion Used oil that can contain food remnants can cause fire at a lower temperature than oil used for the first time Do not put flammable products or items that are wet with flammable products in near or on the appliance WARNING Risk of damage to the appliance Do not keep hot cookware on the control panel Do not put a hot pan cover on the glass surface of t...

Page 27: ...nstallation Before you install the hob write down the information below from the rating plate The rating plate is on the bottom of the hob Serial number 3 2 Built in hobs Only use the built in hobs after you assemble the hob into correct built in units and work surfaces that align to the standards 3 3 Connection cable The hob is supplied with a connection cable To replace the damaged mains cable u...

Page 28: ...ontrol panel For detailed information on the sizes of the cooking zones refer to Technical data 4 2 Control panel layout 7 8 5 2 4 3 9 1 12 10 11 6 Use the sensor fields to operate the appliance The displays indicators and sounds tell which functions operate www husqvarna electrolux se 28 ...

Page 29: ...Timer indicators of cooking zones To show for which zone you set the time 7 Timer display To show the time in minutes 8 Hob Hood To activate and deactivate the manual mode of the function 9 To select the cooking zone 10 To increase or decrease the time 11 PowerBoost To activate the function 12 Control bar To set a heat setting 4 3 Heat setting displays Display Description The cooking zone is deact...

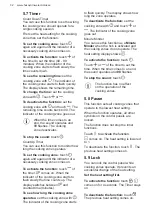
Page 30: ...f The function deactivates the hob automatically if all cooking zones are deactivated you do not set the heat setting after you activate the hob you spill something or put something on the control panel for more than 10 seconds a pan a cloth etc An acoustic signal sounds and the hob deactivates Remove the object or clean the control panel the hob gets too hot e g when a saucepan boils dry Let the ...

Page 31: ...vate the function touch the function deactivates and the heat setting goes down to 0 or touch the control bar and adjust the heat setting manually The Pause function and lifting of the pot deactivate SenseBoil 5 4 Using the cooking zones Place the cookware in the centre of the selected zone Induction cooking zones adapt to the dimension of the bottom of the cookware automatically 5 5 Automatic Hea...

Page 32: ...flash slowly the time counts up The display switches between and counted time minutes To see how long the cooking zone operates set the cooking zone with The indicator of the cooking zone starts to flash quickly The display shows how long the zone operates To deactivate the function set the cooking zone with and touch or The indicator of the cooking zone goes out Minute Minder You can use this fun...

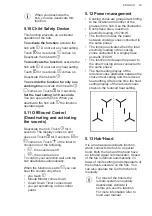
Page 33: ... Count Down Timer comes down you put something on the control panel 5 12 Power management Cooking zones are grouped according to the location and number of the phases in the hob See the illustration Each phase has a maximum electricity loading of 3700 W The function divides the power between cooking zones connected to the same phase The function activates when the total electricity loading of the ...

Page 34: ... of the Timer to select an automatic mode To operate the hood directly on the hood panel deactivate the automatic mode of the function When you finish cooking and deactivate the hob the hood fan may still operate for a certain period of time After that time the system deactivates the fan automatically and prevents you from accidental activation of the fan for the next 30 seconds Operating the fan ...

Page 35: ...se a high power level clicking electric switching occurs hissing buzzing the fan operates The noises are normal and do not indicate any malfunction 6 3 Hints Tips for SenseBoil The function works best for boiling water and preparing potatoes It does not work with cast iron and non stick cookware e g with a ceramic coating Enamelled steel pots are recommended for achieving the best results while bo...

Page 36: ... 50 Add at least twice as much liq uid as rice mix milk dishes halfway through the proce dure 5 7 Steam vegetables fish meat 20 45 Add a couple of tablespoons of liquid 7 9 Steam potatoes 20 60 Use max l of water for 750 g of potatoes 7 9 Cook larger quantities of food stews and soups 60 150 Up to 3 l of liquid plus ingredi ents 9 12 Gentle fry escalope veal cor don bleu cutlets rissoles sausages ...

Page 37: ...ately melted plastic plastic foil sugar and food with sugar otherwise the dirt can cause damage to the hob Take care to avoid burns Use a special hob scraper on the glass surface at an acute angle and move the blade on the surface Remove when the hob is sufficiently cool limescale rings water rings fat stains shiny metallic discoloration Clean the hob with a moist cloth and a non abrasive detergen...

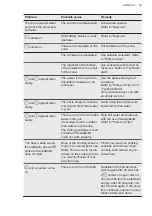
Page 38: ...or field Remove the object from the sensor field Residual heat indicator does not come on The zone is not hot because it operated only for a short time or the sensor is dam aged If the zone operated sufficient ly long to be hot speak to an Authorised Service Centre Hob Hood does not work You covered the control pan el Remove the object from the control panel You use a very tall pot which blocks th...

Page 39: ...her than water e g oil Avoid using the function with liquids other than water and appear alter nately There is too much or too little water in the pot You boiled some food other than water and potatoes The boiling point was moved in time and SenseBoil could not work properly Only boil water and potatoes with the use of SenseBoil Refer to Hints and Tips You hear a beep sound the indicators above bl...

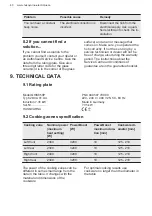
Page 40: ...during the warranty period The instructions about the Service Centre and conditions of guarantee are in the guarantee booklet 9 TECHNICAL DATA 9 1 Rating plate Model QHIK850P PNC 949 597 799 00 Typ 62 D4A 01 AA 220 240 V 400 V 2N 50 60 Hz Induction 7 35 kW Made in Germany Ser Nr 7 35 kW HUSQVARNA 9 2 Cooking zones specification Cooking zone Nominal power maximum heat setting W PowerBoost W PowerBo...

Page 41: ... 10 2 Energy saving You can save energy during everyday cooking if you follow below hints When you heat up water use only the amount you need If it is possible always put the lids on the cookware Before you activate the cooking zone put the cookware on it Put the smaller cookware on the smaller cooking zones Put the cookware directly in the centre of the cooking zone Use the residual heat to keep ...

Page 42: ...ukemiseen jotta voitte hyödyntää laitteen ominaisuudet parhaalla mahdollisella tavalla Vieraile verkkosivullamme Saadaksesi käyttöön liittyviä neuvoja esitteitä vianmääritysohjeita ja korjausohjeita www husqvarna electrolux se support Rekisteröi tuote paremman palvelun saamiseksi www husqvarna electrolux se Ostaaksesi laitteesi lisävarusteita kulutusosia ja alkuperäisiä varaosia www husqvarna elec...

Page 43: ...dän turvallisuudestaan vastaava henkilö valvoo ja ohjaa heitä käyttämään laitetta turvallisesti ja ymmärtämään sen käyttöön liittyvät vaarat Laite on pidettävä 3 8 vuotiaiden lasten ja erittäin vakavasti liikuntarajoitteisten henkilöiden ulottumattomissa ellei heitä valvota jatkuvasti Alle 3 vuotiaat lapset tulee pitää kaukana laitteesta ellei heitä valvota jatkuvasti Älä anna lasten leikkiä laitt...

Page 44: ... jatkuvasti VAROITUS Tulipalon vaara Älä säilytä mitään keittotason päällä Metalliesineitä kuten veitsiä haarukoita lusikoita ja kansia ei saa asettaa keittotasolle koska ne voivat kuumentua Älä käytä laitetta ennen kuin se on asennettu kalusteeseen Laitteen puhdistuksessa ei saa käyttää painepesuria Älä luota keittoastian tunnistimeen vaan kytke keittotason vastus pois päältä vääntimellä Jos kera...

Page 45: ...tai paperiarkkeja jotka voivat päästä laitteeseen Muutoin ne voivat vahingoittaa jäähdytyspuhaltimia tai heikentää jäähdytysjärjestelmän tehoa Varmista että laitteen alaosan ja laatikossa säilytettävien esineiden välinen etäisyys on vähintään 2 cm Poista laitteen alla olevaan kaappiin mahdollisesti asennetut erotuslevyt 2 2 Sähköliitännät VAROITUS Tulipalo ja sähköiskuvaara Kaikki sähkökytkennät t...

Page 46: ...aitteen pinnassa on säröjä irrota laite välittömästi sähköverkosta Täten vältetään sähköiskut Sydämentahdistimia käyttävien henkilöiden on säilytettävä vähintään 30 cm n turvaetäisyys induktiokeittoalueisiin laitteen ollessa toiminnassa Öljy voi roiskua kun asetat ruoka aineksia kuumaan öljyyn VAROITUS Tulipalo ja räjähdysvaara Kuumista rasvoista ja öljyistä voi päästä syttyviä höyryjä Pidä liekit...

Page 47: ...o tai tukehtumisvaara Kysy lisätietoa laitteen oikeaoppisesta hävittämisestä paikalliselta viranomaiselta Irrota pistoke pistorasiasta Leikkaa virtajohto laitteen läheltä ja hävitä se 3 ASENNUS VAROITUS Lue turvallisuutta koskevat luvut 3 1 Ennen asentamista Kirjoita alla olevat tiedot ylös arvokilvestä ennen keittotason asentamista Arvokilpi sijaitsee keittotason pohjassa Sarjanumero 3 2 Kalustee...

Page 48: ...eeli Katso tarkempaa tietoa keittoalueiden koosta osiosta Tekniset tiedot 4 2 Käyttöpaneelin painikkeet 7 8 5 2 4 3 9 1 12 10 11 6 Laitetta käytetään kosketuspainikkeilla Näytöt merkkivalot ja äänimerkit ilmaisevat mitkä toiminnot ovat käytössä www husqvarna electrolux se 48 ...

Page 49: ... 6 Keittoalueiden ajastimen il maisimet Aika asetusta koskevan keittoalueen osoit taminen 7 Ajastimen näyttö Ajan osoittaminen minuutteina 8 Hob Hood Toiminnon manuaalisen tilan kytkeminen päälle ja pois päältä 9 Keittoalueen valitseminen 10 Ajan lisääminen tai vähentäminen 11 PowerBoost Toiminnon kytkeminen toimintaan 12 Säätöpalkki Tehotason säätäminen 4 3 Tehotasojen näytöt Näyttö Kuvaus Keitto...

Page 50: ...s toiminnasta Keittotaso kytketään toimintaan ja pois toiminnasta koskettamalla painiketta sekunnin ajan 5 2 Automaattinen virrankatkaisu Toiminto katkaisee virran automaattisesti keittotasosta seuraavissa tilanteissa Kaikki keittoalueet on kytketty pois toiminnasta Et aseta tehotasoa kytkettyäsi keittotason toimintaan Käyttöpaneelin päälle on roiskunut jotakin tai sen päälle on asetettu jotakin p...

Page 51: ...rrallaan kunnes vesi saavuttaa kiehumispisteen Kun toiminto tunnistaa kiehumispisteen keittotasosta kuuluu äänimerkki ja tehotaso säätyy automaattisesti arvoon 8 Jos kaikki keittoalueet ovat jo käytössä tai niissä kaikissa on jälkilämpöä keittotasosta kuuluu äänimerkki symbolin yläpuolella olevat merkkivalot vilkkuvat ja toiminto ei käynnisty Kytke toiminto pois päältä koskettamalla toiminto kytke...

Page 52: ...s toiminnasta aseta keittoalue painikkeella ja kosketa painiketta Jäljellä oleva aika laskee takaisin arvoon 00 Keittoalueen merkkivalo sammuu Kun aika on kulunut loppuun laitteesta kuuluu äänimerkki ja näytössä vilkkuu 00 Keittoalue kytkeytyy pois toiminnasta Äänimerkin deaktivoiminen kosketa painiketta CountUp Timer Voit käyttää tätä toimintoa keittoalueen toiminta ajan tarkkailemiseen Keittoalu...

Page 53: ...taso toimintaan painikkeella Älä valitse tehotasoa Kosketa painiketta neljän sekunnin ajan syttyy Kytke keittotaso pois toiminnasta painikkeella Voit ohittaa toiminnon vain yhtä keittoaikaa koskien kytke keittotaso toimintaan painikkeella syttyy Kosketa painiketta neljän sekunnin ajan Aseta tehotaso 10 sekunnin kuluessa Nyt voit käyttää keittotasoa Kun kytket keittotason pois päältä painikkeella t...

Page 54: ... tilan H1 H6 Keittotason oletusasetus on H5 Liesituuletin reagoi aina keittotasoa käyttäessä Keittotaso tunnistaa keittoastian lämpötilan automaattisesti ja säätää puhaltimen nopeuden Automaattitilat Auto maatti nen valo Keittä minen1 Paista minen2 Tila H0 Pois päältä Pois päältä Pois päältä Tila H1 Päällä Pois päältä Pois päältä Tila H2 3 Päällä Puhalti men no peus 1 Puhalti men no peus 1 Tila H3...

Page 55: ...ttämään valon automaattisesti aina keittotason päälle kytkemisen yhteydessä Aseta tällöin automaattinen tila H1 H6 Liesituulettimen valo kytkeytyy pois päältä kahden minuutin kuluttua keittotason pois päältä kytkemisen jälkeen 6 VIHJEITÄ JA NEUVOJA VAROITUS Lue turvallisuutta koskevat luvut 6 1 Keittoastiat Induktiokeittoalueilla voimakas sähkömagneettinen kenttä luo keittoastian lämmön erittäin n...

Page 56: ...i veden ja perunoiden kokonaispaino on 1 5 kg Varmista perunoita keittäessä että perunat ovat kokonaan veden alla Jätä kuitenkin aina vähintään 1 4 keittoastiasta tyhjäksi Keitä ainoastaan kokonaisia kuorimattomia ja keskisuuria perunoita parhaan lopputuloksen saavuttamiseksi Keittoastiaa ei saa täyttää liian tiiviisti perunoilla Vältä tuottamasta ulkoista tärinää esim käyttämällä tehosekoitinta t...

Page 57: ...neet 9 12 Leikkeiden vasikanlihan cor don bleun kotlettien pyöryköi den makkaroiden maksan kastikepohjan kananmunien ohukaisten ja munkkien paista minen tarpeen mukaan Käännä kypsennyksen puoli välissä 12 13 Voimakas paistaminen sipuli perunat ulkofilee pihvit 5 15 Käännä kypsennyksen puoli välissä 14 Veden keittäminen pastan keittäminen lihan ruskistaminen gulassi pa tapaisti ranskalaisten fritee...

Page 58: ...goittaa keittotasoa Varo palovammoja Käytä keittotason erityistä kaavinta viistosti lasipintaa vasten ja liikuta kaavinta pintaa pitkin Poista sitten kun keittotaso on jäähtynyt riittävästi kalkkirenkaat vesirenkaat rasvatahrat kirkkaat metalliset värimuutokset Puhdista keittotaso kostealla liinalla ja miedolla puhdistusaineella Pyyhi keittotaso pehmeällä kuivalla liinalla puhdistuksen jälkeen Poi...

Page 59: ...kaa tai anturi on viallinen Jos alue on toiminut riittävän kauan ollakseen kuuma ota yhteys valtuutettuun huoltoliik keeseen Hob Hood ei toimi Käyttöpaneeli on peitetty Poista esineet käyttöpaneelin päältä Käytössä on erittäin korkea kattila joka estää signaalin Käytä pienempää kattilaa vaihda keittoaluetta tai säädä liesituuletinta manuaalisesti Automaattinen kuumen nus ei toimi Alue on kuuma Ann...

Page 60: ...s teen saavuttamiseen kulunut aika oli poikkeava ja Sense Boil toiminto ei voinut toi mia oikein Keitä SenseBoil toiminnolla ainoastaan vettä ja perunoita Katso kohta Neuvoja ja vink kejä Laitteesta kuuluu ääni merkki symbolin ylä puolella olevat merkkivalot vilkkuvat ja SenseBoil toiminto ei käynnisty Mikään keittoalue ei ole val mis käytettäväksi Sense Boil toiminnolla Valitsemil lasi keittoalue...

Page 61: ...duktio 7 35 kW Valmistettu Saksassa Sarjanumero 7 35 kW HUSQVARNA 9 2 Keittoalueiden määritykset Keittoalue Nimellisteho suurin tehota so W PowerBoost W PowerBoost kesto enintään min Keittoastian halkaisija mm Vasemmalla edessä 2300 3200 10 125 210 Vasemmalla ta kana 2300 3200 10 125 210 Oikealla edessä 2300 3200 10 125 210 Oikealla takana 2300 3200 10 125 210 Keittoalueiden teho voi poiketa hiuka...

Page 62: ...alla Käytä veden kuumentamisen aikana ainoastaan tarvittavaa vesimäärää Mikäli mahdollista peitä keittoastia aina kannella Aseta keittoastia keittoalueelle ennen alueen kytkemistä toimintaan Aseta pieni keittoastia pienemmälle keittoalueelle Aseta keittoastia suoraan keittoalueen keskelle Käytä jälkilämpöä ruoan pitämiseksi lämpimänä tai ruoan sulattamiseksi 11 YMPÄRISTÖNSUOJELU Kierrätä materiaal...

Page 63: ......

Page 64: ...www husqvarna electrolux se shop 867358283 A 242020 ...

Reviews: