34 –
English
1
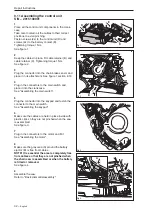
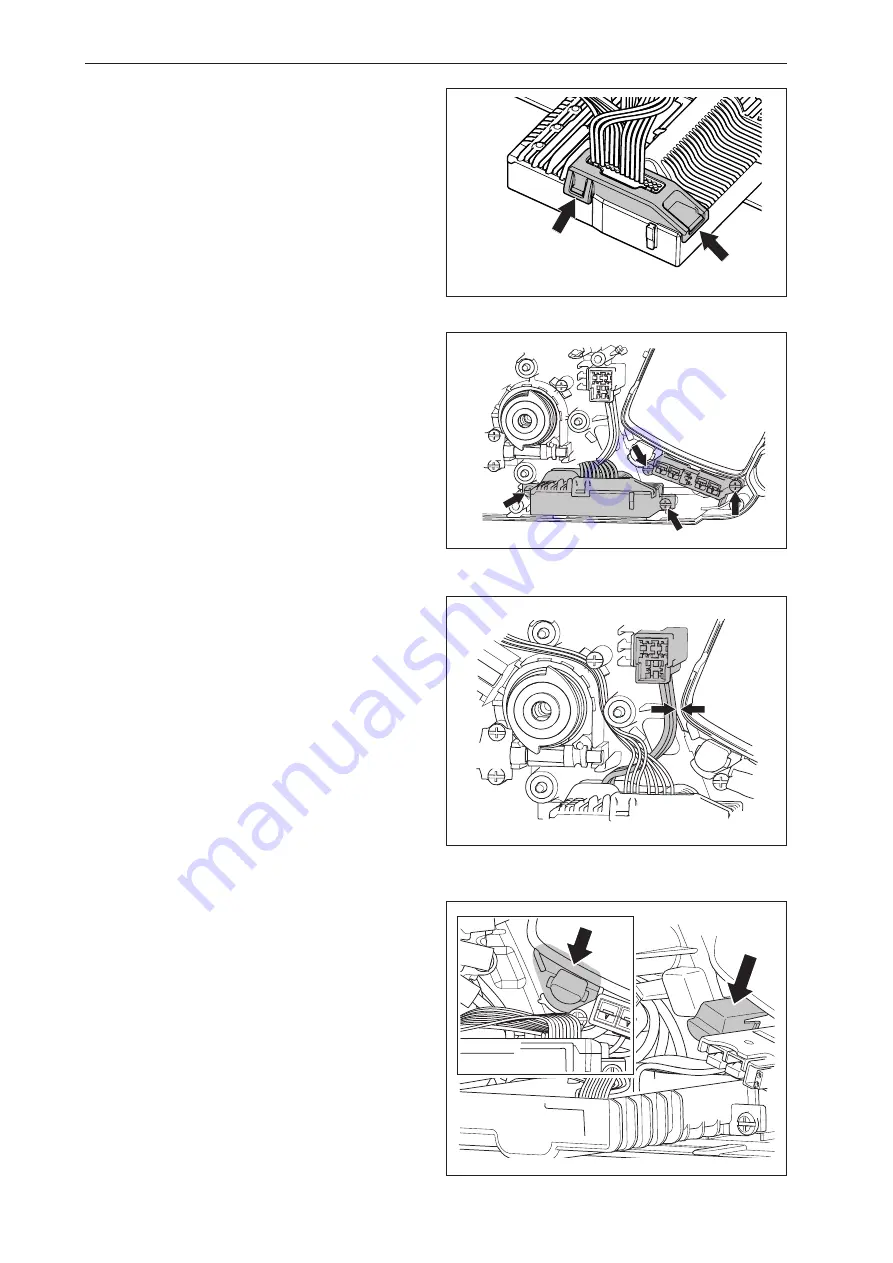
Attach the wiring to the control unit in the or-
der shown i figure 1. Make sure the sealing and
bracket is properly attached.
2
Attach the control unit and the battery terminal to
the crankcase. Tightening torq 1Nm.
See figure 2.
3
Place the motor connector in the holder. Make
sure the cable stays as far to the left as possible to
avoid pinching. See figure 3.
Repair Instructions
9.13 Assembling the control unit
S/N 2015100001 –
1
2
Fig 4
B
A
Fig 2
Fig 1
Fig 3
4
Make sure the gray area (A) around the battery
ejector (B) is free from cables.
NOTE! It is essential the area is completely free
from cables so that they are not pinched when
the chain saw is assembled or when the battery
is fitted or removed.
See figure 4.
5
Assemble the chain saw.
Refer to "Basic dismantle/assembly".
Summary of Contents for T536 Li XP
Page 1: ...Workshop Manual English T536 Li XP ...
Page 2: ......
Page 5: ......
Page 55: ......
Page 56: ... 115 53 98 26 2015W36 ...


