background image

English/French

115 93 95-32 Rev. 2

Operator’s Manual

Manuel de L’Opérateur

TR314C 

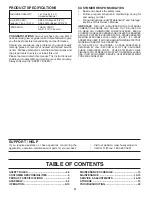
Gasoline containing up to 10% ethanol (E10) is accept-

able for use in this machine.  The use of any gasoline ex-

ceeding 10% ethanol (E10) will void the product warranty.
Vous pouvez utiliser de l’essence contenant jusqu’à 

10 % d’éthanol (E10) avec cet appareil.  L’utilisation 

d’essence contenant plus de 10 % d’éthanol annulera 

la garantie du produit.

Please read the operator's manual carefully and make sure 

you understand the instructions before using the machine.

Lisez très attentivement et soyez certain de comprende 

ces instructions avant d’utiliser cette machine.

Summary of Contents for TR314C

Page 1: ...productwarranty Vous pouvez utiliser de l essence contenant jusqu à 10 d éthanol E10 avec cet appareil L utilisation d essence contenant plus de 10 d éthanol annulera la garantie du produit Please read the operator s manual carefully and make sure you understand the instructions before using the machine Lisez très attentivement et soyez certain de comprende ces instructions avant d utiliser cette ...

Page 2: ... governor settings or over speed the engine Starttheengineorswitchonthemotorcarefullyaccord ing to instructions and with feet away from the tines SAFETY RULES SAFE OPERATION PRACTICES FOR POWERED WALK BEHIND ROTARY TILLERS AND HAND SUPPORTED CULTIVATORS TRAINING Read understand and follow all instructions on the machine and in the manual s before starting Be thoroughly familiar with the controls a...

Page 3: ...e tiller is to be stored for an extended period If the fuel tank has to be drained do this outdoors Follow the manufacturer s recommendations for safe loading unloading transport and storage of machine IMPORTANT CAUTIONS IMPORTANTS AND NOTES ARE A MEANS OF ATTRACTING ATTENTION TO IMPORTANT OR CRITICAL INFORMATION IN THIS MANUAL IMPORTANT USED TO ALERT YOU THAT THERE IS A POSSIBILITY OF DAMAGING TH...

Page 4: ...ORGRASSCOVEREDLANDUNLESSTHEENGINE S EXHAUST SYSTEM IS EQUIPPED WITH A SPARK ARRESTER MEETING APPLICABLE LOCAL LAWS IF ANY IF A SPARK ARRESTERISUSED ITSHOULDBEMAINTAINEDINEFFECTIVE WORKING ORDER BY THE OPERATOR IN THE STATE OF CALIFORNIA A SPARK ARRESTER IS REQUIRED BY LAW SECTION 4442 OF THE CALIFORNIA PUBLIC RESOURCES CODE OTHER STATES MAY HAVE SIMILAR LAWS FEDERAL LAWS APPLY ON FEDERAL LANDS SEE...

Page 5: ... been assembled at the factory with exception of those parts left unassembled for shipping purposes To ensure safe and proper operation of your tiller all parts and hardware you assemble must be tightened securely Use the correct tools as necessary to insure proper tightness FRONT OPERATOR S POSITION LEFT RIGHT Fig 1 1 Hairpin Clip 1 Carriage Bolt 3 8 16 UNC x 1 Grade 5 1 Center Locknut 3 8 16 UNC...

Page 6: ...sertrearcarriagebolt first with bolt head on L H side of tiller and loosely assemble locknut See Fig 5 Insert pivot bolt in front part of plate and tighten Cut down remaining corners of carton and lay panels flat Lower the handle assembly Tighten nut on carriage bolt so handle moves with some resistance This will allow for easier adjustment Place flat washer on threaded end of handle lock lever In...

Page 7: ...ift lever indicator Insert hairpin clip through hole of shift rod to secure CHECK TIRE PRESSURE The tires on your unit were overinflated at the factory for shipping purposes Correct and equal tire pressure is important for best tilling performance Make sure tires are properly inflated to the PSI shown on tires HANDLE HEIGHT Handle height may be adjusted to better suit operator See TO ADJUST HANDLE...

Page 8: ...rting a cold engine DEPTH STAKE Controls depth at which tiller will dig DRIVE CONTROL BAR Used to engage tines LEVELING SHIELD Levels tilled soil RECOIL STARTER HANDLE Used to start the engine SHIFT EMERGENCY DISENGAGE LEVER Used to shift transmission gears and to disengage powered drive and tines SHIFT LEVER INDICATOR Shows which gear the trans mission is in THROTTLE CONTROL Controls engine speed...

Page 9: ... and backward until are able to shift gears DEPTH STAKE See Fig 9 The depth stake can be raised or lowered to allow you more versatile tilling and cultivating or to more easily transport your tiller OPERATION HOW TO USE YOUR TILLER Know how to operate all controls before adding fuel and oil or attempting to start engine STOPPING See Fig 8 TINES AND DRIVE Release drive control bar to stop movement ...

Page 10: ... OR FUEL USE CLEAN OIL AND FUEL AND STORE IN APPROVED CLEAN COVERED CONTAINERS USE CLEAN FILL FUNNELS CHECK ENGINE OIL LEVEL See Fig 11 The engine in your unit has been shipped from the factory already filled with SAE 30 summer weight oil With engine level clean area around oil filler plug and remove plug Engine oil should be to point of overflowing when en gineislevel Forapproximatecapacitysee PR...

Page 11: ...le control to desired running position 9 Allow engine to warm up for a few minutes before engaging tines NOTE If engine does not start see trouble shooting points Fig 12 THROTTLE CONTROL ENGINE SWITCH CHOKE CONTROL FUEL VALVE RECOIL STARTER HANDLE SPARK PLUG CAUTION Fill to within 1 2 inch of top of fuel tank to prevent spills and to allow for fuel expansion If gasoline is accidentally spilled mov...

Page 12: ...furthergrowthofweeds and grass See Fig 14 TILLING HINTS CAUTION Until you are accustomed to handlingyourtiller startactualfielduse with throttle in slow position mid way between FAST and IDLE Tilling is digging into turning over and breaking up packed soil before planting Loose unpacked soil helps root growth Best tilling depth is 4 to 6 10 15 cm A tiller will also clear the soil of unwanted veg e...

Page 13: ... oil level Check tine operation Check for loose fasteners LUBRICATION Keep unit well lubricated See LUBRICATION CHART SAE 30 OR 10W 30 MOTOR OIL REFER TO MAINTENANCE ENGINE SECTION EP 1 GREASE LUBRICATION CHART WHEEL HUB ENGINE IDLER BRACKET LEVELING SHIELD HINGES DEPTH STAKE PIN RH GEAR CASE GREASE FITTING MAINTENANCE SCHEDULE FILL IN DATES AS YOU COMPLETE REGULAR SERVICE Check Engine Oil Level C...

Page 14: ...il must meet API service classification SJ SN Be sure tiller is on level surface Oil will drain more freely when warm Use a funnel to prevent oil spill on tiller and catch oil in a suitable container Remove drain plug Tip tiller forward to drain oil After oil has drained completely replace oil drain plug and tighten securely Remove oil filler plug Be careful not to allow dirt to enter the engine R...

Page 15: ... first Spark plug type and gap setting are shown in PRODUCT SPECIFICATIONS on page 3 of this manual TRANSMISSION Once a season lubricate the right hand gear case grease fitting with 1 oz of EP 1 grease CLEANING Do not clean your tiller when the engine and transmission are hot We do not recommend using pressurized water garden hose etc to clean your unit unless the gasket area around the transmissi...

Page 16: ...NDLE HEIGHT See Fig 19 Select handle height best suited for your tilling conditions Handle height will be different when tiller digs into soil First loosen handle lock lever Handlecanbepositionedatdifferentsettingsbetween HIGH and LOW positions Retighten handle lock lever securely after adjusting CLEVIS PIN HAIRPIN CLIP Fig 20 Fig 19 HANDLE LOW POSITION HANDLE LOCK LEVER HANDLE HIGH POSITION TIRE ...

Page 17: ...uard Reposition wheel and replace clevis pin and hairpin clip LESS TENSION IDLER PULLEY TRANSMISSION PULLEY CABLE CLIP SCREW DRIVE CONTROL CABLE MORE TENSION 5 8 EXTENSION SPRING Fig 22 ENGINE PULLEY GROUND DRIVE BELT ADJUSTMENT See Fig 22 For proper belt tension the extension spring should have about 5 8 inch stretch when drive control bar is in EN GAGED position This tension can be attained as f...

Page 18: ...mission If the gap between the tines exceeds3 1 2 theyshouldbereplacedorstraightened as necessary New tines should be assembled as shown in Fig 26 Sharpened tine edges will rotate rearward from above ENGINE TO ADJUST CARBURETOR The carburetor has been preset at the factory and adjust ment should not be necessary IMPORTANT NEVERTAMPERWITHTHEENGINEGOVERNOR WHICHISFACTORYSETFORPROPERENGINESPEED OVER ...

Page 19: ...by starting the engine and let it run until the fuel lines and carburetor are empty Never use engine or carburetor cleaner products in the fuel tank or permanent damage may occur Use fresh fuel next season NOTE Fuel stablizer is an acceptable alternative in minimizing the formation of fuel gum deposits during storage Add stabilizer to gasoline in fuel tank or storage container Always follow the mi...

Page 20: ...ater in fuel 7 Empty fuel tank and carburetor and refill tank with fresh gasoline 8 Clogged fuel tank 8 Remove fuel tank and clean 9 Spark plug wire loose 9 Connect and tighten spark plug wire 10 Dirty engine air screen 10 Clean engine air screen 11 Dirty clogged muffler 11 Clean replace muffler 12 Poor compression 12 Contact an authorized service center department Engine overheats 1 Low oil level...

Page 21: ...esse du moteur ni emballer le moteur Démarrer la machine ou allumer le moteur en suivant at tentivement les instructions et en tenant les pieds à l écart des dents Ne jamais soulever ou porter la machine pendant que le moteur est en marche FORMATION Lire toutes les instructions des manuels et celles sur la machine avant de démarrer la machine Bien connaître les commandesetl utilisationappropriéede...

Page 22: ...t doit être vidé le faire à l extérieur Suivre les recommandations du fabricant concernant la sécurité du chargement du déchargement du transport et de l entreposage de la machine IMPORTANT ATTENTION IMPORTANT ET REMARQUE SONT UN MOYEN D ATTIRER VOTRE ATTENTION SUR DE L INFORMATION IMPORTANTE DANS CE MANUEL IMPORTANT CE SYMBOLE ATTIRE VOTRE ATTENTION SUR LES RISQUES DE DOMMAGES À L ÉQUIPEMENT REMA...

Page 23: ...ousnepouvezpasrésoudre contactez le centre d entretien autorisé le plus proche Vous y trouverez les techniciens qualifiés et les outils appropriés pour l entretien et la réparation de cette machine Veuillezlireetconservercemanuel Lesinstructionsqu ilcontient vous permettront de monter et d entretenir correctement votre motobineuse Observez toujours les RÈGLES DE SÉCURITÉ SPÉCIFICATIONS DE PRODUIT ...

Page 24: ... toutes les pièces et ferrures que vous assemblez doivent être serrées à fond Utilisez les bons outils LES OUTILS EXIGES POUR LE MONTAGE Un jeu des clés à douille facilitera l assemblage Les dimensions normales des clés sont indiquées 1 Couteau à tout usage 1 Manomètre à pneu 1 Pince 1 Clé de 9 16 POSITION D OPERATEUR Voir la Fig 1 Quand on utilise l expression droite ou gauche l utilisateur est e...

Page 25: ...nt l écrou frein Voir la Fig 5 Insérez le boulon à pivot dans la section antérieure de la plaque et serrez à fond Coupez les coins restant du carton et mettez les plats Baissez l ensemble du guidon Serrez l écrou sur le boulon de chariot afin que la poignée bouge avec résistance Ceci permetra un réglage plus facile Mettez la rondelle plate sur l extrémité filetée du levier de verrou de poignée Ins...

Page 26: ... poignée Séparezlecouvercleencartondudéflecteurdenivellement Tournez la poignée de motobineuse à droite et enlever la motobineuse du carton VERIFIER LA PRESSION DE PNEU Les pneus ont été surgonflés à l usine pour l expédition La pression doit être la même pour les deux pneus pour obtenir les meilleurs résultats de labourage Vérifiez si les pneus sont correctement gonflés à la pression indiquée sur...

Page 27: ...LES DE SÉCURITÉ AVANT D UTILISER VOTRE MOTOBINEUSE Comparez les illustrations à votre motobineuse pour connaître les positions des différentes commandes et les différents réglages Conservez ce manuel Ces symboles peuvent figurer sur votre motobineuse ou dans les publications fournies avec le produit Apprenez et comprenez la signification des symboles Cette motobineuse sont conformes aux normes de ...

Page 28: ...TÉES NE VOUS POSITIONNEZ PAS DIRECTEMENT DERRIÈRE LA MOTOBINEUSE Relâchez la barre de commande d entraînement Déplacezlacommandedesgazàlapositionlente SLOW Déplacez l indicateur de levier de changement de vitesse à la position marche arrière R Tenez la barre de commande d entraînement contre la poi gnée pour commencer le déplacement de motobineuse C EST DIFFICILE DE CHANGER LES VITESSES Engagezsub...

Page 29: ... et baissez la poignée Mettez le levier de changement de vitesse en position labou rage T et déplacez la commande des gaz à la position désirée Pour commencer le labourage tenez la barre de commande d entraînement contre la poignée depth_stake_16 POSITION DE RELÂCHÉE GOUPILLE DE JAUGE DE PROFONDEUR EN POSITION VERROUILLAGE Fig 10 Mettez l indicateur du levier de changement de vitesse à la position...

Page 30: ...nce N en mettez pas trop Essuyez toujours l huile ou l essence renversée Vous ne devez jamais emmagasiner répandre ou utiliser de l essence près d une flamme nue IMPORTANT POUR ASSURER UN BON DÉMARRAGE PAR TEMPS FROID SOUS LES 32 F 0 C VOUS DEVEZ UTILISER DE L ESSENCE FRAÎCHE PROPRE ET SPÉCIALE D HIVER ATTENTION L expérience indique que les combustibles mélangés avec l alcool appelés gasohol ou ut...

Page 31: ...saillementcassent n utilisezquelespièces de rechange autorisée par le fabricant de votre souffleuse à neige O E M BINAGE Le binage est un labourage peu profond entre les sillons pour arracher les mauvaises herbes et pour les empêcher de priver les plantes de l humidité et des aliments De plus l ameublissement delacouchesupérieuredelacroûtecontribueraàlaconservation de l humidité dans le sol La mei...

Page 32: ...fixation LUBRIFICATION Assurez que votre motobineuse est bien lubrifiée Reportez au TABLEAU DE LUBRIFICATION HUILE DE MOTEUR SAE 30 OU 10W30 RÉFÉREZ VOUS À LA SECTION DE ENTRETIEN DE MOTEUR GRAISSE DE EP 1 MOTEUR BRAS DE GALET TENDEUR MOYEU DE ROUE CHARNIÈRES DU DÉFLECTEUR DE NIVELLEMENT GOUPILLE DE LA JAUGE DE PROFONDEUR RACCORD DE GRAISSE DU CÔTÉ DROIT DE LA BOÎTE DE VITESSE CALENDRIER D ENTRETI...

Page 33: ...avant le prochain remplacement de l huile Toutes les huiles doivent rencontrer la classification de service API SF SJ Assurez vous que la motobineuse soit stationnée sur un terrain plat L huile se vidangera plus facilement si elle est chaude Utilisez un entonnoir pour éviter l écoulement d huile sur la motobineuse etrecueillezl huiledansunrécipientapproprié Enlevez le bouchon de vidange Penchez en...

Page 34: ... Un silencieux ou un pare étincelles avariéposedesrisquesd incendie Inspectez lespériodiquement et remplacez les si nécessaire Si votre moteur est muni d un grillage de pare étincelles enlevez le toutes les 50 heures pour le nettoyer et l inspecter Remplacez le s il est avarié BOUGIE D ALLUMAGE La bougie d allumage devrait être changée toutes les 25 heures d utilisation ou au commencement de la sa...

Page 35: ...pneu n est pas uniforme la moto bineuse tirera d une côté Maintenez les pneus libres d essence ou d huile qui peuvent endommager le caoutchouc POUR ENLEVER LA ROUE Voir la Fig 20 Mettez des blocs sous la transmission pour éviter le baseu lement de la motobineuse Enlevez le collier en épingle à cheveux et l axe de chape de la roue Enlevez la roue et le pneu Réparez le pneu et remontez ÉCROU BORGNE ...

Page 36: ...ingle à cheveux MOINS DE TENSION POULIE DU GALET TENDEUR POULIE DE TRANSMISSION VIS DU COLLIER DU CÂBLE CÂBLE DE LA COM MANDE D ENTRAÎ NEMENT PLUS DE TENSION 5 8 RESSORT DE TRACTION Fig 22 POULIE DU MOTEUR RÉGLER LA COURROIE D ENTRAÎNEMENT À TERRE Voir la Fig 22 Pour la tension de courroie correcte le ressort de traction devrait avoir approximativement un allongement de 5 8 po 16 mm lorsquelabarre...

Page 37: ...ESSEMAXIMUMHORS Pour conserver cette machine en bon fonctionnement il convient d inspecter les fraises du point de vue de l acuité de l usure et du gauchissement en particulier les fraises qui se trouvent à côté de la transmission Si l écart entre les fraises dépasse 3 1 2 pouces 9 cm il convient de les remplacer ou de les redresser suivant le cas Les nouvelles fraises devraient être montées comme...

Page 38: ...e carburateur soient vides N utilisezjamaislesproduitsspéciauxpournettoyerlemoteur et le carburateur dans le réservoir d essence L emploi de ces produits pourrait causer des dégâts permanents Utilisez de l essence fraîche à l année suivante REMARQUE Un agent stabilisant dans l essence est une option acceptable pour minimiser la formation des dépôts de gomme de carburant pendant l entreposage Ajout...

Page 39: ... 7 II y a d eau dans l essence 7 Vidangez l essence du réservoir et du carburateur et remplissez le réservoir avec l essence fraîche 8 Réservoir d essence bouché 8 Enlevez le réservoir d essence et nettoyez le 9 Fil de bougie d allumage est débranché 9 Branchez et serrez le fil de bougie d allumage 10 Tamis d air encrassé 10 Nettoyez le tamis d air de moteur 11 Silencieux est bouché sale 11 Nettoy...

Page 40: ...11 29 17 SR Printed in U S A ...

Reviews: