22
Instruction book/Manual de instrucciones 315, 325, 335
1.
Mark the fabric where the button is
to be located.
2.
Turn the stitch selector to zigzag.
3.
Lower the feed teeth
. See
page 17.
4.
Snap off the presser foot.
5.
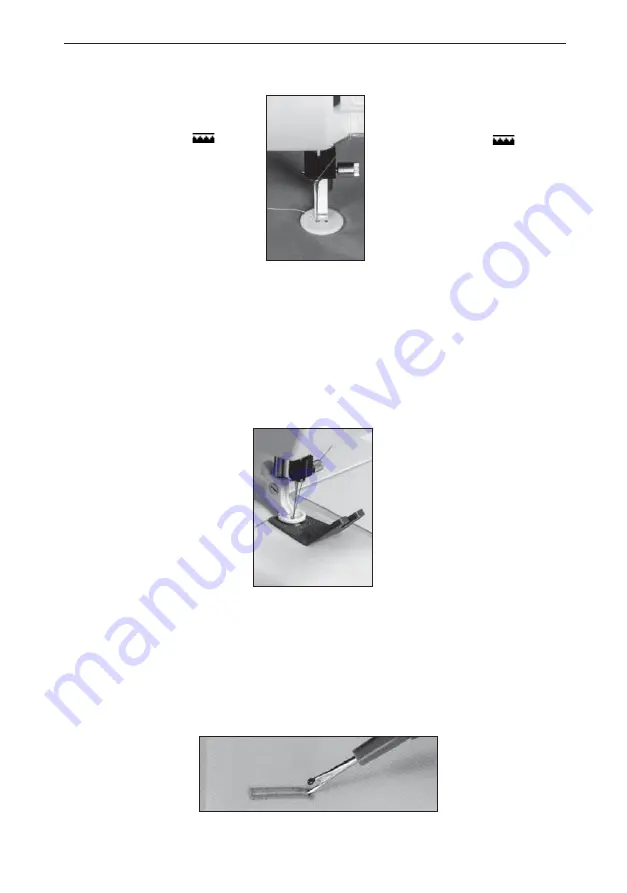
Place the material under the press-
ser foot ankle.
6.
Place the button on marking and
lower the pres ser bar so that the
presser foot ankle is between the
holes of the button (see picture).
7.
Hold the thread ends to one side.
Turn the handwheel and check to be sure
that the needle goes into the holes of the
button.
8.
Sew 5-6 stitches. Set the stitch width dial
to 0 and lock the threads with a few stit-
ches.
Use the clearance plate for this
purpose. Use the thin end when
sewing buttons on light fabrics, the
thick end for heavier fabrics.
Push in the plate between the
button and the fabric. Lower the
presser bar and sew on the button.
Pull the threads between the button
and the fabric. Wind the threads a
few times around the shank and tie
the ends.
Sewing buttons
1.
Hacer una marca en el tejido
para la posición del botón.
2.
Girar en zigzag.
3.
Bajar el transporte
, ver pag.
17.
4.
Sacar el prensatelas.
5.
Poner el tejido en la máquina.
6.
Colocar el botón en la tela y
bajar la barra prensatelas, de
manera que el cuerpo del
prensatelas esté perfectamente
centrado entre los agujeros del
botón (ver fi gura).
7.
Poner los extremos de los hilos hacia un
lado. Girar el volante manual y asegurarse
de que la aguja coincida con los agujeros
del botón.
8.
Coser 5-6 puntadas. Gira el regulador
de amplitud de puntada al 0 y haga una
puntadas de remate.
Costura de botones
A menudo se necesita coser un bo-
tón con ”cuello”. Para ello, se emp-
lea el suplemento para botones. La
parte delgada para tela mediana y
la parte más gruesa, para géneros
pesados.
Colocar el suplemento entre el bo-
tón y el género y coser el botón.
Retirar el suplemento, meter los
hilos entre el botón y el género,
dándoles unas cuantas vueltas
alrededor del ”cuello” .
Buttonhole knife
The knife is used to cut
buttonholes. It is also
useful for removing stit-
ches sewn in error.
Abridor de ojales
El abridor de ojales se
utiliza para abrir los
ojales. Sirve también
para abrir costuras
erróneamente cosidas.
Summary of Contents for VIKING Daisy 315
Page 1: ...K E E P I N G T H E W O R L D S E W I N G User s Guide Manual de instrucciones 315 325 335 ...
Page 37: ......
Page 38: ......
Page 39: ......


