background image

Summary of Contents for VIKING Viva

Page 1: ...C D D ...
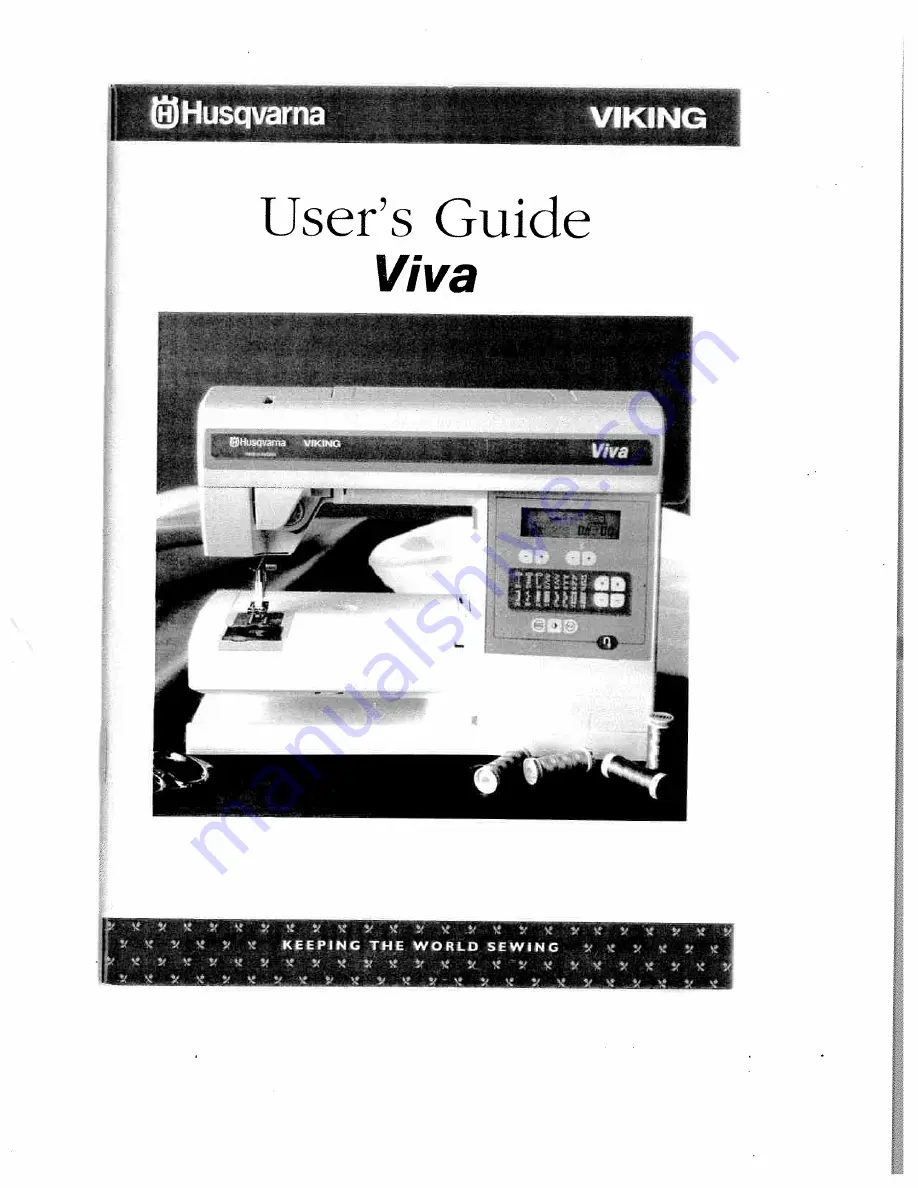
Page 2: ...ci ci serx ice centei foi e irnin mtion repair electrical or mechanical adjustment Never operate the sewing machine with any air openings blocked Keep ventilation openings of the sewing machine rod foot cont ollei flee horn the iccurnul Ition of lint dust and loose cloth Keep flngei iw iy horn ill mo ing p irIs Speci il C lie is i equn ccl u ound the sew wig machine needle Always use the proper ne...

Page 3: ...Threading the upper tlire id hlee steP zigzag Mending Threading for twin needle and darning Sewing terry cloth 23 Bobbin winding with the Appliqué machine threaded B bbin I ain ing stitch winéing vertical spot iI Flatlock Placing the lx hl in Blind hem in the mar hinc Loss ering the Bogmg stitch Iced teeth C Seam and overcast Decoratis e Thread tension Correct and stitches 29 incorrect thread tens...

Page 4: ...resser foot ankle Needle clamp screw Presser foot lifter 17 Thread guide for bobbin v inding 18 Spool pin Spool holders I 9 Recess for additional spool pin 20 Thread cutter for bobbin inding 21 Bobbin spindle Bobbin stop 22 Handwheel 23 Infodisplav 24 Function selector buttons 25 Stitch panel 26 Buttons for Stitch election 27 Main power switch Connection to power supply II 27 5 6 7 8 9 I0 Ii 12 13...

Page 5: ...wing Packing away after sewing I nplug the cords horn the wall socket and the machine 2 ind the c rds anon nd vc cir hand and place the bc t control cord in the k ot control storage space and the main cord in the pt cket of the sc lb cc o er There is also space provided k r the instruction 1 00k 3 Check to ensure that all accessories are in the accessory box Slick it onto the machine 1 eh mci the ...

Page 6: ...about tile power supply V and the frequenc liz Check the pover supply setting in the machine to ensure that this agrees with the main supply before you connect the IThichille I Connect tile foot control cord to the first si ccket on tIle h ttolll right side of the machi te 2 Connect tile main cord to tile back socket on the bottom right side of the machine 3 Xihen you press the power switch both t...

Page 7: ...ot hi i ono the rn u hmne to pios mdc m I mtei flit ssomk sut oe 2 Slide the mcressot lx i to div left ss lien On 55 msh to memos e II oid use the bee arm 3 To facilitate sev ing to rnser sleeve hems use the lice arm Ihe lice urn Iso illoss s coo to d in cii ks darning toot is an aeeessorv 4 lb epl icc the mci m ssoi ho s slide it to ht intO lie machine 4cm extension t il 1 is ilso is nImble is an...

Page 8: ...ed in I r nt ol t I te thread Slide the correct ve 5i mol hi ilder in place so the flat side is pressed hrnilv against the spool o space bets ceo spoc ml holder and sPool I Ic1m e mrecu SJ im I I There is also a separate spool pin cI to be attached onto the machine The fingers on the extra sPool irt fit into the two holes to the riilit m it the fixed spool pin Push downward to snap place lIce lai ...

Page 9: ...akes it cas to see the eve ol the needle 7 Place thread rtndcr the presser loot and into tile thread knihe where it is rut Threading for Twin Needle I Insert a twin needle See page Ii Changing the secdle 2 Use a second thread spool or w md a hohhin with tile thread von ate going to use as the second upper thread 3 LEFT NEEDLE Thread tite machine and ci teck to ensrt re t It at t I te thread lies h...

Page 10: ...e bobbin winding is finished remove the bobbin cut off the thread and bring the bobbin spindle op Note We do not recommend winding specialty threads such as clear nylon or other stretchy threads through the needle Instead see Bobbin winding vertical spool pin Bobbin Winding Vertical Spool Pin I Place an empty bobbin with the mark outwards on the bobbin spindle and bring it down 2 Place the large s...

Page 11: ... it clicks into place 4 Continue th reading an u nd b and the right f and then left inn i the thread cutter e Replace the cover 1 Pull the thread to the left to cut it 2 Lowering the Feed Teeth The feed teeth are lowered when oti turn the dial to the left to Turn the dial to the right to if von wish to aise the feed teeth The feed teeth will eome tip automatically when you begin to sew The feed te...

Page 12: ...ncorrect Thread Tension To understand the c rreet thread tension sew a e sample stitches at different settings I l3egin with a tension that is too loose i e set at 1 The lower thread will lie straight and the upper thread will be cli iwn clown on thc undcisidc 2 If you set the tension at the highest number the opposite will occur and the seam may pucker 3 The correct thread tension is provided whe...

Page 13: ... the spring and the presser Piot ankle Press I ac k until the Ps t snaps intl I place Presser Foot Pressure The presser foot pressure is adjusted with the dial on the front of the machine Normal setting is t The higher the number the nore piessctre on the fabric Knit and Soft fabrics should he sewn at low pressure Presser Foot Lever l he presser foot is raised and low erecl ss ith the presser foot...

Page 14: ...length hv pressing either the or C ltutt in Certain stitches have a limited stitch length Stitch width Xhen you select a stitch the machine automatically sets the hest stitch width which is display ccl with numhers on the lnlodisplay You can change the stitch s iclth 1w pressing the or C I u lion TI te width can he adjusted hetween and 6 mm fl 2 4 4 6 6 8 11 DoC CDC k Ilfl 1111 I STOP _ j w Sn Sn ...

Page 15: ...the flu tt ru nh ri i it iota ge side to sidle Y tu can a iso inirri ii the xx iclth xx hen von xx ish to to change the needle posit ion ft om left to right TI ie symbol will he chisplar ccl FIX by usitig the FIX hittton volt can tie of a t tel t at tie begitining and i r at tit e cud the set ul stl flashing ito the displas indicates t I tat FIX is selected Stitch selection buttons oit select a st...

Page 16: ...nd ni ro ir image For seams which are subject to considerable strain i e to reinforce and topstitch swear ai id xx orking ck ithes 2 needle p sitk ins r sea ins in trir C t and stretch fabrics 03 Zigzag see page 22 Presser foot A For lace edging and sewing on braids 04 Three step zigzag see page 2 Presser foot j 13 OS Overcast stitch see page 29 Presser foot I 06 Seam and overlock see page 29 Pres...

Page 17: ...stitch for applicfu6s rounded edge sewing on see page 2 laces and bands Presser foot B I 2 Decorative edging For decorative edges Sew 15 mm from the see page 2 edge and trim close to the stitching Presser foot B I 3 Decorative stitch For decorative stitching see page 29 Presser foot B 14 Bartack Buttonhole Suitable in medium and heavy fabrics see page 16 Use stabilizer under light fabrics Presser ...

Page 18: ... presser too t against the needle ljich mark on the foot corresponds to the button Sew until the first buttonhole column reaches this mark For better visibility your Husqvarna Viking sews buttonholes away from you 4 Place the material under the presser toot and begin at the hotto om ii the huttonhole V V V 5 Sess thy lob column of thy buttonholo to thc i cquu cd Ic no th usinçthc ni ii kim s 6 1 o...

Page 19: ... I Stitr h the huttonh le as nest rihed Always stitd h a sample buttonhole on ser ips of the t rment hi I inc If neenied d u si ii ie stitch setting F se the stitch width and length 3 hitittons On heavy fabric Increase the stitn h length to I Cutting Buttonholes Cut htlttonh jie open ssitit the seam ripper Place a straight pin acr Os the end v uI are cutting tons aid to 15 mIni rutting u o far ...

Page 20: ...needle a Iso g ies in to the rig it hole 9 Sess as mane slits hes as on consider necessa rv I OTouch STOP the machine will then tie off in one 01 the holes and stop I I N love it the nest pa ir d h tIes t r the next hutton If von have a h Litti in with a cIte rent hi tIe spacing von can adjust this by presssing one of the stitch width huttons or Button with a thread shank f se the thin end of the ...

Page 21: ...dth is left need Ic p slt ii in w id i I i in nor imaged is right needle In return to center posit h in use tIme st i c h sv idt Im hutton and step hack 0 Adjust the width heiw een 0 h for additional positions k edge stitch ou sli Ri Id take aclva n age of the possihilits to set the needle to the left or the tight position lb sew ahoot 2 mm from tIme edge snap on presser foot A when sewing light f...

Page 22: ...ill t lie I asted scant 3 Place the zipper under the P lcled seam a I loss a nec 55 it h the teet Ii as near to t lie fold as ix issilile and stitch zipper to Lii inc close to Pld Begin sewing at tile hott irn of the zipper Before reac Ping the zipper pull lift the presser loot and slide the zipper puii clown past the zipper foot Loss er the foot and sew to the top of the 7ipper 4 Snap on the zipp...

Page 23: ...s I 4 t 1 2 Pull both bobbin threads from the t same direction and distribute the tAD gathering esenly then half the distance Is gathered wind the threads around a pin Then gather the other half from the other direction l trthute the gathering esenly 3 JoIn the pieces with straight stitch the gathered material facing up Set betneen the straight gathering rots Hold the gathering tith your fingers o...

Page 24: ...1 se the reverse and for every row of stitriting guide the fahri slightly to the side if the fahric is cry s urn a piece of lahric or lining may he attached to the reverse side of the material as rein U rceme nt Sewing Terry Cloth lerr cloth isa rather k osely woven faliric in which seams easil hreak Ses the garment together with straight stitch Trim the seams and press the seam alIo ance flat and...

Page 25: ...paper Liver from the fusible ss eb Fuse the appliqué n the background matena I Flare stabilizer tinder backgo oind fabric 4 Satin stitch irni stitch width 2 0 around the edges Sew all design Ime using the same satin stitches ii I P I Appliq ué I l raw a mirror image of your design on the paper side of the fusible web F V lJ U L 24 ...

Page 26: ...cover you r tear or w tm 5Ot 2 Touch the reverse button and the maclone continues sewing the remaining stitcltesat the same length and fastens the thread 3 Touch STOP Move the fabric so that the needle is right o er the last stitch Repeat as many times as you need to cover the hole If you wish to sew another stitch and then return to your stitch you only select this stitch and touch STOP The repea...

Page 27: ...sewing the flatluc k trom the right side Trim excess Item to stitc hini lrom the wrong side To se an us erla pped sea us lap one piece o hihric over the othe r pieve and sew flatloc k slur h over the fabric edge on the right side Trim from the wrong side or sess anot her scans from tlte right side 7 z7 d t S I Nar row belt s and ban ds Fold the Lil Sri c is tls rds a sd sew in the center Trim exce...

Page 28: ...nder the right side of the presser foot Practice rising a scrap of material and compare with the illustrations I If the stitch does not catch the fAded edge increase the stitch width 2 If the stitch catd hes too much of the fold decrease the stitch width 3 F r an invisible hem the needle catches a single thread of the folded edge In Er L 27 ...

Page 29: ...ng the elastic threads Lace edging Select the bridging stud hi to sew two pieces i of fabric or trim with edges butted together se this technique to oin stops of lacc and 7 or ru bon and to St ich them to a finish ted fabric edge i lie bridging stitch is picferrecl for this type of oin tog P a flat neat result CAY Fabric Short piece of inserin m lace and linen fabric with one edge turned under or ...

Page 30: ... used to o erlock and overcast many different fabrics xvith the exception if heav firm fabrics The pin on the presser foot should Iolh w the edge of the fabric and will prevent the fabric from puckering Stitch svidth 5 6 mm When using stitch width 5 or losker use presser foot A 5UhJ Decorative stitches lhese stitches are mainly used as decorative stitches Examples Stitch 1 3 sewn with am gives a d...

Page 31: ...his case use the clearance plate to balance the height of the hem as you sew Place the clearance plate behind the b ot as yc in apis acl i the hem and in fn nt of the foot as you sew o er the hem thk kness Remo e the clearance plate before sewing in to it Sewing on Belt Loops 1 se presser foot 13 and los er the feed teeth Fold in about 1 cm on the short ends Place the belt loop on the garment and ...

Page 32: ...h found in the accessory box with its deep hole around the bull Do not turn the bulb just pull it do n to remove the bulb 2 X hen inserting place the rubber sheath with its shallow hole around the new bulb insert the bulb by pushing it up Lse light bulb designed as indicated on the front of the machine IainIeuincc ...

Page 33: ...h plate Turn wa rd v u to p p of tI Ic stitch plate Clean the feed teeth vith the hrudt Cleaning Under the Bobbin Area X hen lint builds up the arei under the l llil a se must he cleaned Remo e the bobbin ease holder I co ering the front part of the I l l i n case 2 Remoe the hohhin case by lifting it up 2 Clean v ith the brush Replace the hohhin case and the hohhin case holder Replacing the Stitc...

Page 34: ...ate may he chipped and has e sharp edges X e t ecommench that you replace it The Bobbin Thread Breaks I he bobbin thread may be mci rrect lv threaded See page 9 11w stitch plate hole is damaged See Upper thread breaks I 1 Oilhb SIiorlifl L Irregular Thread Tension This may he due to po r ciualitv t hreacl hen sewing with cotton thread increase the thread tension The Machine Does Not Feed the Fabri...

Page 35: ...he machine i l einu checked II is a great help if it an he test sewn under conditions that are similar to when you used it Remember to take a sewing sanipie along with you pieferahl the t a brie i nd the thread you intend to use A sewing sample will often give much hettei intornation than w oids Non original Parts and Accessories The warranty does not cover any defect or dlamage caused 1w use of m...

Page 36: ...Spool Holders 6 Spool pin 6 Fhistic shirring 2 Stitch Length 12 l xtr i spool pin 0 Stitch plate 32 Stitch selec lion 15 1 Feed teeth lowering I Stitch table I i I FIX 13 Stitch ichtli 12 Flatlock 20 Stop 13 18 2 Free arm 30 Straight Stifth 1 i 19 Stretch stitch 1 i 22 Gathering 21 Os erviess 2 11cm 20 2 30 lension Flemstitch IT 29 l errv cloth lOl stitc lung ln klisplas 12 13 Threading bobbin Thr...

Page 37: ...n is based upon Certificate or Technical Construction File performed by SEMKO The complete archi e file is drawn up and maintained by SM Group AB SE 561 8 t l luskvarna Sweden We reserve the right to change the machine equipment and the assortment of accessories without prior notice or make modifi cations to the performance or design Such modifications however will always be to the benefit of the ...

Page 38: ...4 I I L t rn Ic fl1 C VSM Group AB SE 56 84 Huskvarna Sweden w w w h u sq var n a vi k n g corn ...

Reviews: