power tool. The machine stop buttons also disconnects
the power tool from the power supply.
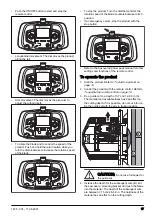
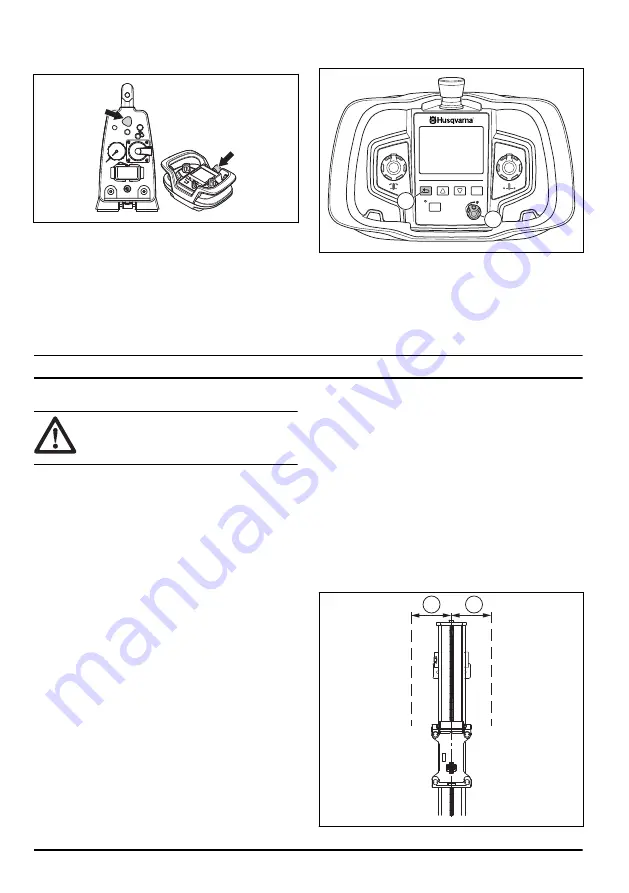
To do a check of the machine stop buttons
1. Turn the machine stop button on the power pack
clockwise to make sure that is released.
2. Push the ON/OFF button on the remote control.
3. Push and hold the "RETURN" button (A) and turn
the dial (B) clockwise to rotate the blade or wire.
OK
ON/OFF
0
A
B
4. Push the machine stop button on the power pack to
stop the blade or wire.
5. Make sure that the power indicator on the product
goes out.
6. Do the same procedure to do a check of the
machine stop button on the remote control.
Assembly
Introduction
WARNING:
Read and understand the
safety chapter before you assemble the
product.
To do a check of the work area before
operation
1. Examine the work area to make sure that safe
operation is possible. Look out for persons, objects
and situations that can prevent safe operation of the
product. Keep a safety distance of minimum 4 m.
2. Make sure that there are no electric cables, gas or
water pipes in the work area.
3. Make sure that the cut out piece can be removed.
Divide it into smaller sections to make it easier to
remove.
4. Keep the work area clean and bright.
5. Make sure that the work area has electric and water
supply. Make sure that waste water can be removed.
To do a function check before
operation
1. Do a check of the safety devices on the product.
Safety devices on the product on page 7
.
2. Make sure that the blade and the blade guard are
not damaged. Replace the blade or the blade guard
if there are cracks or other damage.
3. Make sure that the product is correctly assembled
and that the wall brackets, rails, blade bolt and lock
wheels are tightened. Make sure that the end stops
are attached on the ends of the rail.
4. The blade guard must always be assembled when
the product is in operation. If the blade guard
touches the ceiling, 1 of the end pieces of the blade
guard can be temporarily disassembled.
5. Move the product to the start position before you
start the motor.
To assemble the wall supports
1. Do a mark of the cut line and do marks of the
expander bolt holes (A) = 165 mm (6.5 in.) from the
cut line.
A
A
8
1675 - 001 - 11.06.2021
Summary of Contents for WS 482 HF
Page 98: ...98 1675 001 11 06 2021 ...
Page 99: ...1675 001 11 06 2021 99 ...


