1-12
I
nstallatIon
P/N 3093114_A
U.S. & Canada 1-800-922-1919 • Mexico 1-800-890-2900 • WWW.HUSSMANN.COM
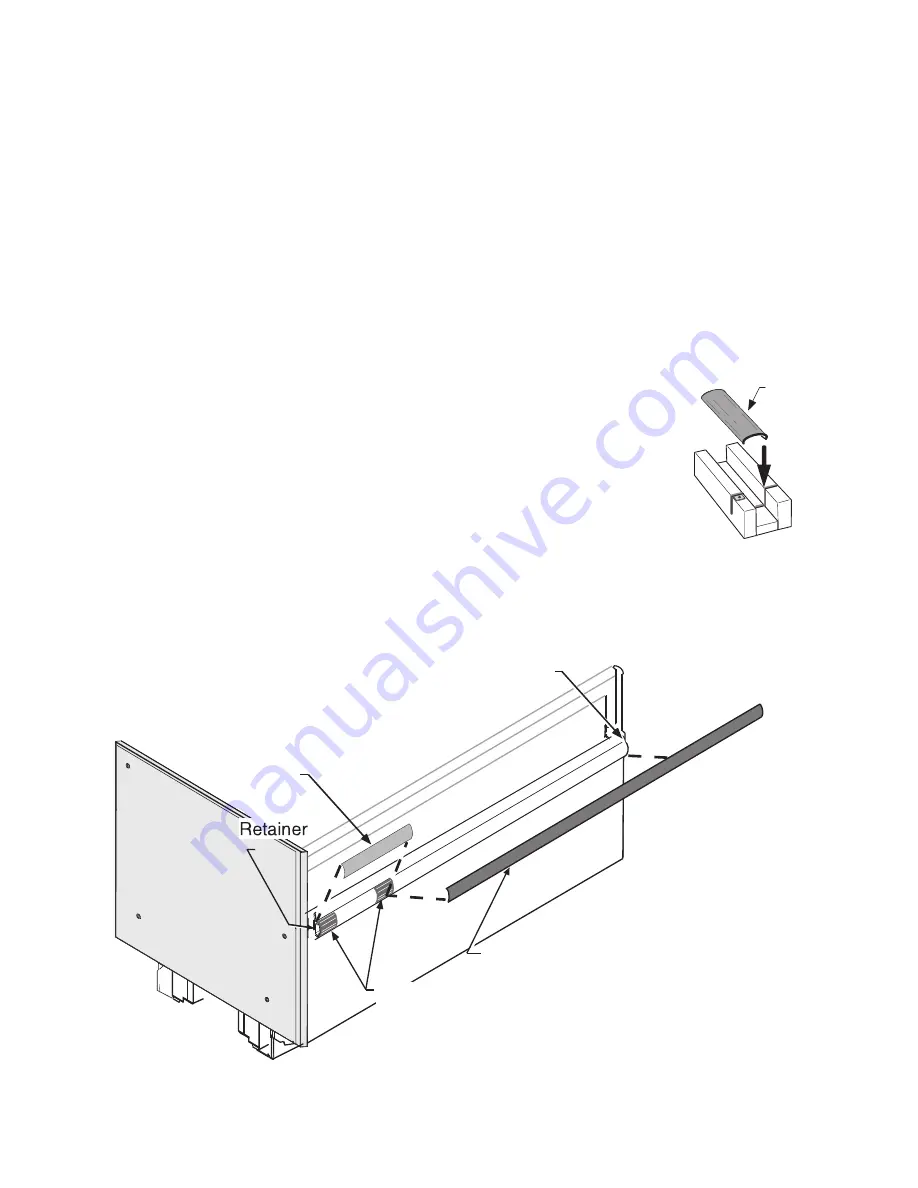
Offsetting Bumper (for End Merchandisers)
1. Locate starter bumper shipped with the
left-end kit.
2. Remove factory installed bumper by pulling
bumper away from bumper retainer. Be careful not
to lose the internal joint trim on the bumper.
3. Starting at the left end of the lineup, install
the bumper starter section first. To install:
a. Position internal joint trims so that
the first is flush to the left-end panel and
the second is centered between the starter
bumper and the full-length bumper as
shown.
b. Install full-length bumpers and internal
trims offset across joints. Make sure that
no gaps exist between sections. Continue
installing the bumpers the length of the
lineup.
4. Once all except the last section of bumper
have been installed, refrigerate the merchan-
diser lineup for at least six (6) hours.
The last
section of bumper should be kept inside a cooler
or refrigerated merchandiser during this time.
This will allow the bumper to contract.
5. Go to the right end of the lineup and tap
the bumper to close any gaps.
6.
Measure and cut last
section of bumper. Use a miter
box and fine-tooth saw to cut
last bumper to length. Install
the last section.
7.
Remove protective film
from bumper once installation
is complete.
Bumper
Miter Box
Merchandiser
Joint
Starter
Bumper
Full Length
Bumper
Internal Joint Trims


