background image

Rev. 0508 

5

Setting and Joining

The sectional construction of these models enable them to 

be joined in line to give the effect of one continuous display. 

A joint trim kit is supplied with each joint.

Leveling

IMPORTANT!  IT  IS  IMPERATIvE  THAT  CASES  BE 

LEvELED FROM FRONT TO BACK AND SIDE TO SIDE 

PRIOR TO JOINING. A LEvEL CASE IS NECESSARY 

TO INSURE PROPER OPERATION, WATER DRAINAGE, 

GLASS ALIGNMENT, AND OPERATION OF THE HINGES 

SUPPORTING  THE  GLASS.  LEvELING  THE  CASE 

CORRECTLY WILL SOLvE MOST HINGE OPERATION 

PROBLEMS.

NOTE:   A. To avoid removing concrete flooring, begin lineup  


leveling from the highest point of the store floor.


B. When wedges are involved in a lineup, set them first.

All  cases  were  leveled  and  joined  prior  to  shipment  to 

insure the closest possible fit when cases are joined in 

the field. When joining, use a carpenters level and shim 

legs accordingly. Case must be raised correctly, under legs 

where support is best, to prevent damage to case.

1.   Check level of floor where cases are to be set. 

Determine the highest point of the floor; cases will 

be set off this point.

2.   Set first case, and adjust legs over the highest part 

of the floor so that case is level. Prevent 


damage-case must be raised under leg or by use 

of x6 or x4 leg brace. Remove side and back leg 

braces after case is set.

3.   Set second case as close as possible to the 

first case, and level case to the first using the 

instructions in step one.

4.   Apply masking tape 1/8” in from end of case on 

inside and outside rear mullion on both cases to be 

joined.

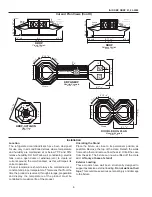
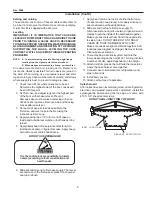
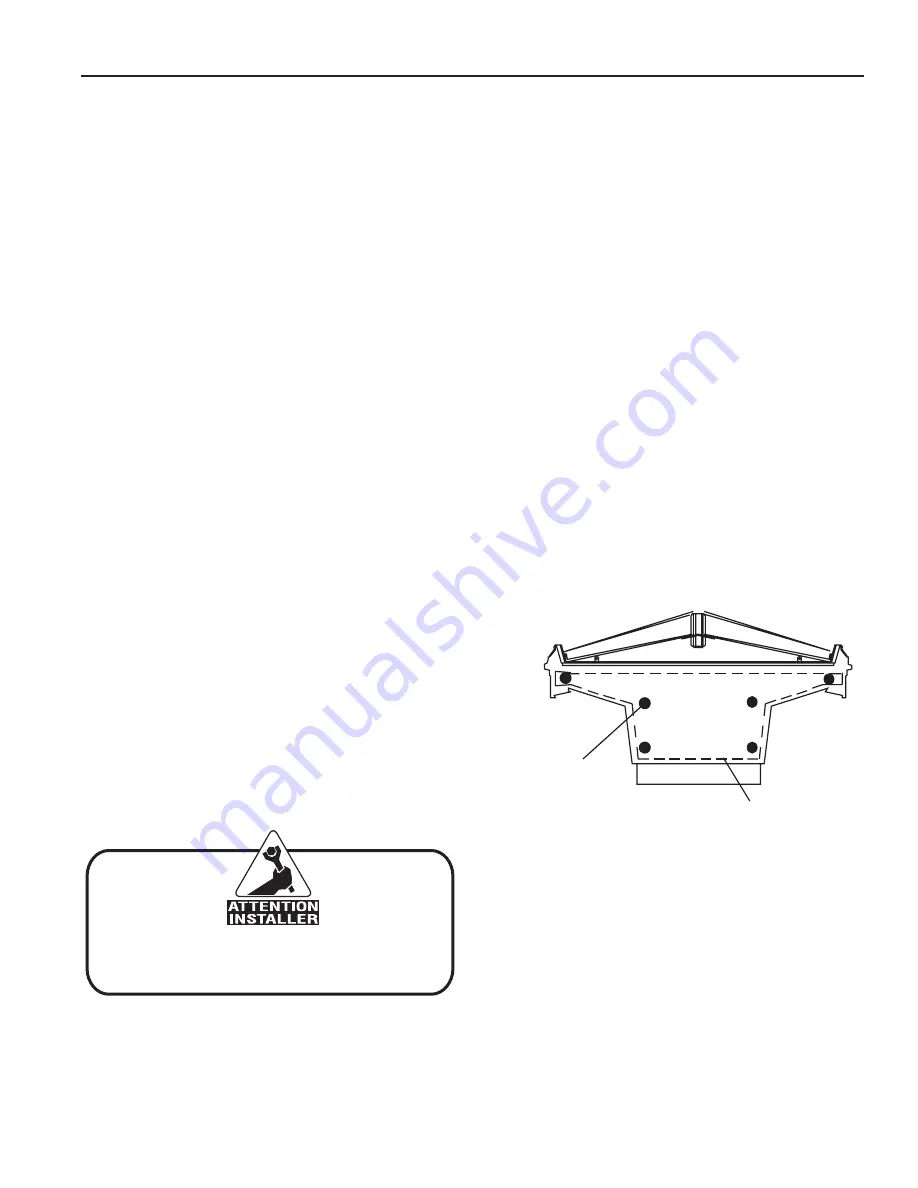
5.   Apply liberal bead of case joint sealant (butyl) to 

(dotted area shown in figure) first case. Apply heavy 

amount to cover entire shaded area.

DO NOT USE PERMAGUM!

It is the contractor’s responsibility to install

case(s) according to local construction and

health codes

6.   Slide second case up to first case snugly. Then level 

second case to the first case so glass front, bumper 

and top are flush.

7.   Apply bead of silicone to side of either half of case 

(if case is built in two pieces). Also apply silicone to 

seam between overhead light tubes.

8.   Slide second half up to first case snugly. To 

compress silicone at joint, use two Jurgenson wood 

clamps to pull the inside of the bulkheads together. 

Make sure case is level from front to back and side 

to side at joint. DO NOT USE BOLTS TO DRAW 

CASES UP TIGHT! DAMAGE MAY OCCUR! 

Make sure cases are tight and bolted together in all 

locations (see diagram next page). Remove clamps. 

Cleanup excess silicone.

9.   There may be an interlock system built into the 

tower, depending on the height of it. Joining involves 

a number of bolts, again dependent on the height.

10. Attach joint trim pieces, that will hide the loose joint 

where the case halves come together.

11. Connect case to field electrical, refrigeration, and 

pipe to floor sink.

1.  Install body covers.

13.  Attach cart bumper, if applicable.

Splash Guard

After cases have been leveled and joined, and refrigeration, 

electrical, and wasted piping work completed, install the 

splashguards. Fasten along the top edge, or center, with 

#10 X 3/3” sheet metal screws.

DO NOT SEAL JOINT TRIM TO FLOOR!

BOLT  LOCATIONS

SEALANT  APPLICATION

Installation (Cont'd)

Summary of Contents for DBP-03

Page 1: ...DBP DBRP 01 03 ISLAND PRODUCE p n IGIP DBP DBRP 01 03 0508 INSTALLATION OPERATION GUIDE CHINO DBP DBRP 01 03 ISLAND PRODUCE Rev 0508 Installation Operation Manual...

Page 2: ...s Information on DBP DBRP 01 03 Island Produce Cases Shipping Damage All equipment should be thoroughly examined for shipping damage before and during unloading This equipment has been carefully inspe...

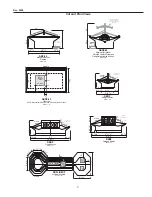
Page 3: ...ain Ref 6 24 16 26 1 8 DBRP 03 Shown with Optional Ref High Center Divider and Refrigerated Lighted Shelves Scale 3 8 30 Optional Ref High Center Divider and Ref Lighted Shelves Optional Base Display...

Page 4: ...ty are maintained at or below 75 F and 55 relative humidity DO NOT allow air conditioning electric fans ovens open doors or windows etc to create air currents around the merchandiser as this will impa...

Page 5: ...and outside rear mullion on both cases to be joined 5 Apply liberal bead of case joint sealant butyl to dotted area shown in figure first case Apply heavy amount to cover entire shaded area DO NOT US...

Page 6: ...means to prevent freezing The water seal should be insulated to prevent condensation Hose Reel If an optional hose reel is ordered it will be installed at the factory The water supply valve is locate...

Page 7: ...rator outlet 2 From a refrigerant pressure temperature chart determine the saturation temperature at the observed suction pressure 3 Measure the temperature of the suction gas at the thermostatic remo...

Page 8: ...in and around the case area free of foreign gasses and fumes or food will rapidly deteriorate 3 Maintain the display merchandisers temperature controls as outlined in the refrigerator section of this...

Page 9: ...orescent Lamps Fluorescent lamps are furnished with a shatterproof protective coating The same type of lamp with protective coating must be used if replaced This lamp has been treated to resist breaka...

Page 10: ...that no outside doors or windows are open allowing moisture to enter store FOR PROMPT SERVICE When contacting the factory be sure to have the Case Model and Serial Number handy This information is on...

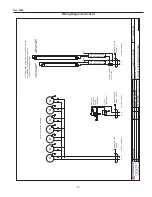
Page 11: ...01 CASES W0500000 CROWN CASE WIRING DIAGRAM 115 VAC 50 60 Hz L1 N BUNDLE COLOR BLACK WHITE T STAT SUCTION SOLENOID VALVE FIXTURE LITHONIA SM132 125 02 1072 FIXTURE LITHONIA SM125 125 02 1073 SWITCH T...

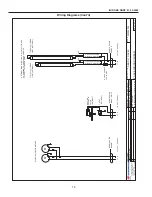
Page 12: ...00001 2 POINT CASE WIRING DIAGRAM 115 VAC 50 60 Hz L1 N BUNDLE COLOR BLACK WHITE T STAT SUCTION SOLENOID VALVE FIXTURE LITHONIA SM132 125 02 1072 FIXTURE LITHONIA SM125 125 02 1073 SWITCH TOGGLE 125 0...

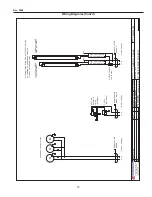
Page 13: ...OINT CASE WIRING DIAGRAM 115 VAC 50 60 Hz L1 N BUNDLE COLOR BLACK WHITE T STAT SUCTION SOLENOID VALVE FIXTURE LITHONIA SM132 125 02 1072 FIXTURE LITHONIA SM125 125 02 1073 SWITCH TOGGLE 125 01 0329 BU...

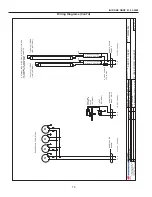
Page 14: ...SES W0500003 8 CASE WIRING DIAGRAM 115 VAC 50 60 Hz L1 N BUNDLE COLOR BLACK WHITE T STAT SUCTION SOLENOID VALVE FIXTURE LITHONIA SM132 125 02 1072 FIXTURE LITHONIA SM125 125 02 1073 SWITCH TOGGLE 125...

Page 15: ...004 10 CASE WIRING DIAGRAM 115 VAC 50 60 Hz L1 N BUNDLE COLOR BLACK WHITE T STAT SUCTION SOLENOID VALVE FIXTURE LITHONIA SM132 125 02 1072 FIXTURE LITHONIA SM125 125 02 1073 SWITCH TOGGLE 125 01 0329...

Page 16: ...S W0500005 12 CASE WIRING DIAGRAM 115 VAC 50 60 Hz L1 N BUNDLE COLOR BLACK WHITE T STAT SUCTION SOLENOID VALVE FIXTURE LITHONIA SM132 125 02 1072 FIXTURE LITHONIA SM125 125 02 1073 SWITCH TOGGLE 125 0...

Page 17: ...6 14 CASE WIRING DIAGRAM 115 VAC 50 60 Hz L1 N BUNDLE COLOR BLACK WHITE T STAT SUCTION SOLENOID VALVE FIXTURE LITHONIA SM132 125 02 1072 FIXTURE LITHONIA SM125 125 02 1073 SWITCH TOGGLE 125 01 0329 BU...

Page 18: ...07 9 OCTAGON CASE WIRING DIAGRAM 115 VAC 50 60 Hz L1 N BUNDLE COLOR BLACK WHITE T STAT SUCTION SOLENOID VALVE FIXTURE LITHONIA SM132 125 02 1072 FIXTURE LITHONIA SM125 125 02 1073 SWITCH TOGGLE 125 01...

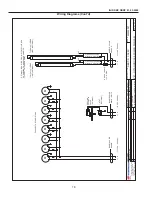
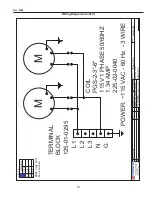
Page 19: ...SSMANN CORPORATION 13770 RAMONA AVENUE CHINO CA 91710 909 590 4910 LIC 644406 1 2 3 1 1 04 08 05 T WIRESCHEMATICS NEW WIRING DBRP 03 8 W0500008 DBRP 03 8 COIL PGS 2 3 6 115V 1 PHASE 50 60HZ 1 34 AMP 2...

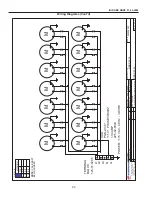
Page 20: ...N CORPORATION 13770 RAMONA AVENUE CHINO CA 91710 909 590 4910 LIC 644406 1 2 3 1 1 04 08 05 T WIRESCHEMATICS NEW WIRING DBRP 03 32 W0500020 DBRP 03 32 COIL PGS 2 3 6 115V 1 PHASE 50 60HZ 1 34 AMP 225...

Page 21: ...HRH 561536 COIL PGS 2 3 6 115V 1 PHASE 50 60HZ 1 34 AMP 225 02 0040 M M TERMINAL BLOCK 125 01 0295 L1 L2 L3 N G DEFROST TIMER PARAGON 8045 20 208 V 60 Hz 125 01 0715 M YELLOW C 2 1 3 R S POWER 208 230...

Page 22: ...HRH COIL PGS 2 3 6 115V 1 PHASE 50 60HZ 1 34 AMP 225 02 0040 M M TERMINAL BLOCK 125 01 0295 L1 L2 L3 N G DEFROST TIMER PARAGON 8045 20 208 V 60 Hz 125 01 0715 M YELLOW C 2 1 3 R S POWER 208 230 VAC 6...

Page 23: ...6B GE FAN 9W 4 125 01 0615A 60A CONDENSING UNIT COPELAND FJAM A150 CFV 020 225 03 7510 RLA 10 9A MCC 15 7A LRA 56 A M C R CONDENSING UNIT SAFETY SWITCH FLOAT SWITCH FISHER EVAPOWAY DM20WW 3D 2000W 240...

Page 24: ...installer should perform a complete start up evaluation prior to the loading of food into the refrigerator which includes such items as a Initial temperature performance Coils should be properly fed...

Page 25: ...product 2 Is the product loaded beyond the Safe Load Line markers 3 Are the return air ducts blocked 4 Are the entering air ducts blocked 5 Is a dumped display causing turbulent air flow and mixing wi...

Page 26: ...temperature recovery Food store refrigerators are not food chillers nor can they reclaim quality lost through previous mishandling d Care must be taken when cross merchandising products to ensure that...

Page 27: ...___________________________ _______________ ___________________________________________________________________________________________________ _______________ ________________________________________...

Reviews: