18
WARNING
ALWAYS DISCONNECT THE ELECTRICAL POWER AT THE MAIN DISCONNECT WHEN SERVICING OR
REPLACING ANY ELECTRICAL COMPONENT OF THIS REFRIGERATOR. THIS INCLUDES, BUT IS NOT
LIMITED TO SUCH ITEMS AS FANS AND THERMOSTATS.
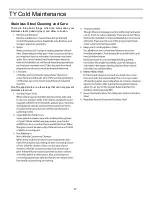
Fan Blade Replacement
The evaporator fan is located directly under the deck pan.
Should the fan blade ever need servicing. ALWAYS REPLACE
THE FAN BLADE WITH THE RAISED EMBOSSING SIDE
OF THE BLADE INSTALLED TOWARD THE MOTOR.
Honeycomb Removal & Cleaning
CAUTION: DO NOT TEAR THE HONEYCOMB
1)
Remove the honeycomb assembly as follows
:
Insert a small Phillips screwdriver behind the rear edge of the
honeycomb on the right hand end and gently pull down. The
bottom of the honeycomb will drop down. Continue down the
length of the case, lifting the honeycomb out.
2)
To clean honeycomb
:
Mix powdered detergent, in warm water. (5 to 7 Tablespoons
per gallon)
Immerse or spot clean the honeycomb. Use care not to
damage the cell structure of the honeycomb.
Rinse thoroughly in clean water. Shake excess water from
the honeycomb and dry. (If heat is used, do not exceed 140
°
F dry heat)
3)
Install honeycomb
by inserting the notched side up
against the defl ector and press upwards inserting the bottom
of the honeycomb into the back ledge. Slide along the
honeycomb, pressing the front edge upward into the ledge.
Be careful no to damage the cells or cut yourself on the edges
of the honeycomb.
Ballast/LED Driver Replacement
The power supply for the LED fi xtures is located under the
case in a dedicated electrical box.
For access to the ballast:
-
-
-
Service Tips
Stocking
Improper temperature and lighting will cause serious
product loss. Discoloration, dehydration and spoilage can be
controlled with proper use of the equipment and handling of
product. Product temperature should always be maintained
at a constant and proper temperature. This means that from
the time the product is received, through storage, preparation
and display, the temperature of the product must be controlled
to maximize life of the product. Hussmann cases were not
designed to “heat up” or “cool down” product - but rather to
maintain an item’s proper temperature for maximum shelf
life. To achieve the protection required always:
1. Minimize processing time to avoid damaging tem-
perature rise to the product. Product should be at
proper temperature.
2. Keep the air in and around the case area free
of foreign gasses and fumes or food will rapidly
deteriorate.
3. Maintain the display merchandisers temperature
controls as outlined in the refrigerator section of
this manual.
4. Do not place any product into these refrigerators
until all controls have been adjusted and they are
operating at the proper temperature. Allow mer-
chandiser to operate a minimum of three (3) hours
before stocking with any product.
5. When stocking, never allow the product to extend
beyond the recommended load limit. Air dis-
charge and return air fl ue must be unobstructed at
all times to provide proper refrigeration.
6. Avoid the use of supplemental fl ood or spot light-
ing. Display light intensity has been designed for
maximum visibility and product life at the factory.
Summary of Contents for ENTYCE TY3
Page 3: ...3 Warning...
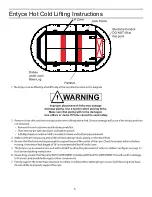
Page 5: ...5 Entyce Hot Cold Lifting Instructions...
Page 6: ...6 Installation J Bar lift points typical for Cold and Hot section of case...
Page 8: ...8 TY3 4X4E S Cold Section...
Page 12: ...12 15A Wiring Diagram...
Page 13: ......
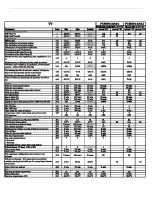
Page 14: ...14 Controller Programmed Parameters...
Page 15: ...15...
Page 19: ...19...
Page 20: ...20...
Page 21: ...21...
Page 22: ...22...
Page 23: ...23...
Page 24: ...24...
Page 25: ...25...
Page 26: ...26...
Page 27: ...27...
Page 28: ...28...
Page 29: ...29...
Page 30: ...30...
Page 31: ...31...
Page 32: ...32...
Page 33: ...33...
Page 34: ...34...
Page 35: ...35...
Page 36: ...36...
Page 37: ...37...
Page 38: ...38...
Page 39: ...39...
Page 40: ...40...
Page 41: ...41...
Page 42: ...42...
Page 43: ...43 TY 4X5E H Hot Section...
Page 52: ......


