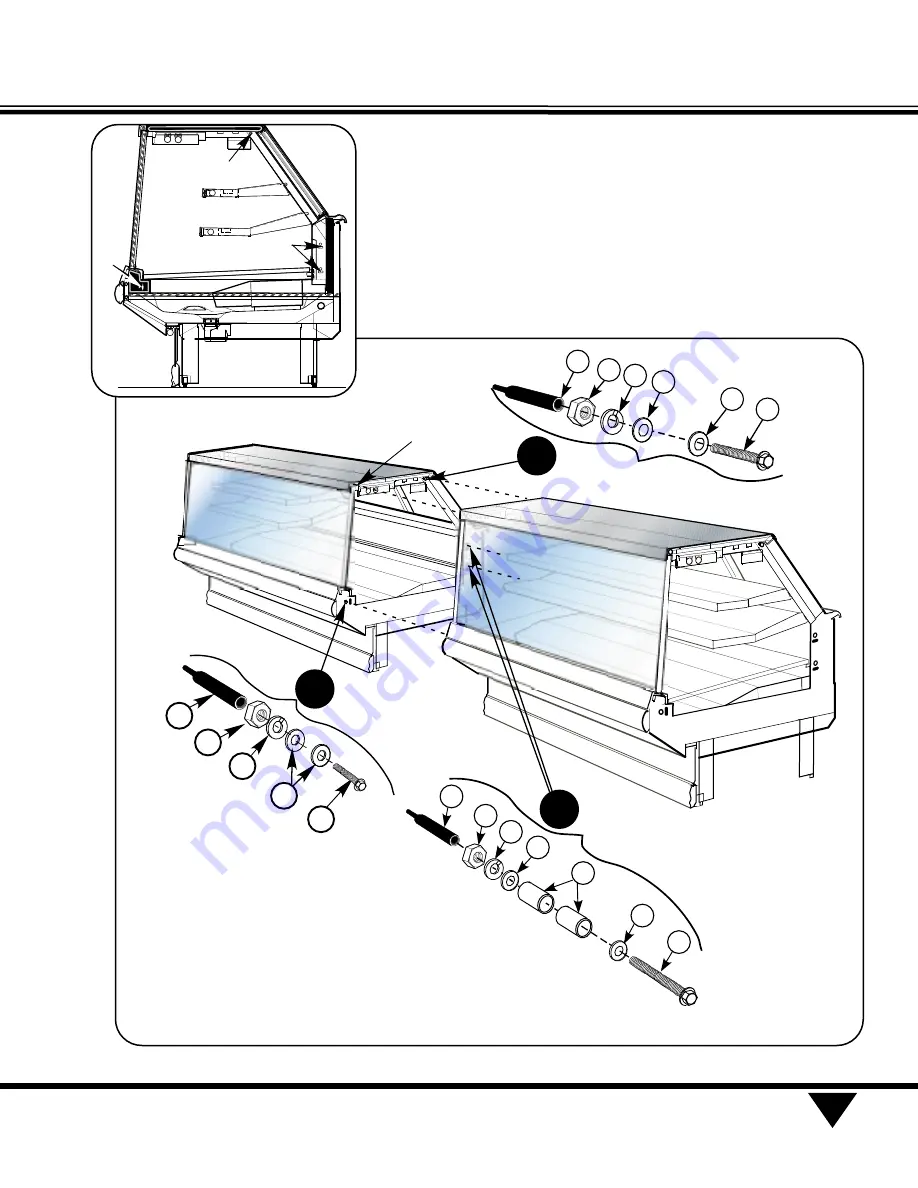
11
Follow the sequence
correctly when bolting the
cases together.
See Figure
7, Detail K.
12
Fasten the fronts together
using
Cap Screws (Item – 9),
Flat Washers (Item – 10),
Lock Washers (Item – 11),
Hex Nut (Item – 12) and
Cap Plug (Item – 22).
See Figure 7, Sequence A.
HUSSMANN CORPORATION • BRIDGETON, MO 63044-2483 (Printed in U.S.A.)
P/N 0430502
Vertical Glass Service Merchandisers Joining Instruction
Figure 7. Overview of Fastener Locations
18
19
19
20 19
21
22
Cap
Plug
C
9
10
11
12
22
A
Cap
Plug
17
15
13
15
14
22
B
Cap
Plug
Spacer
16
Top Alignment
Pin
7
C.
A.
B.
Note:
Make sure that no more than
(2) threads are exposed when the
cases are bolted together. If this does
occur, the bolt should be shortened,
replaced with a shorter bolt or capped
off according to NSF specifications.
DETAIL K.


![FRIGOGLASS ICM2000 [R290] User Manual preview](http://thumbs.mh-extra.com/thumbs/frigoglass/icm2000-r290/icm2000-r290_user-manual_2338092-01.webp)

