6-10
s
eRVIce
P/N 0467434_P
U.S. & Canada 1-800-922-1919 • Mexico 1-800-890-2900 • WWW.HUSSMANN.COM
CENTER FLUE SUPERSTRUCTURE
ANTI-SWEAT HEATER REPLACEMENT
MODEL: FW-S
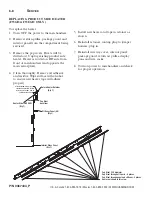
To replace the heater:
1. Turn off power to the merchandiser.
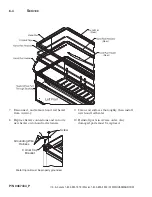
2. Remove the shelves from the section of
the superstructure that requires heater
replacement.
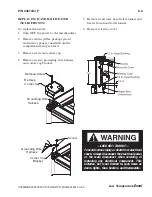
3. Unscrew, and remove the night curtain
covers.
4. Remove the night curtains from the spring
clip using a flat head scerwdriver.
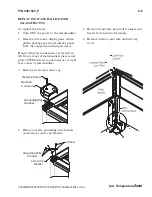
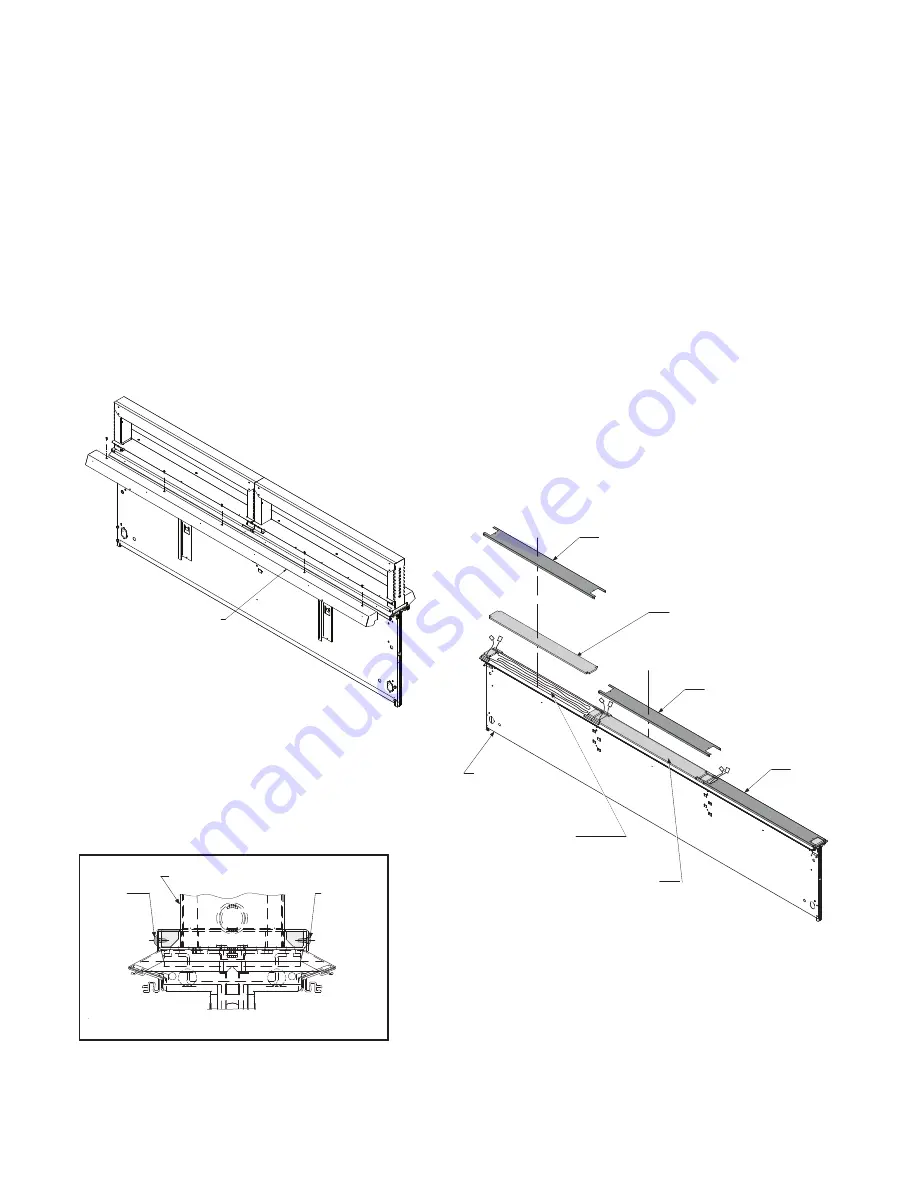
5. Unscrew and raise the center flue heater
cover, and remove the center flue
insulation.
6. Unplug the heater from the anti-sweat
heater supply harness, and remove it.
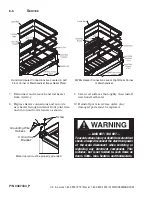
7. Apply the new heater to the center flue
using the adhesive backing.
8. Connect the heater leads to the anti-sweat
heater supply harness, and reverse the steps
to install the insulation, heater cover, and
night curtains.
NIGHT CURTAIN COVER
Field-Installed, Lit or Unlit, 48-In. or 58-In.
P/N 0484796_D
Superstructure for
EXCEL
Wide Island
10. Install
Center Insulation
and
Center
Flue Heater Covers
as shown in
Upright
Figure 19.
Screw
Screw
#8 x
3
/
8
#8 x
3
/
8
Note:
For clarity, the superstructure
(each side)
(each side)
assembly is not shown.
14
14
Fasten Center Flue Heater Covers
with
3
/
8
-inch #8-18
Truss Head
Sheetmetal Screws
as shown in Detail.
Install screws at each end of case
Figure 19 Detail — Screw Location
in Step 12 with End Trim.
Center Flue Heater Cover
13
Center Insulation
12
Center Flue Heater Cover
13
Center Flue
LH View from
Heater Cover
Front of Case
13
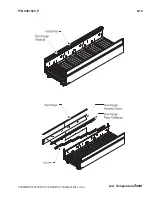
Center Flue Superstructure
Anti-sweat Heaters
Center Insulation
12
Figure 19 — Install Insulation and Heater Covers
HUSSMANN CORPORATION • BRIDGETON, MO 63044-2483 U.S.A. • WWW.HUSSMANN.COM
11
Field-Installed, Lit or Unlit, 48-In. or 58-In.
P/N 0484796_D
Superstructure for
EXCEL Wide Island
10. Install
Center Insulation
and
Center
Flue Heater Covers
as shown in
Upright
Figure 19.
Screw
Screw
#8 x
3
/
8
#8 x
3
/
8
Note:
For clarity, the superstructure
(each side)
(each side)
assembly is not shown.
14
14
Fasten Center Flue Heater Covers
with
3
/
8
-inch #8-18
Truss Head
Sheetmetal Screws
as shown in Detail.
Install screws at each end of case
Figure 19 Detail — Screw Location
in Step 12 with End Trim.
Center Flue Heater Cover
13
Center Insulation
12
Center Flue Heater Cover
13
Center Flue
LH View from
Heater Cover
Front of Case
13
Center Flue Superstructure
Anti-sweat Heaters
Center Insulation
12
Figure 19 — Install Insulation and Heater Covers
HUSSMANN CORPORATION • BRIDGETON, MO 63044-2483 U.S.A. • WWW.HUSSMANN.COM
11
Screw Location Detail
Insulation and Heater Covers (Step 5)
For clarity, the superstructure assembly is not shown.

