Hussmann Corporation • Bridgeton, Missouri 63044-2483 U.S.A.
Innovator Door Installation and Service Instruction
P/N 0425683_M
11
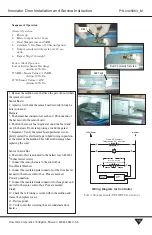
Heat the Gasket
Make sure the door is closed. Beginning
at the top of the gap, use a heat gun or
electric hair dryer (1500-1600 watt) to
heat the gasket with a constant up and
down motion.
IMPORTANT: If a gap runs the entire
length of the door, heat the area 4 in. (100
mm) above and 8 in. (200 mm) below the
top-most point where the gap starts and
work in 12 in. (300 mm) increments.
If the gasket becomes shiny, remove
heat immediately as this is an indi-
cation that the gasket is near the
melting point.
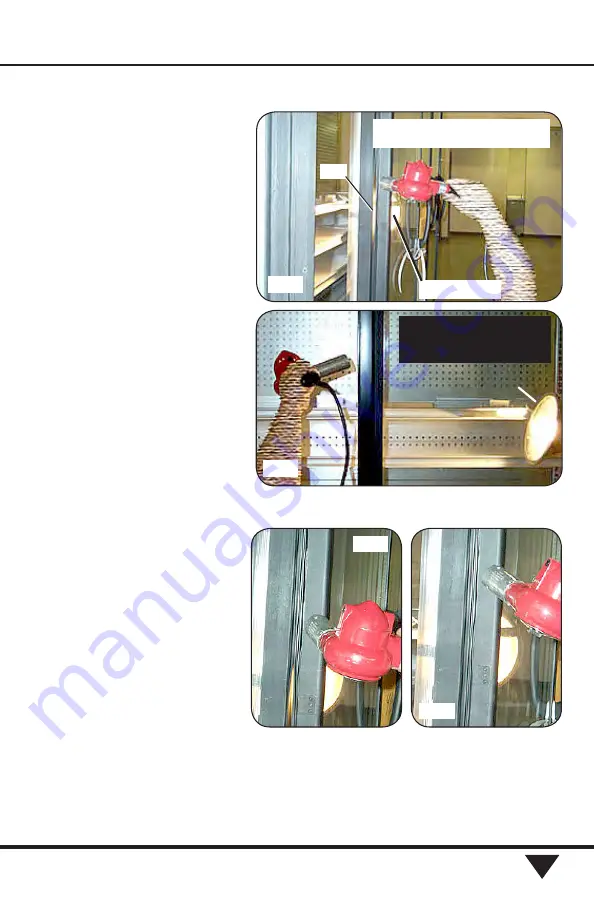
If possible, direct the hot air onto the gas-
ket and also through the gap between the
gasket and mullion. This will help to heat
both sides of the gasket. Refer to Figure
13(A) and (B).
As the gasket softens and becomes pliable,
the magnet in the gasket should pull it
across the gap. As the gap closes, move
heat down to create a zippering effect as
shown in Figure 14.
If the gasket is not pulled across the gap
by the magnet, reach around the mullion
(from the inside) and pull the gasket skirt
toward the mullion.
Gap
Back-Light
Direct the hot air through the gap
between the gasket and mullion.
Back-Light
Remember to use a con-
stant up and down motion
when applying heat.
Figure 13. Applying Heat to Gasket
(A)
(B)
Figure 14. Zipper Effect
(A)
(B)


