background image

4-4


M

aintenance

P/N 2400205_J 

U.S. & Canada 1-800-922-1919 • Mexico 1-800-522-1900 • www.hussmann.com

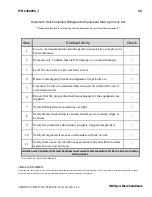
Self-Contained Refrigeration Equipment Maintenance Check List

* * * * * Warranty  does  not cover issues

caused by improper installation

or lack of basic preventative maintenance. * * * * *

Record starting

date

Store

Name and Number

Store

Address

Unit

Model

Number

Unit

Serial Number

Contractor/Technician

Technician

PM

date

PM

activity-For 

v

is

ual

inspection items,

denote

"ok

or

complete"

in the

column

to

right

when PM has been

performed

For

measured

data

requested, record

data

requested in the

appropriate column 

to the

right)

Quarterly

Semi- 

Annually

Ql

   Q2

Q3

Q4

Ql

Q2

Q3

Q4

Check in

with store

manager, record

any complaints

or issues

they have

wi

th

unit.

x

Loo

k

unit

over for any damage,

vibratio

n

s

or

abnormal

noise.

x

Verify

unit is level 

side 

to

side

and front to rear.

x

Confirm refrigerant lines properly are

secured and

not touching

or rubbing other

lin

es, wires

or frame

work.

x

Verify

fan motors

and

motor mounts are

ti

ght

.

x

Confirm fan blade/s are tight and not rubbing or hitting.

x

Make

sure all

electrical connections, factory

and

field, are tight.

x

Verify electrical

connections at

lamp

are they

secure

and dry.

x

Check for

and

replace any frayed or chaffed

wiring.

x

Check

a

ll

electrical  wiring 

make

sure

it is

secured

and not on

any sharp edges

or hot lines.

x

Check for air disturbances

external

l

to the unit. Heat and air

registers, fans,

a

nd

doors etc.

x

Check for

wa

ter

leaks.

x

Clean

evaporator

coil/s and fan blade/s. Do

not 

use an acid

base cleaner. Rinse off

any

cleaner residue.

x

Clean discharge air honeycombs or grilles. Do not use

an

acid

base cleaner. Rinse off any cleaner residue.

x

Clean condenser coil/s and fan blade/s. Do not use

an

acid base

Cleaner. Rinse off any cleaner residue.

x

Clean condensate drain pan and drain

lin

e.

x

Verify

condensate drain

lin

es 

are clear and functioning.

x

Record

vo

ltage

reading at unit

with unit

off?

x

Verify

condenser and

evaporator

fans

are working.

x

Record condenser air inlet temperature

x

Record condenser air outlet temperature

x

I

condenser

air

inlet or air

exhaust

restricted or recirculating?

x

Verify there are no

visua

l

oil or refrigerant

l

eaks.

x

Record voltage reading

w

ith

unit running.

x

Record compressor amp draw.

x

Record defrost heater voltage and amp draw.

x

Record anti-sweat heater voltage and

amp

draw.

x

Record case product temperature.

x

Record unit discharge air temperature.

x

Record unit return air temperature.

x

Record ambient conditions around

unit

(wet Bulb temperature

and

dry bulb temperature).

x

Check product

lo

ading,

do not

load

beyond the units

load limit

s.

x

Verify 

clearances 

o

sides/back

of unit.

x

Check

unit

controller for proper operation. See controller or 1/0

Manual for proper controller operation

.

x

Confirm door

switches

function.

x

x

Verify 

that all the panels,

shields

and covers are in place.

Technician Notes:

Form HSCW03 Rev-29 OCTOBER13

P/N

0525210_C

Summary of Contents for SM-110W

Page 1: ...SM Low Temperature Spot Merchandisers Installation Operation Manual P N 2400205_J September 2020 IMPORTANT Keep in store for future reference Spanish 0531305 MANUAL I O SELF CONTAINED SM Æ ...

Page 2: ...rchandiser These merchandiser are designed only for frozen products IMPORTANT KEEP IN STORE FOR FUTURE REFERENCE Quality that sets industry standards 12999 St Charles Rock Road Bridgeton MO 63044 2483 U S Canada 1 800 922 1919 Mexico 1 800 890 2900 www hussmann com 2020 Hussmann Corporation ...

Page 3: ... 2 1 Electrical Connections 2 1 Electrical Outlet 2 1 Refrigeration Self Contained 2 2 Defrost 2 2 Temperature Control 2 2 High Pressure Switch 2 2 START UP OPERATION Start Up 3 1 Controls and Adjustments 3 1 Load Limits 3 2 Stocking 3 2 Thermometer 3 2 MAINTENANCE Care and Cleaning 4 1 Do NOT Use 4 1 Do 4 1 Cleaning Stainless Steel Surfaces 4 2 Cleaning Pencil Thermometer 4 2 Cleaning Coils 4 3 B...

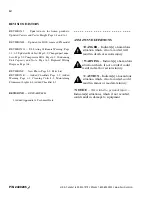
Page 4: ...N E Added Checklists Page 1 5 Added Warning Page 1 3 Cleaning Coils 4 2 Maintaining Fluorescent Lights 4 3 Added Checklist 4 5 REVISION D JANUARY 2013 1 Added Appendix A Technical Data iv ANSI Z535 5 DEFINITIONS DANGER Indicate s a hazardous situation which if not avoided will result in death or serious injury WARNING Indicate s a hazardous situation which if not avoided could result in death or s...

Page 5: ...should be thoroughly examined for shipping damage before and during unloading This equipment has been carefully inspected at our factory Any claim for loss or damage must be made to the carrier The carrier will provide any necessary inspection reports and or claim forms Apparent Loss or Damage If there is an obvious loss or damage it must be noted on the freight bill or express receipt and signed ...

Page 6: ...that Hussmann products will cause cancer or reproductive harm or is in violation of any product safety standards or requirements As clarified by the California State government Proposition 65 can be considered more of a right to know law than a pure product safety law When used as designed Hussmann believes that our products are not harmful We provide the Proposition 65 warning to stay in complian...

Page 7: ...ge to the merchandisers and serious personal injury could occur merchandisers are not structurally designed to support external loading such as the weight of a person Do not place heavy objects on the merchandiser SHIPPING SKID Each merchandiser is shipped on a skid to protect the merchandiser s base and to make positioning the case easier Remove the skid by raising one end of the merchandiser app...

Page 8: ...hrough the drain to the inside of the merchandiser Failure to cap the waste outlet could result in excessive frosting of the interior walls SEALING MERCHANDISER TO FLOOR If required by local sanitary codes or if the customer desires merchandisers may be sealed to the floor using a vinyl cove base trim The size needed will depend on how much variation there is in the floor from one end of the merch...

Page 9: ...xtension cord 6 Ensure that the proper electrical requirements for the equipment are supplied 7 Verify field electrical connections are tight 8 Verify all electrical wiring is secured and clear of any sharp edges or hot lines 9 Verify the condensate drain line is properly trapped and pitched 10 Verify all required clearances on the sides and back of unit 11 Verify there are no air disturbances ext...

Page 10: ...1 6 Maintenance P N 2400205_J U S Canada 1 800 922 1919 Mexico 1 800 522 1900 www hussmann com NOTES ...

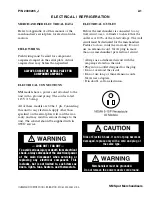
Page 11: ...ter to check that the outlet is at 100 of the rated voltage The wall circuit must be dedicated for the merchandiser Failure to do so voids the warranty Do not use an extension cord Never plug in more than one merchandiser per electrical circuit Always use a dedicated circuit with the amperage stated on the unit Plug into an outlet designed for the plug Do not overload the circuit Do not use long o...

Page 12: ...y area The correct type of refrigerant will be stamped on each merchandiser s serial plate The merchan diser refrigeration piping is leak tested The unit is charged with refrigerant and shipped from the factory with all service valves open SM models have a refrigeration system that uses a hermetic compressor SM systems use a capillary tube for refrigerant control The capillary tube is soldered to ...

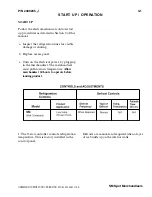
Page 13: ...for visible damage or chafing b Replace access panel c Turn on the electrical power by plugging in the merchandiser The merchandiser must pull down in temperature Allow merchandiser 24 hours to operate before loading product 1 The T stat controller controls refrigeration temperature This is factory installed in the control panel Defrosts are manual and required when a layer of ice builds up on the...

Page 14: ...be placed inside the merchandisers until merchandisers are at proper operating temperature Allow merchandiser 24 hours to operate before loading product Proper rotation of product during stocking is necessary to prevent product loss Always bring the oldest product to the top and set the newest to the bottom THERMOMETER The cabinet has a pencil type thermometer and reads from 40º F to 120º F 40º F ...

Page 15: ...sh Coarse paper towels on coated glass Ammonia based cleaners on acrylic parts Solvent oil or acidic based cleaners on any interior surfaces Do not use high pressure water hoses Do Use Disconnect electrical power before cleaning Remove the product and all loose debris to avoid clogging the waste outlet Store product in a refrigerated area such as a cooler Remove only as much product as can be take...

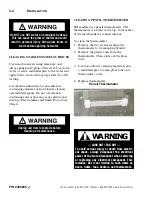
Page 16: ... To clean the thermometer 1 Remove the two screws securing the thermometer to its mounting bracket 2 Remove the plastic ends from the thermometer Then slide out the glass tube 3 Use non abrasive cleaning materials and a mild detergent to clean glass tube and thermometer cover 4 Replace thermometer Pencil Thermometer LOCK OUT TAG OUT To avoid serious injury or death from electri cal shock always di...

Page 17: ...d ICE in or on the coil indicates the refrigeration and defrost cycle is not operating properly Contact an authorized service technician to determine the cause of icing and to make adjustments as necessary To maintain product integrity move all product to a cooler until the unit has returned to normal operating temperatures BUMPERS AND OPTIONAL KITS Most scratches and dings can be removed using th...

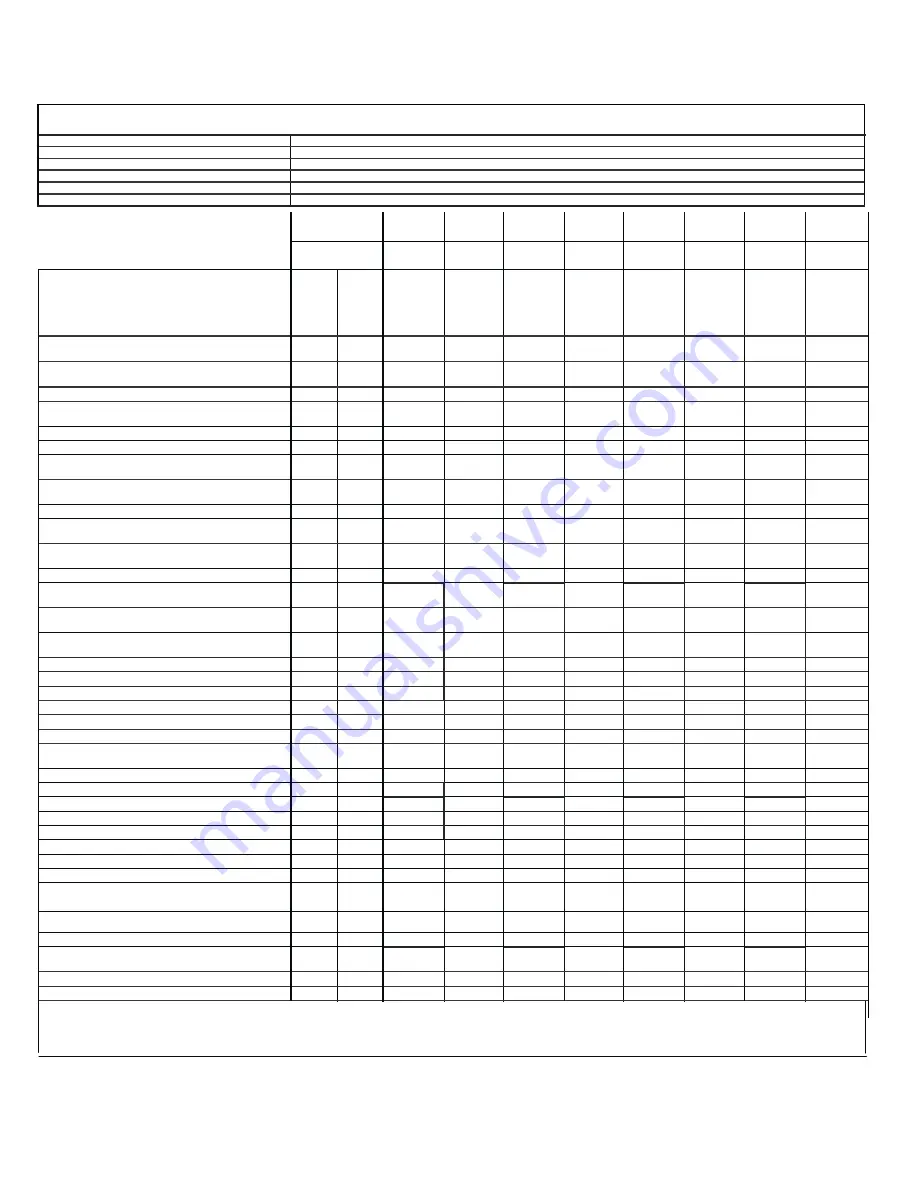
Page 18: ...isturbances externall to the unit Heat and air registers fans and doors etc x Check for water leaks x Clean evaporator coil s and fan blade s Do not use an acid base cleaner Rinse off any cleaner residue x Clean discharge air honeycombs or grilles Do not use an acid base cleaner Rinse off any cleaner residue x Clean condenser coil s and fan blade s Do not use an acid base Cleaner Rinse off any cle...

Page 19: ...tage compressor cycling on overload 5 Condenser dirty 1 Reset control 2 Leak check replace drier evacuate and recharge 3 Relocate 4 Check power 5 Clean Compressor runs continuously product too cold 1 Adjust to warmer setting 2 Control feeler not in tube properly 3 Short on refrigerant 1 Replace 2 Assure proper length in tube 3 Leak check change drier evacuate and recharge Compressor will not start...

Page 20: ...efrigeration Thermostat 1700528 X X High Pressure Indicating Light 1800629 X X High Pressure Control 1700549 X X Refrigeration Description Part Number Condenser Fan Motor 1800618 X X Condenser Fan Blade 1700156 X X Drier C052 S 1700481 X X Cap Tube Assembly 7600524 X Cap Tube Assembly 7600577 X Compressor Hermetic 1 4 AE2410Z AA1A 0546974 X Compressor Hermetic 1 3 127 60AEA2411ZXA 3008656 X Conden...

Page 21: ...lways disconnect the electrical power at the main disconnect when servicing or replacing any electrical component This includes but is not limited to such items as doors lights fans heaters and thermostats Product will be degraded and may spoil if allowed to sit in a non refrigerated area Height shown without casters installed MODEL Height w Caster Height Added SM115 373 8 21 2 SM110 361 2 27 8 ...

Page 22: ...5º F 8 5º F Compressor hp SM 115 1 4 hp SM 110 1 3 hp Condensing Unit Capacity SM 115 800 SM 110 1238 at 30º F evaporation and 100º F condensing temperature DEFROST DATA Frequency Manual Defrost as needed PHYSICAL DATA Refrigerant Charge SM 110 15 oz 0 425 kg SM 115 15 5 oz 1 439 kg Note This data is based on store temperature and humidity that does not exceed 75 F and 55 R H unless otherwise stat...

Page 23: ...r to deter mine total merchandiser electrical load Condensing Unit 115V 1Ph 60Hz Standard SM 115 SM 110 Compressor LRA 30 2 40 Compressor RLA 4 5 6 5 Product Data SM 110 Interior Volume Cu Ft Case 12 ft3 case 338 80 liters case SM 115 Interior Volume Cu Ft Case 8 83 ft3 case 250 03 liters case ESTIMATED SHIPPING WEIGHT 1 Case SM 110 SM 115 lb kg 162 73 178 81 1Actual weights will vary according to...

Page 24: ...DZ K NOTES APLICABLE UNL REV ECN DATE D 04H101 2004 03 15 F 844485 2014 05 22 G 0002247 2016 07 20 ELECTRIC SPECIFICATIONS SN SM 075 090 115 140 190 SM 110 VOLTS 115V FRECUENCY 60HZ WARNING BEFORE ANY SERVICE DISCONECT THE CASE FROMTHE ELECTRICAL SUPPLY TO AVOID ACCIDENTS ADVERTENCIA ANTES DE HACER CUALQUIER REPARACION DESCONECTE EL APARATO DE LA TOMA DE CORRIENTE PARA EVITAR ACCIDENTES BK THERMIC...

Page 25: ... information or other support contact your Hussmann representative Please include the model and serial number of the product Hussmann Corporation Corporate Headquarters Bridgeton Missouri U S A 63044 2483 01 October 2012 ...

Page 26: ...Hussmann Corporation 12999 St Charles Rock Road Bridgeton MO 63044 2483 www hussmann com ...

Reviews: