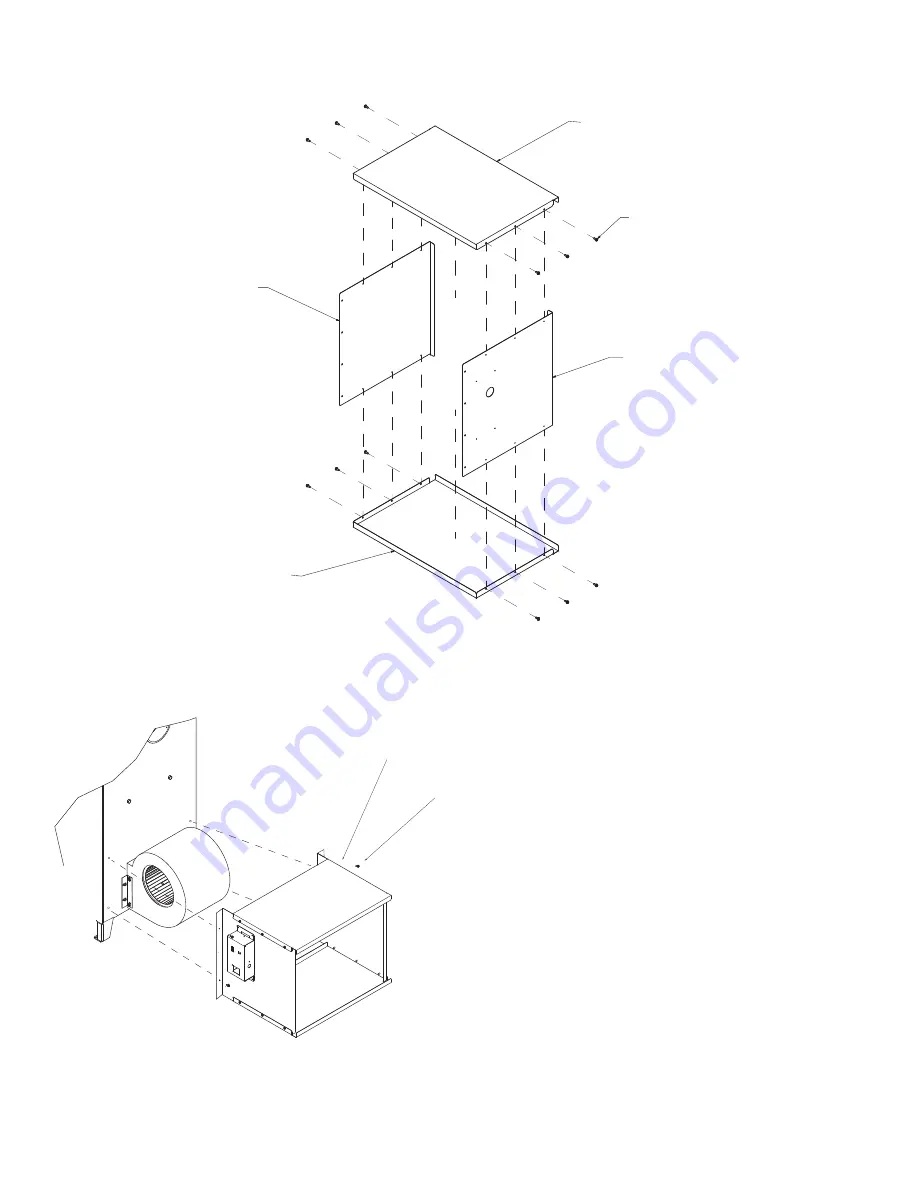
3. Assemble the following parts using 6 #8 sheet metal screws. Both “B” panels should fit inside of “A” panel flanges. Attach “
A
”
(bottom
panel) to side panels
.
. After the
bottom
and sides are assembled, attach ”A” (top panel) using 6 #8 sheet metal screws provided.
4. Position the assembled filter box on rear of furnace, supporting it firmly up to electrical enclosure, covering the rear distribution blower.
Make sure the filter box is tightly pressed to the back of the furnace. Use 4 1/4” bolts (included) to firmly attach the filter box to sides of
furnace.
Filter
Box
1/4”
Bolts
)
Panel A
Panel B
Panel C
Panel
A
#8 Sheet Metal Screw
The filter box requires one 20” x 20” x 1” filter (not included, but available
at most hardware and home centers).
See diagram for proper installation filter box. With the connection of the
thermostat, chimney pipe and ductwork, your furnace installation is
complete.
Inspect your filter regularly and replace the filter every 30 days during
heating season for maximum efficiency.
6
Summary of Contents for Shelter Furnace SF1000
Page 2: ...This Page Intentionally Blank...
Page 26: ...This Page Intentionally Blank 23...
Page 28: ...This Page Intentionally Blank...


