background image

2.18

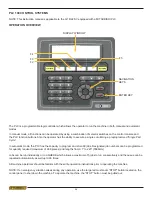
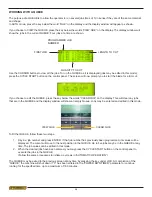
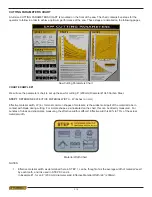
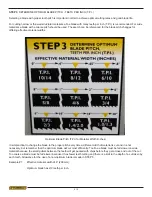
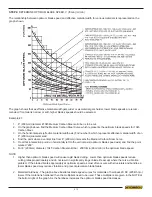
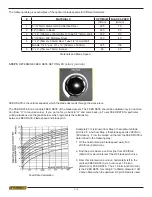
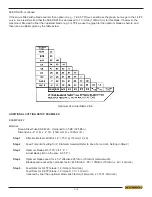
BUNDLING OPERATION (OPTION) 

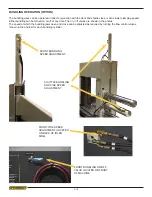
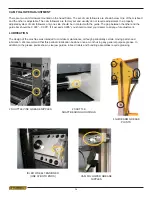
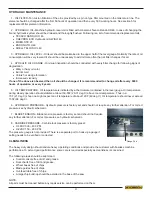
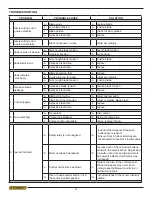
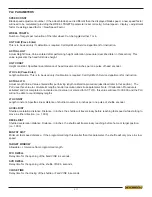
The bundling vises can be operated in direct conjunction with the front and shuttle vises or at a slower clamping speed. 

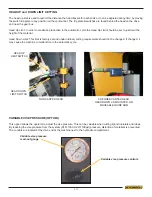
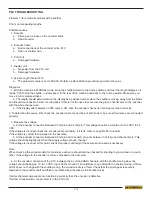
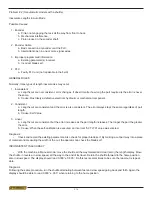
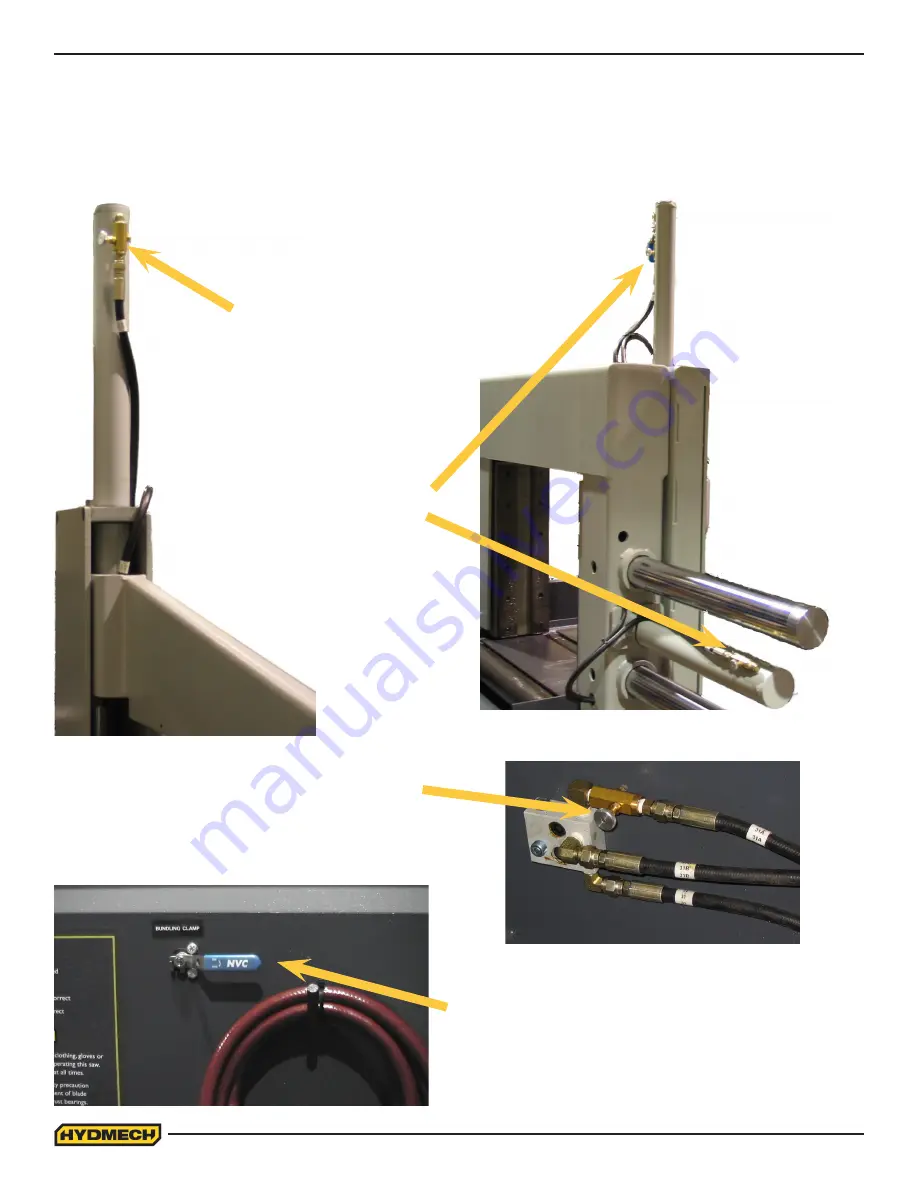
Either bundling can be turned on or off at any time. The on / off valves are shown in the photos.

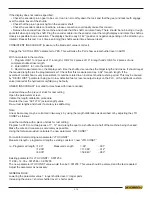
The speed at which the bundling jaws open and close can be adjusted as required by turning the flow control valves 

(shown in the photos) for each bundling cylinder.

FRONT BUNDLING ON/OFF 

VALVE LOCATED ON FRONT 

OF MACHINE

FRONT VISE SPEED 

ADJUSTMENT  (LOCATED  

ON BACK OF IDLER 

SIDE)

FRONT BUNDLING 

SPEED ADJUSTMENT

SHUTTLE BUNDLING 

AND VISE SPEED 

ADJUSTMENT

Summary of Contents for H18 A

Page 1: ...ference in a known location and easily accessible to all users of the device HYD MECH offers a great variety of options components and features for its various models Therefore some of the equipment described in this manual various illustrations and drawings may not be applicable to your particular machine The information and specifications provided in this manual were accurate at the time of prin...

Page 2: ......

Page 3: ...L 2 1 THE CONTROL PANEL 2 1 MANUAL OPERATION 2 1 PLC 100 CONTROL SYSTEMS 2 4 OPERATION OVERVIEW 2 4 FUNCTION KEY DESCRIPTIONS 2 5 MANUAL MODE FUNCTION KEY DESCRIPTIONS 2 5 SINGLE PART CYCLE OPERATION 2 6 KERF CORRECTION 2 6 AUTOMATIC OPERATION 2 7 SHUTTLE EMERGENCY STOP 2 9 HYDRAULIC FEED CONTROL 2 9 CUTTING PARAMETERS CHART 2 10 ADDITIONAL CONTROLS 2 16 COOLANT FLOW 2 16 HEAD UP and DOWN LIMIT SE...

Page 4: ...PLC PARAMETER DEFINITIONS VALUES 3 22 SECTION 4 ELECTRICAL FOR ELECTRICAL SCHEMATICS SEE PDF ON ATTACHED CD 4 1 SECTION 5 HYDRAULIC HYDRAULIC SCHEMATICS AND PLUMBING DIAGRAMS SEE PDF ON ATTACHED CD 5 1 HYDRAULIC COMPONENT LIST 5 1 GLAND ASSEMBLIES 5 2 PISTON ASSEMBLIES 5 2 SECTION 6 MECHANICAL ASSEMBLIES MECHANICAL ASSEMBLY DRAWINGS AND PARTS LIST SEE PDF ON ATTACHED CD 6 1 SECTION 7 OPTIONS FOR O...

Page 5: ... Materials are within designed specifications and are non hazardous Owner is responsible to Keep Manual accessible at the machine Ensure only reliable fully trained personnel work with the machine Clearly define responsibilities of all personnel working with the machine Keep the machine in good working order Operator and Maintenance Personnel are responsible to Keep all safety equipment in order c...

Page 6: ...ty hazards associated with what you are doing That should get your brain working again Certainly production is important but if you think you re too busy to put safety first think how much production you ll lose if you get hurt You owe it to yourself your family and your co workers to PUT SAFETY FIRST Mandatory Information All persons operating this machine must have read and understood all of the...

Page 7: ...cannot accept any liability for personal injury or property damage due to operator errors or non compliance with the Safety and Operating Instructions contained in this Manual RESPONSIBILITIES OF THE OWNER Organization of work This Operation and Maintenance Manual must always be kept near the machine so that it is accessible to all concerned The general statutory and other legal regulations on acc...

Page 8: ...t on the machine must be checked At the start of every shift After maintenance and repair work When starting for the first time and after prolonged shutdowns Emergency Stop Button E Stops Always be aware of the location of the Emergency Stop Button s Do not allow material or objects to block your access to an Emergency Stop Damage If any changes capable of impairing safety are observed in the mach...

Page 9: ...cessity to pick them off the machine by hand Hearing protection Ear protection must be worn whenever necessary The level and duration of noise emission requiring hearing protection depends upon the national regulations in the country in which the machine is being used The actual level of noise emission by band sawing machines depends upon work piece size shape and material blade type blade speed a...

Page 10: ... HAZARD LABELS The safety hazard labels attached to your machine represent important safety information to help you avoid personal injury or death All supervisors operators and maintenance personnel must locate and understand the safety information associated with each hazard label prior to operating or servicing the machine The safety hazard labels shown below are located at various positions on ...

Page 11: ...Keep hands clear of vises and work piece when vises are opened or closed Be aware that vise closing or opening may result in potentially dangerous work piece movement Be aware also that the opening motion of a vise may create potential pinch points MOVING PARTS CAN CRUSH AND CUT Keep hands clear of chip auger Lock out power in accordance with your company s lock out procedures before attempting to...

Page 12: ...0 8 Item 391938 Chip Augar Item 391335 Item 391340 ...

Page 13: ...0 9 Item 391397 Item 392801 Fixed Vise Shuttle Vise Item 392801 ...

Page 14: ......

Page 15: ...ROUND THE SAW SHOULD BE MAINTAINED IN A CLEAN AND TIDY CONDITION TO AVOID OBSTACLES OPERATORS COULD TRIP OVER THE H 18 22 SV SHOULD ONLY BE OPERATED ACCORDING TO THE SPECIFICATIONS OF THE SAW AVOID UNSAFE USAGE PRACTICES IF AT ANY TIME THE SAW DOES NOT APPEAR TO BE OPERATING PROPERLY IT SHOULD BE STOPPED IMMEDIATELY AND REPAIRED OPERATOR THE SAW SHOULD NEVER BE OPERATED UNLESS ALL GUARDS AND DOORS...

Page 16: ...1 2 LIFTING INSTRUCTIONS ...

Page 17: ...e necessary power hook up needs to be performed In order to provide safe operation as well as to prevent potential damage to the machine only qualified personnel should make the connections BEFORE START UP THE FOLLOWING TWO POINTS SHOULD BE CHECKED 1 Signs of damage that may have occurred during shipping to the electrical cables conduits and the hydraulic hoses 2 The hydraulic oil level is between...

Page 18: ...the ground rod does not exceed 3 ohms Customer is advised to consult local power company for further information on grounding 4 The ground rod is to be connected to the ground terminal in the control enclosure using insulated stranded copper wire The wire gauge size is to be determined according to the electrical code of the customer s local electrical authority 5 An additional point to check is t...

Page 19: ...materials A high quality and well mixed coolant will extend blade life and also increase cutting rate and quality On those materials where coolant is undesirable for cutting a slight coolant flow or periodic oiling of the blade is necessary to prevent the blade from being scored by the carbide guides 3 The stock being cut must be securely clamped in the vises 4 The proper feed force should be chos...

Page 20: ...m of the stroke The speed of descent is controlled by the Head Feed and Head Force Limit controls BLADE START The blade can be started only when the hydraulics are running in either manual or auto mode NOTE In automatic Mode the head will not descend until the blade has been started which the PLC will prompt the operator to do so HYDRAULIC START To start the hydraulic system the switches for the h...

Page 21: ...ue but will not let the head descend until the blade is started EMERGENCY STOP This mushroom button stops the blade and hydraulic motors Both vises will hold their position but pressure will begin to fall off Long pieces of work should always be supported so they will not become loose over time and fall while the machine is shut down This is a latched button and must be pulled out to start the mac...

Page 22: ...c mode the PLC has the capacity to program and store 99 jobs Designated job numbers can be programmed for quantity required maximum of 999 pieces and lengths from 0 1 to 220 5588mm Jobs can be run individually or in a QUEUE which allows a maximum of 5 jobs to run consecutively and the queue can be repeated automatically as well up to 99 times All machine operators should be familiar with the entir...

Page 23: ...d AUTO modes Auto mode cannot be accessed unless the front vise is closed Also used to stop an automatic job in progress by switching to MANUAL mode UNLABELLED The function of these keys are displayed directly above them The function will change as the PLC is switched from one mode to another and as the process of each mode is changed INCH MM While depressed momentarily it resets the displayed len...

Page 24: ...completed the head will rise to the head up limit switch the blade will stop and the display window will reset for the next cut 9 To cut another piece repeat steps 2 through 6 NOTES 1 To PAUSE the SINGLE CUT CYCLE press the CYCLE START button The CYCLE START button will begin to flash and the screen will indicate a paused condition All movements will immediately cease To continue the cycle press t...

Page 25: ...e head is in its down position it will rise to the head up limit so that no damage to the blade will occur 3 After starting the blade the head will descend for the cut and the machine will complete the required job 4 At the completion of the job the machine will shut down if 0 has been entered in the POWER DWN TIMER parameter or continue running for the specified time up to a maximum of 180 minute...

Page 26: ... that are in the QUEUE and the display window will show an empty Queue Jobs may be entered and edited in this mode FIRST JOB PROGRAMMED JOB NUMBER QUANITY TO CUT LENGTH TO CUT To fill the QUEUE follow these two steps 1 Key in a job number and press ENTER If that job number has previously been programmed its values will be displayed The cursor will move to the next position in the QUEUE Up to five ...

Page 27: ... the control panel These controls allow independent control of Feed Force FF and Feed Rate FR FF IS NOT APPLICABLE TO H40 MODEL EXTRA FINE METERING VALVE Used to set feed rate counterclockwise rotation to increase and clockwise rotation to decrease The FINE METERING DDF VALVE is equipped with two Feed Control Knobs Extra fine Micrometer style Knob and Fine Metering Knob The main difference between...

Page 28: ... W inches or mm Effective material width W in for most common shapes of materials is the widest solid part of the material to be in contact with blade during cutting For simple shapes as illustrated on the chart this can be directly measured For bundles of tubes and structurals measuring the effective width is difficult Effective width is 60 to 75 of the actual material width Material Width Chart ...

Page 29: ... See the graph below EXAMPLE When cutting a solid which is 1 2 of machine capacity using the graph locate 50 on the horizontal line and travel upwards to the plotted line and then travel directly across to the vertical FF Setting line The point that you have arrived at shows a setting of 40 for a piece 50 of capacity OF FF SETTING MAT L WIDTH AS OF SAW CAPACITY CUTTING STRUCTURALS A reduced Feed F...

Page 30: ...T P I for Material Width Inches It is impractical to change the blade to the proper pitch every time a different width of material is cut and it is not necessary but remember that the optimum blade will cut most efficiently Too fine a blade must be fed slower on wide material because the small gullets between the teeth will get packed with chips before they get across and out of the cut Too coarse...

Page 31: ...the Medium Carbon Steel Curve 5 From this intersection point run horizontally left to the vertical axis optimum blade speed axis and find the point marked 200 6 For 8 200mm diameter 1045 Carbon Steel solid bar 200 ft min 60m min is the optimum blade speed NOTE 1 Higher than optimum blade speed will cause rapid blade dulling Lower than optimum blade speeds reduce cutting rates proportionately and d...

Page 32: ...irec tion from O to required value If you go too far go back to O and come back up To set FEED RATE for particular cutting situations use the graph below which represents the relationship between FEED RATE blade speed and blade pitch Example 1 It is known from Step 3 that optimum blade pitch is 2 3 and from Step 4 that blade speed is 200 ft min 60mm min From the Graph on the left the FEED RATE is ...

Page 33: ...l Tube SAE 4320 Hardened to 35 RC 325 Bhn Dimensions 6 O D x 4 I D 150mm O D x 100mm I D Step 1 Effective Material Width 4 1 2 75 X 6 114mm 19 x 6 Step 2 Feed Force limit setting for 6 Diameter material Refer to Feed Force Limit Setting in Step 2 Step 3 Optimum blade pitch TPI 3 4 T P I Actual blade pitch on the saw 4 6 T P I Step 4 Optimum blade speed for 4 1 2 effective 225 ft min 70m min materi...

Page 34: ... when the blade is running and the head is descending This is selectable via the PLC parameters The bandsaw is equipped with two independently controlled coolant spouts that are capable of supplying a generous flow of coolant to the blade The left guide arm supplies a flow of coolant that should flood the blade as it moves through the carbide pads into the material to be cut The adjustable spout o...

Page 35: ...t and under ordinary cutting requirements should not be changed If changed it may cause the machine to malfunction in the automatic cycle VARIABLE VISE PRESSURE OPTION This option allows the operator to adjust the vise pressure This can be valuable when cutting light structurals and tubes By reducing the vise pressure from the system H18 1000 H22 1100psi pressure distortion of materials is prevent...

Page 36: ... time The on off valves are shown in the photos The speed at which the bundling jaws open and close can be adjusted as required by turning the flow control valves shown in the photos for each bundling cylinder FRONT BUNDLING ON OFF VALVE LOCATED ON FRONT OF MACHINE FRONT VISE SPEED ADJUSTMENT LOCATED ON BACK OF IDLER SIDE FRONT BUNDLING SPEED ADJUSTMENT SHUTTLE BUNDLING AND VISE SPEED ADJUSTMENT ...

Page 37: ... is connected to the machine via the Power Junction Box see picture below must be turned OFF and locked in the OFF 0 position by means of a padlock The key for this padlock must be kept by the person performing the work on the machine If more than one person is performing work on the machine then a multiple lock hasp shall be used and each person shall apply his or her own lock to the hasp 4 The M...

Page 38: ...oved After notification is made the machine may be re started BLADE CHANGE MODE PROCEDURE Wear safety glasses gloves and a long sleeve shirt for protection when handling band saw blades during blade change NOTE THAT GLOVES SHOULD NEVER BE WORN NEAR A RUNNING BANDSAW BLADE When handling new blades or ones that will be re used it is important to keep the teeth out of contact with concrete floors Thi...

Page 39: ...ng towards the front of the saw where it passes around the wheels and with the teeth in the cutting area pointing towards the drive wheel This may require that the blade be turned inside out before installation 1 With the blade change mode key switch remaining in the ON position turn the blade tension switch to the position for several seconds until the idler wheel has fully retracted and the blad...

Page 40: ...6 6 25mm from the face of the wheels For an H 22 blade tracking is set so the teeth of the blade protrude 310 01 6 6 25mm from the face of the wheels IDLER WHEEL TRACKING Release blade tension before adjusting Adjust tracking by regulating push set screws and pull bolts Loosening bolts A and turning in set screws C by equal amounts will move the blade OFF the wheel Loosening bolts B and turning in...

Page 41: ...e new oil running it briefly at moderate speed and then draining the box again before re filling it with a fresh quantity of the new oil Note The H 22ASV with the A603 gearbox requires 15 litres 3 96 US gallons of Mobil SHC 634 synthetic oil OUTPUT SHAFT LUBRICATION Always follow Lock out Procedures before performing this lubrication Band tension load is carried by a grease lubricated spherical be...

Page 42: ... be 0 003 0 005 If it exceeds 0 005 you should contact your dealer to arrange for adjustment LUBRICATION The design of the machine was intended to minimize maintenance although periodically certain moving parts need lubrication We recommend that this periodic lubrication be done once a month using any general purpose grease In addition to the grease points shown vise jaw guides in feed rollers and...

Page 43: ...TEMPERATURE Oil temperature is indicated by a thermometer contained in the level gauge Oil temperature during steady operation should stabilize at about 50 55F 28 31 deg C above room temperature Thus in a 70F 21 deg C shop one might expect an oil temperature of about 120F 49 deg C Oil temperature should never exceed 155F 68 deg C 6 HYDRAULIC PRESSURE Hydraulic pressure is factory set and should no...

Page 44: ... Tooth strippage 7a Blade pitch too fine 7a Select coarser pitch 7b Blade brush not cleaning 7b Adjust or replace blade brush 7c Excessive feed rate 7c Reduce 7d Excessive feed force 7d Reduce 8 No coolant flow 8a No coolant 8a Add coolant 8b Coolant line blocked 8b Blow out coolant line 8c Coolant pump inoperable 8c Check replace if faulty 9 Saw will not start 9a Safety relay is not energized 9a ...

Page 45: ...2a Observe pilot light s on relevant valve If pilot light fails to go on problem is electrical 12a This requires the attention of a qualified service person 12b If pilot light related to inoperative function does light problem may still be the coil If problem remains it may result from dirt in the valve spool 12b Disassembly of hydraulic valves should be under taken only by qualified service perso...

Page 46: ...unted on the back of the idler wheel or all six spokes of the wheel may be targets to provide blade speed input to the PLC The programmed information includes logic put into the PLC by the manufacturer as well as information programmed into it through the keypad during assembly Information from the plant is referred to as the parameters The parameters are important for the PLC to provide accurate ...

Page 47: ...fter performing length calibration procedure described later in this section The PLC uses this value to calculate its length encoder resolution and stroke parameter Note If Calibration Procedure is activated and not completed or activated and a value not entered for ACT LTH this value will reset to 00 000 and the PLC will not be able to count display lengths LTH CONST Length constant Specifies lin...

Page 48: ...Manual Mode or the cycle in Auto Mode has been completed Range is from 0 to 180 minutes BLADE CLEAR If set to YES when the AUTO cycle reaches the function of head up the shuttle will retract the material from the blade by 1 8 before the head will move up When the head reaches the up position the next length of material is shuttled into position TRIM CUT If YES selected the machine will perform a f...

Page 49: ... be sure all four wires are connected properly 3 Measure the voltage a At the encoder connector Between 0 Volt pin and 24 Volt pin This voltage should be a minimum of 22 VDC to 26 VDC If the voltage is incorrect check the encoder cable continuity If it is ok there is possible PLC problem If the voltage is correct then proceed to the next step b At the encoder connector Between 0 Volt pin and chann...

Page 50: ...ays the same regardless of part length b Cause Kerf Value 3 Linear a Lengths cut are consistent but the error increases as the part length increases The longer the part the greater the error b Cause When the self calibration is executed an incorrect ACT LTH value was entered Diagnosis Check and record the existing parameters Also check for proper blade kerf By making a cut part way into a piece of...

Page 51: ... length If the overshoot undershoot is very inconsistent it could be related to an incorrect shuttle cushion period This may be caused by DECEL DIST parameter being set to low defective fast or reverse output relays on the PLC or the hydraulic cushion valve located at the hydraulic manifold may be faulty LINEAR INACCURACY not valid for machines with linear encoder Load machine with a piece of stoc...

Page 52: ...es back fast 3 As the shuttle approaches the target length the FST output should shut off and the shuttle should travel slowly for the DEC DIST parameter cushion distance When the shuttle reaches the target length the SVC output should light and the shuttle vise should close on the material 4 FVO output light should momentarily turn on and the front vise should open 5 FWD output should light as wi...

Page 53: ...is on the PLC may have failed Check for proper connection of the cable at the PLC and at the interface Also check the PLC fuse c If the fuse is OK ensure that power is being supplied to the fuse Problem 5 No blade speed display Possible Causes 1 Fault at the proximity sensor a Bad sensor misadjusted sensor the gap should be approx 030 040 b Contamination on the end of the sensor 2 Fault at the PLC...

Page 54: ... then replace the PLC battery ERROR Prog E Flashing LED indicates a program error Cpu E LED on Solid Indicates a CPU error Input and output terminal identification The top row of LED S correspond to the top row of terminals and the bottom row of LED S correspond to the bottom row of terminals If LED IN 0 is illuminated then this corresponds to INPUT X0 If LED OUT 17 is illuminated then this corres...

Page 55: ...start X7 Coolant Switch X17 Cycle start X20 Blade stop P B X21 Out of stock option X22 Head up L S HUP Outputs Y0 Machine latch Y10 Front vise close FVC Y1 Open Y11 Front vise open FVO Y2 Open Y12 Shuttle fast FST Y3 Blade run pilot light Y13 Blade motor contactor Y4 VFD start Y14 Shuttle reverse REV Y5 VFD stop reset Y15 Shuttle forward FWD Y6 Open Y16 Head raise HUP Y7 Open Y17 Head lower HDN Y2...

Page 56: ...ll stop flashing To determine if the encoder channels are connected correctly observe the actual length parameter for the sign only during shuttle retraction in calibration mode If the actual length value shows as a negative number then the channels must be reversed and the calibration procedure repeated To determine LTH CONST value use this formula LTH CONST ENCODER PINION CIRCUMFERENCE ENCODER R...

Page 57: ... cursor keys scroll down until the screen displays 3 With the cursor on the word ENTER press the enter key The cycle start button will begin to flash the ENTER will change to ON indicating self calibration mode and the head will move to it s down limit and then will move up to it s full upper limit 4 Measure the distance from the vise horizontal wear strip to the blade teeth tips and enter this va...

Page 58: ...VISE in seconds FEED RATE Activates feed rate display Not active on S20A S23A and H10 machines ACTUAL POSITION If this value is set to YES displays shuttle vise actual position HOLD SHUTTLE HOME Hold shuttle VISE home and closed during cut BROKEN PROXIMITY SWITCH Allows user to override signal from proximity sensor in case it is broken MINIMUM BLADE SPEED Minimum blade speed on which the PLC will ...

Page 59: ...4 1 ELECTRICAL SCHEMATICS SEE PDF ON ATTACHED CD SECTION 4 ELECTRICAL ...

Page 60: ...4 2 ...

Page 61: ...R 1 H22 C31 00C SHT VISE CYLINDER 2 or 3 H22SV C23 00 BUNDLING CYLINDER 1 1 S25 C5 00 H18 H22 C5 00A H22 BLADE TENSION CYLINDER 1 MB6PA MANIFOLD BLOCK 1 DDF6 0 00FP DDF VALVE 2 363300 DOUBLE PILOT CHECK VALVE DPCH 1 4 363295 DIRECTIONAL VALVE DCV3P AB T 1 363290 DIRECTIONAL VALVE DCV3P AB C 1 2 363160 POPET VALVE PV2P A C 1 CHB 25C CUSHION BLOCK 1 362690 CHIP AUGER MOTOR HM 01 1 363155 H22 Only PR...

Page 62: ...5 363335 3 5 362995 362800 CS35 GL 01A 362835 363340 4 0 363005 362805 CS40 GL 01A 362840 363345 5 0 363015 362810 CS50 GL 01A 362840 363345 PISTON ASSEMBLIES CYLINDER DIAMETER A TEFLON RING B LOADER RING C PISTON D O RING 2 0 363035 362950 CS20 PS 01B 362905 2 5 363040 362965 CS25 PS 01 362910 3 0 363045 362980 CS30 PS 01 362910 3 5 363050 362990 CS35 PS 01 362925 4 0 363055 363000 CS40 PS 01 362...

Page 63: ...6 1 MECHANICAL ASSEMBLY DRAWINGS PARTS LIST SEE PDF ON ATTACHED CD SECTION 6 MECHANICAL ASSEMBLIES ...

Page 64: ...6 2 ...

Page 65: ...7 1 SECTION 7 OPTIONS OPTIONAL ASSEMBLY DRAWINGS SEE PDF ON ATTACHED CD ...

Page 66: ...7 2 ...

Page 67: ...3 5 Liters min Control Panel Waist Height Width Blade Tension Hydraulic Motors 50 350 sf min 15 5 109 m min 22 559mm Blade drive 10 HP 7 5 KW System Pressure 1000 PSI 6890 kPa 0 34 0 863mm single stroke multi index capability Vise Control Shuttle Stroke Hydraulic Coolant Hydraulic Pumps Hydraulic Tank 9 5 U S Gallons 36 Liters 127 3225mm Wide 88 2235mm Long 92 5 2362mm High Machine Weight Overall ...

Page 68: ...ht Width Blade Tension Hydraulic Motors 40 300 sf min 12 91 m min 27 685mm Blade drive 10 HP 7 5 KW System Pressure 1000 PSI 6890 kPa 0 34 0 863mm single stroke multi index capability Vise Control Shuttle Stroke Hydraulic Coolant Hydraulic Pumps Hydraulic Tank 9 5 U S Gallons 36 Liters 141 3581mm Wide 88 5 2235mm Long 92 5 2362mm High Machine Weight Overall Dimensions Maximum Workload 15000 lbs 68...

Page 69: ...8 3 H18SV H22SV LIFTING INSTRUCTIONS ...

Page 70: ...8 4 H18SV LAYOUT ...

Page 71: ...8 5 H22SV LAYOUT ...

Page 72: ...8 6 ...

Page 73: ... of the H 18 22 SV but not originally manufactured by Hyd Mech are subject to the original manufacturer s warranty Hyd Mech will provide such assistance and information as is necessary and available to facilitate the user s claim to such other manufacturer Liability or obligation on the part of Hyd Mech for damages whether general special or for negligence and expressly including any incidental an...

Page 74: ...9 2 ...

Reviews: