Performing maintenance
FAM 5
en(us)
74 / 100
BEWA FAM5 3667663b en-us 2012-12-12.doc
2012-12-12
Replacing the air de-oiling element of the vacuum pump
Oil mist or increased electricity consumption by the drive engine (response of
the engine protection switch) are signs of a soiled air de-oiling element.
To perform these tasks, you will need the following tools and
equipment:
Maintenance set, comprising oil filter, air deoiling element,
ventilation cover seal (for part-no., see replacement parts list).
Fork wrench, size 10 mm
To replace the air de-oiling element, proceed as follows:
1.
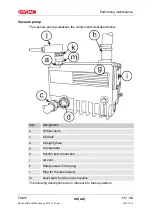
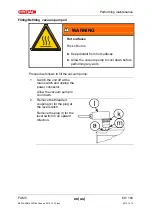
Remove the ventilation cover (i) from the oil separator (g).
2.
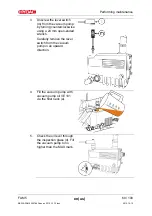
Undo the screw in the middle of the filter spring, but do not remove this.
3.
Press the filter spring down and rotate it out of the depression.
4.
Remove the filter spring from the oil separator (g).
5.
Pull the air de-oiling element out of the oil separator (g).
6.
Make sure that the new air deoiling element is provided with a new O-
ring.
7.
Install the air de-oiling element in such a way that the opening is
situated correctly in the holder in the oil separator (g).
8.
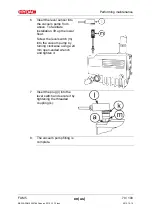
Ensure that the tip of the screw in the middle of the filter spring
protrudes approx. 2 – 5 thread turns out of the filter spring.
9.
Install the filter spring in such a way that the ends are secured against
slipping by lugs in the receptacles in the oil separator (g) and the tip of
the screw engages in the depression of the air de-oiling element.
10. Tighten the screw in the filter spring until the head of the screw impacts
against the spring steel sheet.
11. Make sure that the seal under the ventilation cover is clean and
undamaged. Replace the seal if necessary.
12. Fasten the ventilation cover (i) with seal and hexagon-head screws to
the oil separator (g).
The air de-oiling element becomes saturated with oil during
operation. A slight lowering of the oil filling level after the air de-
oiling element has been replaced is therefore quite normal.

