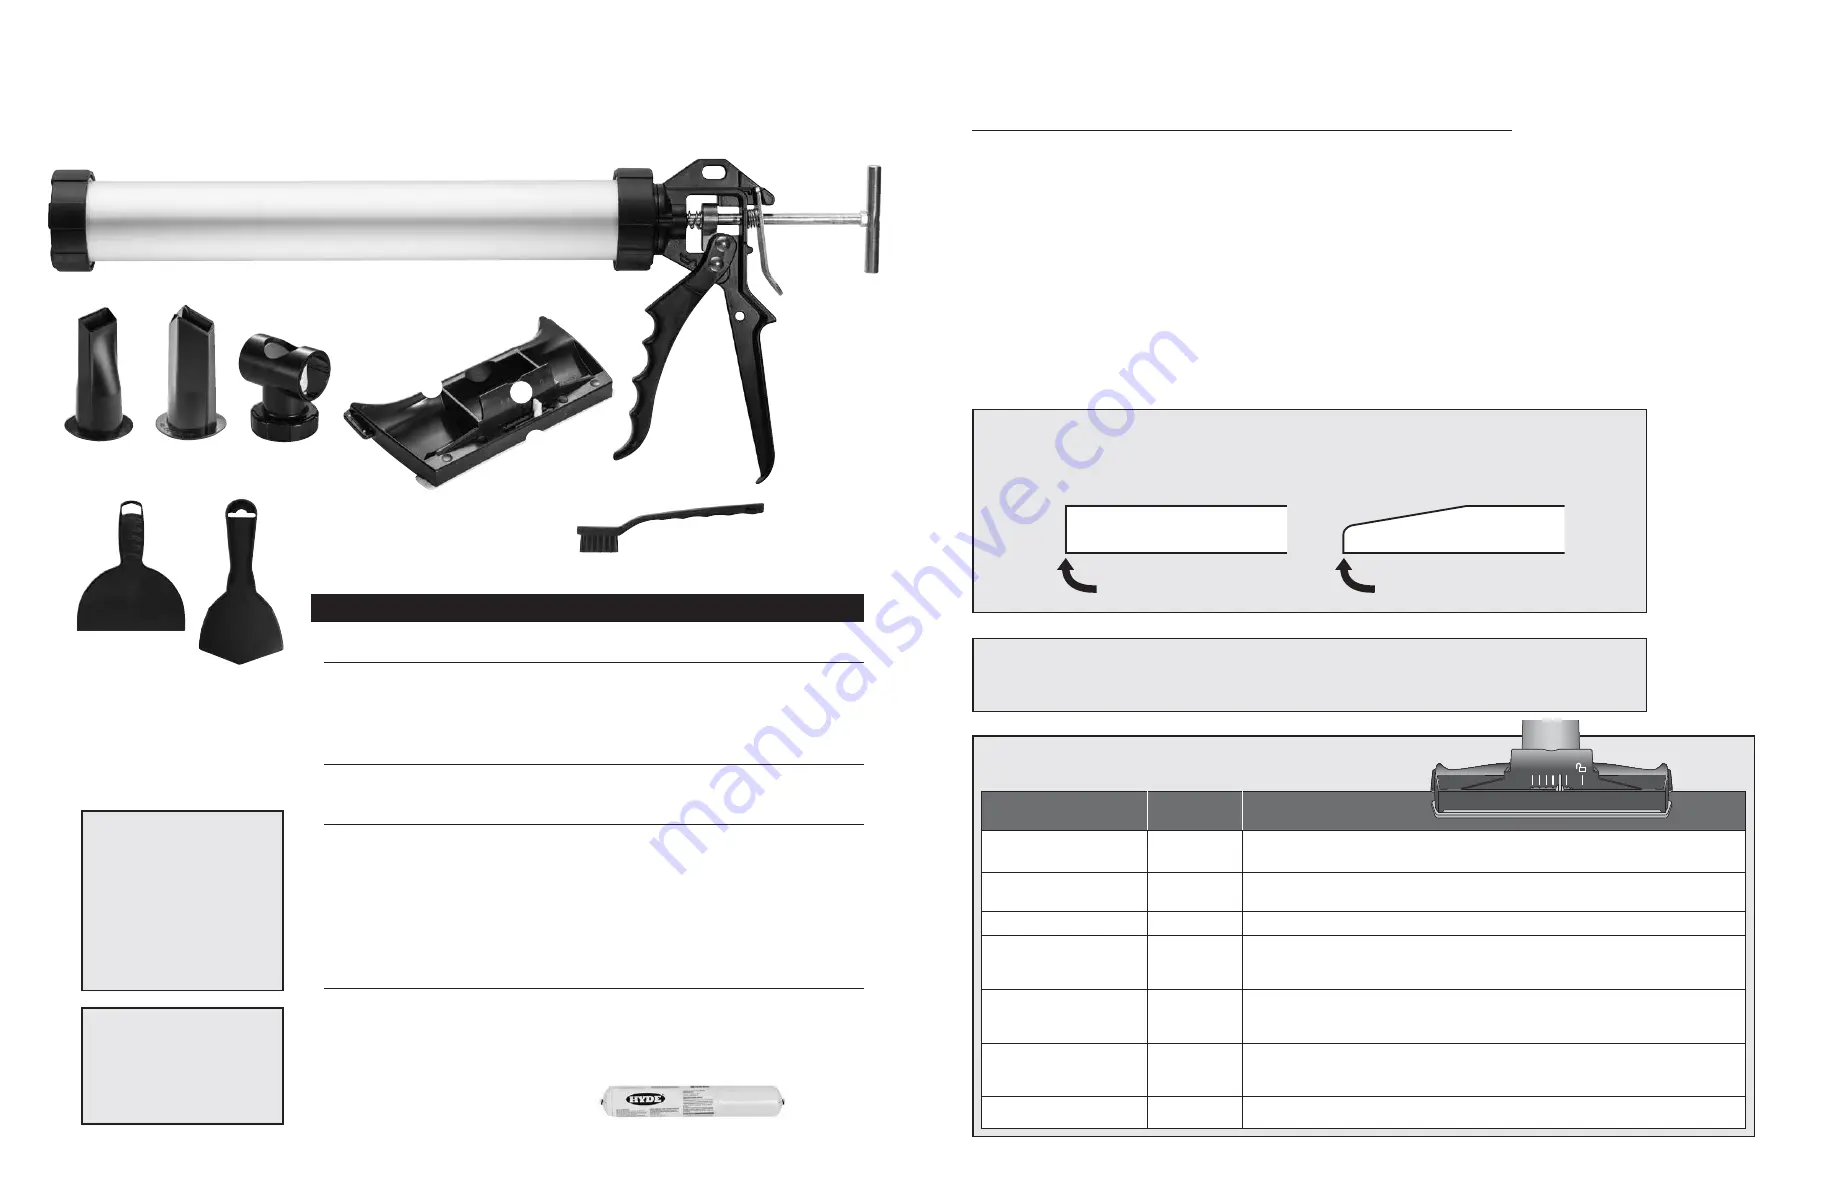
System Contents
A
MudGun
™
Trigger
Mud tube
Brake
Mud tube front ring
Plunger rod
Mud tube back ring
Embedding tools
B
Flat joint nozzle
C
Inside corner nozzle
Finishing tools
D
T-adapter
F
6-inch joint knife
E
7-inch finishing head
G
Inside corner smoothing tool
Front
H
Tool cleaning brush
Slide adjuster
Adjustable crown/contour
Skid pads
You will also need:
• Drywall repair patch or a patch
• Damp rags
board larger than the hole
• 220-grit sandpaper or sanding sponge
• Drywall saw or utility knife
• Straight edge (ex: yard stick)
• Joint tape
• MudPaks
™
(sold separately)
(paper or adhesive mesh)
• 5-gallon bucket filled with
4 inches of water
MUDGUN
™
SMALL REPAIRS (model #09600)
A
B
F
G
H
C
D
E
TIP
The bucket is for resting your
MudGun
™
to keep it clean and
free flowing for the duration
of the job. You may also want
a second bucket of water for
washing your hands and tools
and keeping rags damp.
TIP
There are many types of
drywall tape.
We recommend
using mesh or pre-scored
paper tape with this tool.
4
5
TIP
Before starting, check to see if your existing drywall is 1/2 or 5/8 inches thick.
For flat surface repairs, always
use a patch board with the same thickness as your existing drywall
and
use only cut edges,
not the tapered
(manufactured) edge for repairs.
TIP
Check with your local home improvement store for a small piece of drywall to avoid having to purchase full sheets.
MAKING A FLAT SURFACE REPAIR
Follow these instructions for repairs that do not involve corners – meaning the angled joint between
a wall and ceiling or between two walls. See
More Complex Repairs (page 10) if your job involves a
corner joint.
PATChING INSTRUCTIoNS
For holes under 8 inches (203mm), use a drywall repair patch at least two inches larger than the hole,
providing 1 inch of overlap on all sides. Follow directions on the package to apply it to the wall.
For larger repairs, cut a drywall replacement patch board slightly larger than the hole. Place the
patch board over the hole and trace its outline on the wall in pencil. Use a drywall saw or utility knife
to square up the hole in the wall. Remove any debris from the edges. Screw the replacement board
securely to the framing behind the wall. You are now ready to tape the repair.
CuT edGe
TApered edGe
TIP
For best results, use this guide when using the MudGun
™
Finishing Head.
Finishing Head Settings
Crown
On Slide Adjuster
Thickness
Recommended Uses
0
flat
•
Center pass on Butt Joints after feathering sides.
•
Taper Joints if 2nd pass is needed due to mud having cracks.
1
1/64"
•
Feather Butt Joints, but 2 is recommended in case sanding needed.
•
Finish Taper Joints if doing feathering on sides.
2
2/64"
•
Finish Taper Joints with one pass (mud may crack due to thickness.)
3 3/64”
•
First coat bead, centered over slightly uneven joints.
•
Slightly uneven wall repairs where filling is needed.
Note: May have cracking that needs to be filled with another coat set on 0.
4
4/64"
•
First coat bead, centered over moderately uneven joints.
•
Moderately uneven wall repairs where filling is needed.
Note: May have cracking that needs to be filled with another coat set on 0.
5
5/64"
•
First coat bead, centered over heavily uneven joints.
•
Heavily uneven wall repairs where filling is needed.
Note: May have cracking that needs to be filled with another coat set on 0.
Unlock
•
Releases Slide adjuster and Adjustable Crown/Contour for cleaning
5 4 3 2 1 0


