5 4 3 2 1 0
a
b
c
d
e
8
Installing the finishing head
1. Point the MudGun
™
up and remove the front ring and nozzle.
2. Replace the ring with the
T-adapter
and tighten.
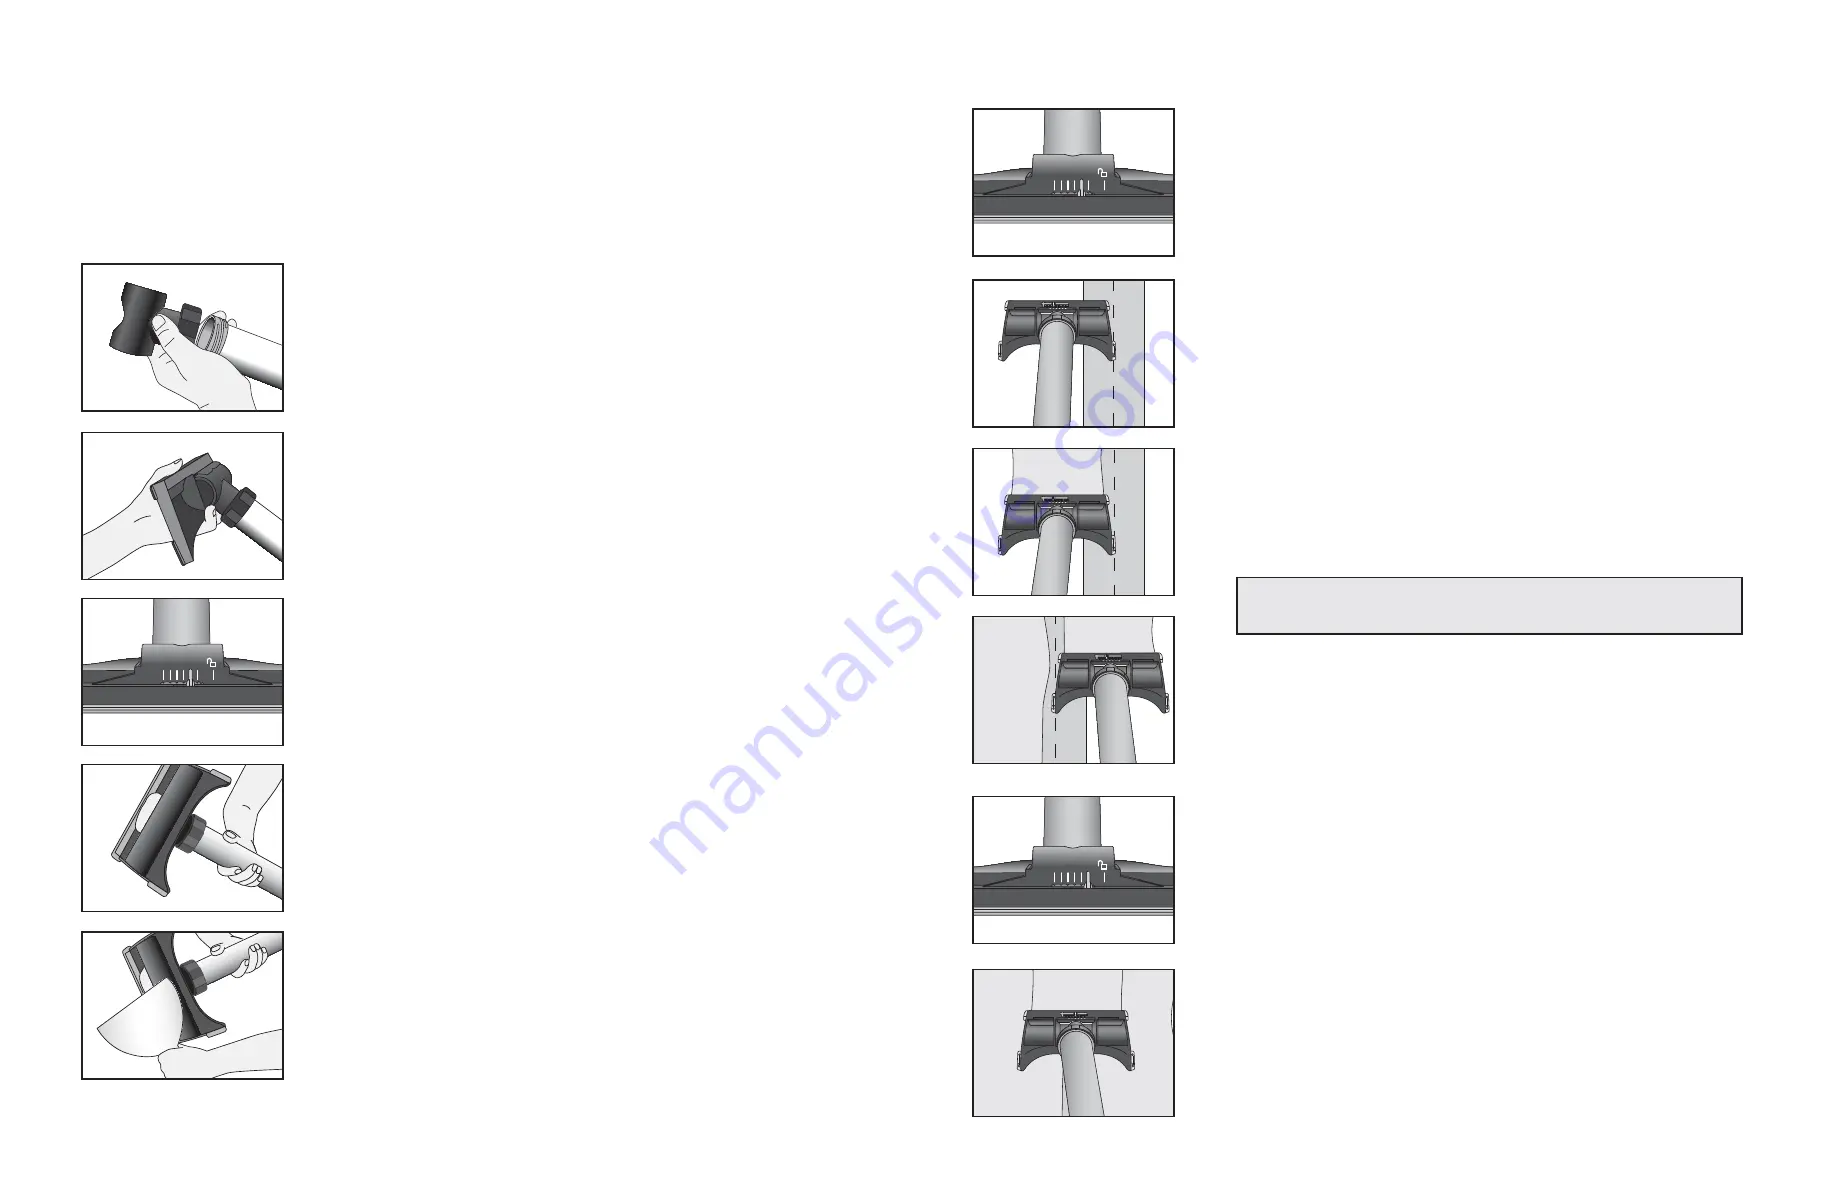
(illustration a)
3. Push the T-adapter into the
7-inch finishing head
.
(illustration b)
4. Set the slide adjuster on
1.
(illustration c)
5. Pull the trigger until you see drywall mud emerge from the head.
(illustration d)
6. As you pump mud out for the first time, use your putty knife to spread
it across the full length of the finishing head.
(illustration e)
TIP
Try to avoid marring wet mud on the first side when feathering the opposite side.
g
5 4 3 2 1 0
f
9
Feathering the repair
1. Set the
slide adjuster
to
1.
(illustration f)
2. Place the finishing head flat against the wall with the skid pad lined up
with the center of the tape.
(illustration g)
3. Run a thin bead of mud along both sides of all taped joints, leaving a
gutter in the center between them.
(illustrations h1 & h2)
4. If the coating is not smooth, has bubbles, or is wavy and uneven on
the edges, smooth the compound out by making another pass over the
coating using the finishing head without pulling the trigger.
5. Rest the gun in water and let the mud dry for up to 24 hours. See
compound manufacturer’s instructions.
6. After both sides are dry, set the
slide adjuster
on
0.
(illustration i)
7. Run a bead of mud down the center of each joint.
(illustration j)
8. Let the mud dry, then check the flatness of the taped area using a straight
edge.
The flatter it is, the better it will look after painting. Sand with 220-
grit sandpaper or sanding sponge to eliminate imperfections
and flatten
out the joint as much as possible without exposing the tape. Prime before
painting.
5 4 3 2 1 0
i
h1
h2
j
FINIShING ThE SURFACE
You will now use the finishing head to “feather” your repair by adding thin coats of mud on either side of the
seams. The goal is to avoid having your taped seams be noticeably higher than the rest of the wall.
Note: Before beginning this step take a moment to ensure the tape is completely embedded, and that there
are no bubbles under the tape. Remove any excess dried compound lumps or ridges by lightly scraping with
your 6" joint knife.


