


29
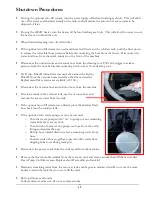
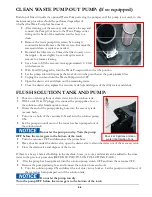
CLEAN WASTE PUMP-OUT PUMP: (If so equipped)
Build-up of fine silt inside the optional Waste Pump can clog the pump even if the pump is not used, so this
maintenance procedure should be performed regardless of
whether the Waste Pump has been used.
•
After cleaning out the recovery tank, remove the cap and
connect the Pump-Out hose to the Waste Pump outlet
fitting on the back of the machine; run the hose to a
drain.
•
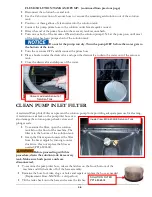
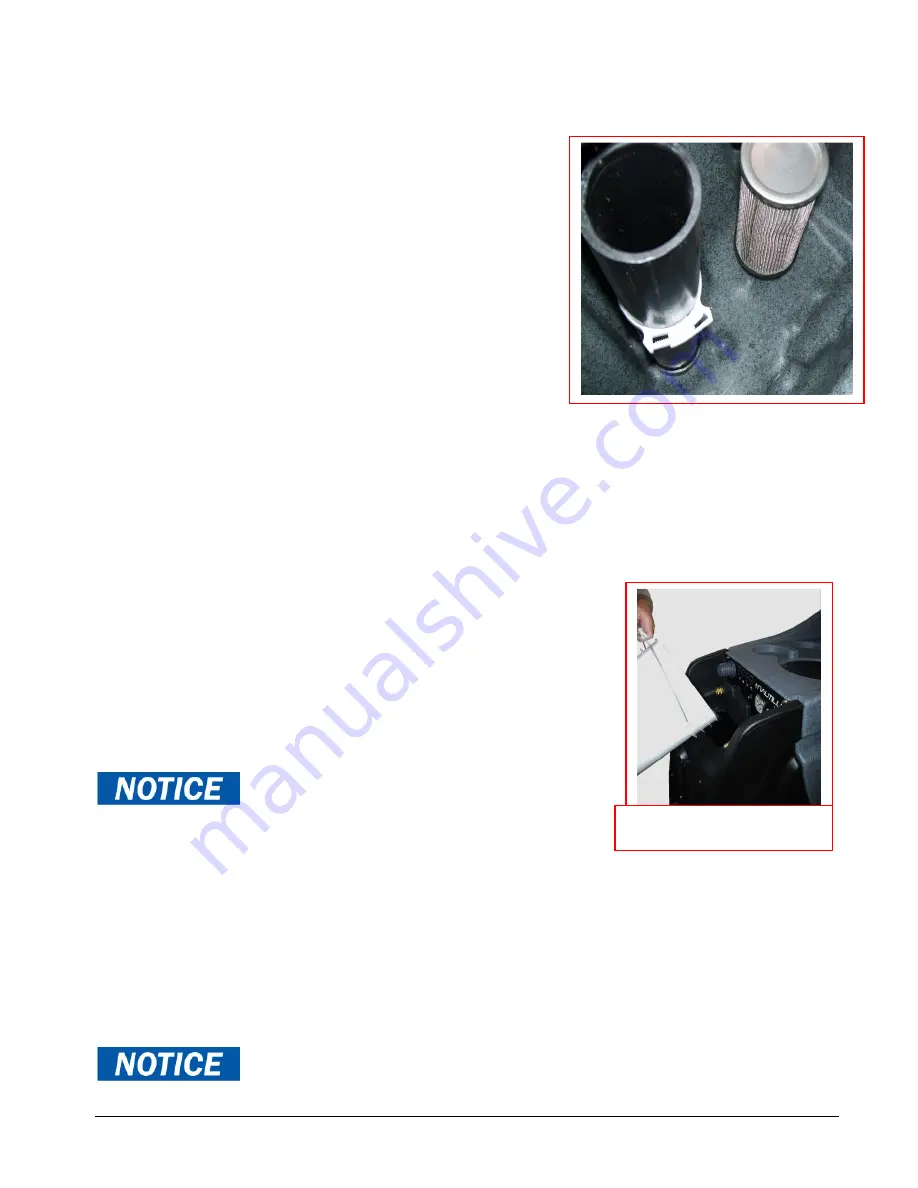
Remove the waste pump filter screen by turning it
counterclockwise. Remove the filter screen. Examine the
screen and clean or replace as needed.
•
Re-install the filter screen. Thread the filter loosely on to
the nipple – Leave slightly loose to keep it easier to
remove for future cleaning.
•
Use a hose to fill the recovery tank approximately 1/2 full
with clean water.
•
With Cord #2 plugged in, turn the Waste Pump switch to the ON position.
•
Let the pump run until it pumps the level down to the point below the pump intake filter.
•
Unplug the cord and turn the Waste Pump switch OFF.
•
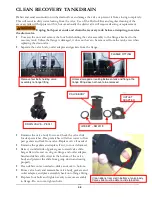
Open the drain valve and drain out the remaining water.
•
Close the drain valve, replace the recovery tank lid, and dispose of the dirty water and debris.
FLUSH SOLUTION TANK AND PUMP:
•
Pour two or three gallons of clean water into the solution tank.
•
With Cords #1 & #2 plugged in, connect the pump prime hose to
the solution outlet female quick connect.
•
Direct the end of the pump priming hose into the recovery tank
vacuum barb.
•
Turn one or both of the vacuums ON and turn the solution pump
ON.
•
Let the pump run until most of the water has been pumped out of
the solution tank.
Do not let the pump run dry. Turn the pump
OFF before the water gets to the bottom of the tank.
•
Turn the vacuums OFF and disconnect the prime hose.
•
Place a bucket under the drain valve; open the drain valve to drain the water out of the recovery tank.
•
Close the drain valve and dispose of the water.
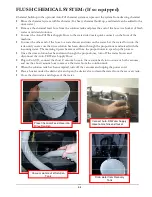
If there is a heavy chemical build-up in the machine, hoses, or tools, a mild acid can be added to the rinse
water in the previous procedure (REFER TO PHOTOS ON FOLLOWING PAGE.)
•
After the pump has been primed, turn the solution pump switch OFF and turn the vacuums OFF.
•
Remove the pump priming hose and connect the solution hose and tools.
•
Turn the solution pump ON and direct the tool spray into a bucket. Let the pump run until most of
the water has been pumped out of the solution tank.
Do not let the pump run dry.
Turn the pump OFF before the water gets to the bottom of the tank.
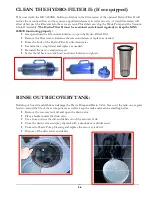
Pour 2 or 3 gallons of clean
water into Solution Tank
Summary of Contents for Nautilus MX3-200HE
Page 1: ...1 LMANN09 Revised 02 16 2018 Nautilus MX3 200HE Operating Manual ...
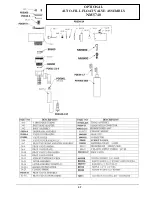
Page 37: ...37 OPTIONAL AUTO FILL FLOAT VALVE ASSEMBLY NM5740 ...
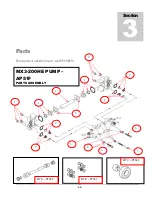
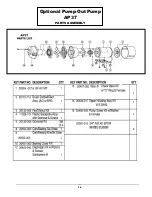
Page 38: ...38 Optional Pump Out Pump AP37 PARTS ASSEMBLY ...
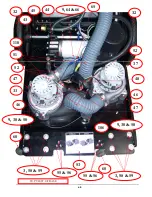
Page 39: ...39 1 2 6 7 8 9 11 3 8 9 12 4 4 3 10 5 15A 8 9 8 9 39 2 ...
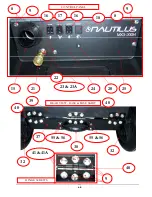
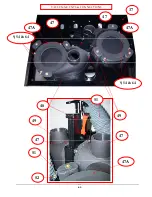
Page 43: ...43 48 49 49 47 47 47A 47 47 47A 47A 51 51 37 9 54 64 52 VACUUM MOUNTS CONNECTIONS 9 54 64 ...
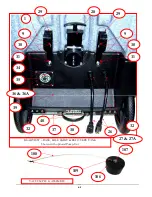
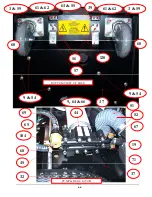
Page 48: ...48 96 91 97 9 94 105 OPTIONAL PUMP OUT CONNECTIONS 99 95 93 103 ...
Page 49: ...49 FLOW 81 92 91 99 96 97 105 13 14A 14 95 OPTIONAL PUMP OUT PARTS 1 9 97 103 39 9 ...
Page 50: ...50 HEATER PARTS 111 113 114 112 2 115 2 116 2 42 42A 98 111 ...


