Page 1 of 4
HydroLynx
Systems, Inc.
•
950 Riverside Pkwy #10 • West Sacramento, CA 95605-1501
Phone 916-374-1800 • Fax 916-374-1877 • Email hydro@hydrolynx.com
50386 ALERT2
Transmitter Upgrade Kit Instructions 04/01/2019
Prepare 50386 Transmitter for Upgrade
1.
Remove 50386 PCB cables.
1.1.
Ribbon connectors- P3, P4, P13, & P14
1.2.
Power – P2
1.3.
Radio and power amp harness – P5 & P1
1.4.
SDI-12, COM1, COM2 cables – P7, P8, P12
2.
Remove 50386 PCB from mounting plate.
2.1.
Save wingnuts.
3.
Remove radio from mounting plate.
3.1.
Save hardware.
4.
Remove radio harness.
4.1.
Discard, it will not be re-used.
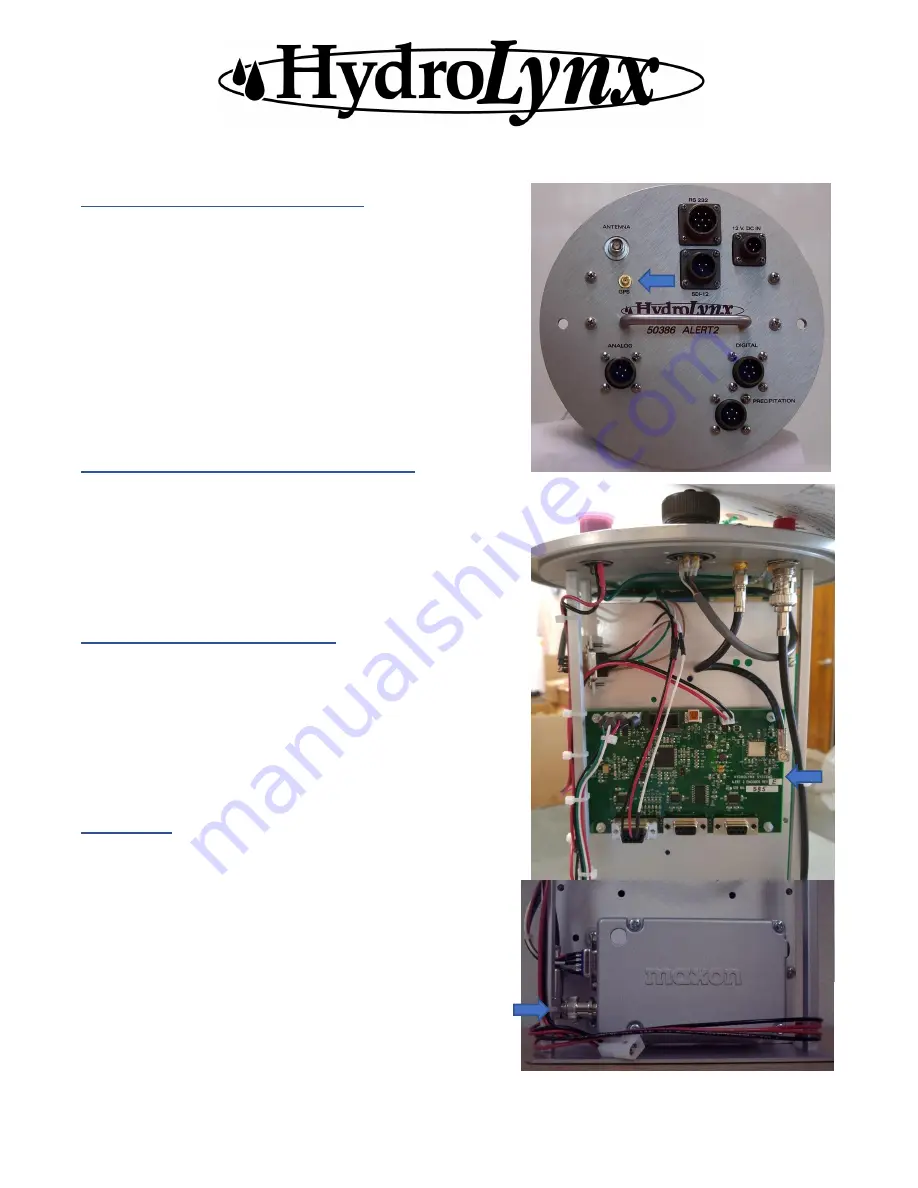
ALERT2 SMA bulkhead connector P/N 132170
1.
See photo for placement approximately 1” up from handle.
2.
For easy drilling use a hand punch, mark center of hole.
3.
Drill top plate, use 1/4" drill bit.
4.
Install bulkhead connector.
5.
Tighten with #6 nut driver.
6.
Apply ALERT2 label on top plate.
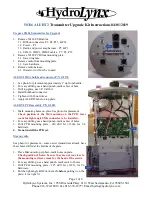
ALERT2 PCB assembly P/N G2012
1.
Mark mounting holes on plate. See photo for placement.
Check position of the SMA antenna on the PCB, leave
room for right angle SMA connector to be installed.
2.
For easy drilling use a hand punch, mark center of holes.
3.
Drill PCB mounting plate - #30 drill bit (.1360), for # 4
hardware.
4.
Do not install the PCB yet.
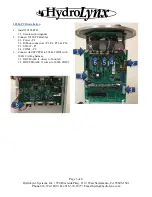
Maxon radio
See photo for placement - some newer transmitters already have
these holes drilled at the bottom of the plate.
1.
Place Maxon radio per photo, mark holes on plate.
Check position of holes; be sure they are not too close to
the mounting rod leave room for the head of the screws.
2.
For easy drilling, use a hand punch, mark center of holes.
3.
Drill PCB mounting plate - #25 drill bit (.1495), for #6
hardware.
4.
Put the right-angle BNC on the radio
before
putting it on the
plate; it is a tight fit.


