Assembly Instructions
7
Step
7
Step
8
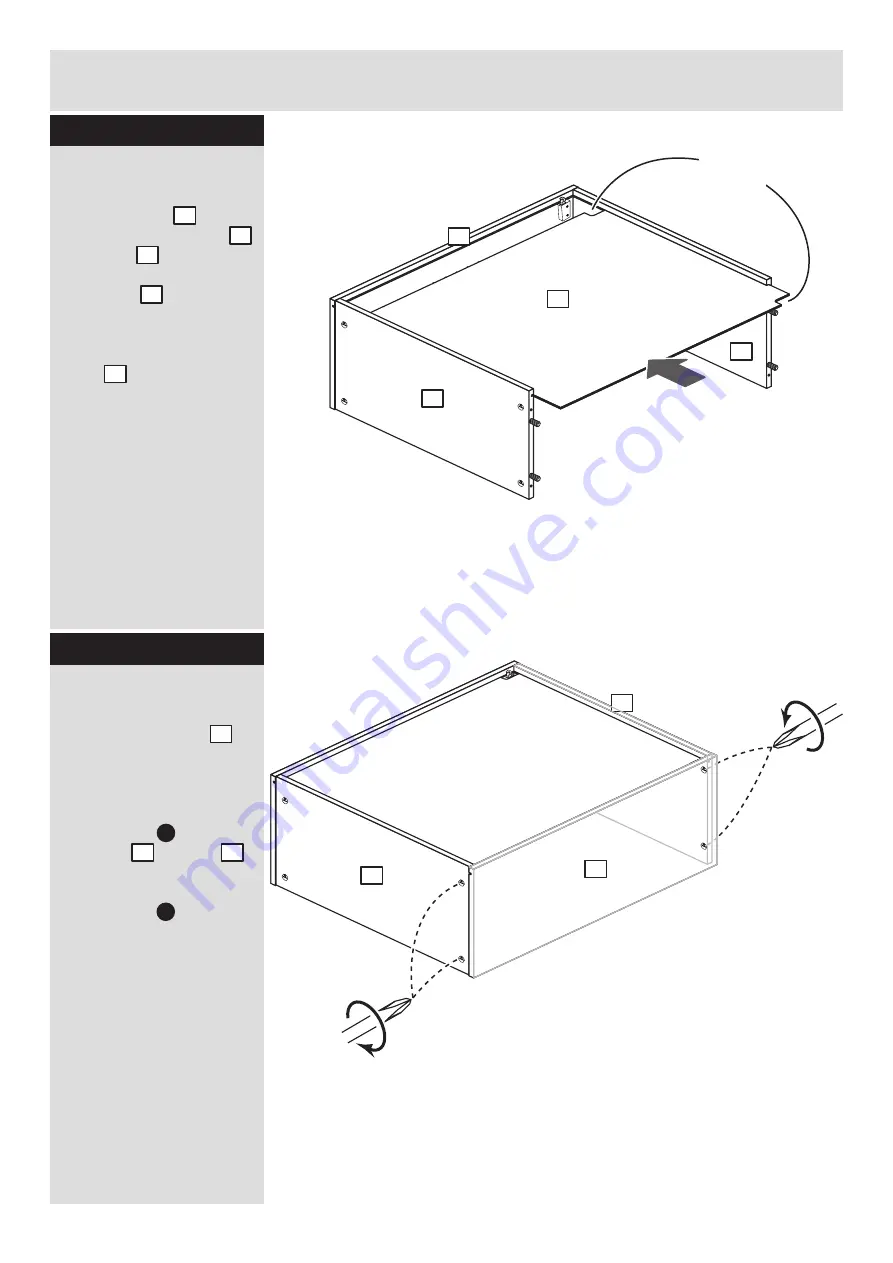
Fit the back
Slide the back along
the grooves in the top
and base and into
the groove of the right
end panel .
Important:
Make sure
that the cut-outs on the
back are at the top of
the assembly.
2
2
1
4
4
4
2
2
1
C
Fit the left end panel
Push left end panel
onto the assembly.
Use a screwdriver to
tighten the 4 large
locking nuts fitted to
the base and top .
Note:
Turn the large
locking nuts as far as
they will go - more than
1/2 a turn.
1
2
2
2
2
C
1
Cut-outs
at the top
Summary of Contents for 203/9309
Page 16: ...ALR2662...


