Assembly Instructions
16
Step
24
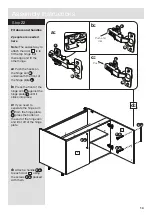
Fit the hinge covers
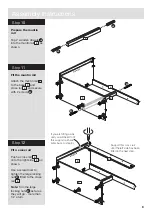
Push the hinge covers
onto the hinge arms .
Step
25
N
M
hyge
na
N
M
Pencil mark
Plinth
I c
I c
I d
Plinth
I e
I e
608/2345
608/2369
608/3784
608/3791
608/2352
Black Plinth Pack
Cream Plinth Pack
Grey Plinth Pack
Plum Plinth Pack
White Plinth Pack
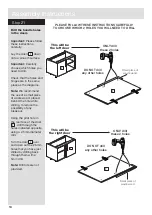
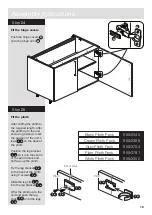
Fit the plinth
After cutting the plinth to
the required length, offer
the plinth up to the unit
and using a pencil, mark
the position of the unit’s
legs on the back of
the plinth.
Position the leg bracket
. so it is in the centre
of the pencil mark and
half way up the plinth.
Fix the leg bracket
to the back of the plinth
using 2 screws .
Slide the leg clip
into the leg bracket
Offer the plinth up to the
unit and push the leg
clips onto the legs
. .
I b
I b
I c
I c
I c
I d
I d
.
I e
Summary of Contents for 633/2710
Page 19: ......
Page 20: ...ALR2653...

