Seite 23
6.2 Unit installation
HygroMatik HPS units are designed for wall
mounting. The unit should be mounted on a
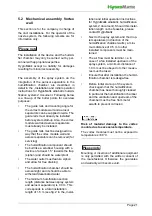
stable wall. Due to the high weight of the unit,
the wall bracket included in the scope of
delivery must be used.
If no suitable wall is available, this bracket
can be used for floor mounting as an alterna-
tive. In this case the bracket is assembled dif-
ferently and screwed to the floor.
The screws supplied are designed for mount-
ing on a concrete wall/floor. Should you find
other local conditions, please use appropri-
ately adapted mounting material.
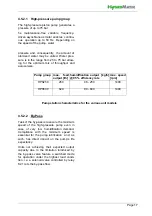
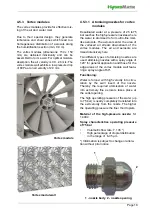
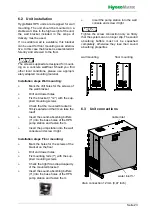
Installation steps Wall mounting:
»
Mark the drill holes for the screws of
the wall bracket
»
Drill and dowel holes
»
Fix the bracket (1*+2*) with the sup-
plied mounting screws
»
Check that the mounted bracket is
firmly seated and that it can take the
load!
»
Insert the sound-absorbing buffers
(3*) into the base holes of the HPS
pump station and fasten them
»
Insert the pump station into the wall
console and screw it tight
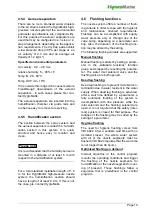
Installation steps Floor mounting:
»
Mark the holes for the screws of the
bracket on the floor
»
Drill and dowel holes
»
Fix mounting rails (1*) with the sup-
plied mounting screws
»
Check the tight fit and load capacity
of the mounted bracket!
»
Insert the sound-absorbing buffers
(3*) into the base holes of the HPS
pump station and fasten them
»
Insert the pump station into the wall
console and screw it tight
Tighten the screw connection only so firmly
that the system can no longer slip. The sound
absorbing buffers must not be squashed
completely, otherwise they lose their sound
absorbing properties
wall mounting floor mounting
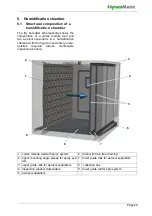
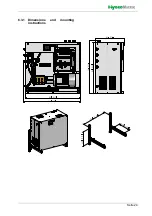
6.3 Unit connections
NOTICE
NOTICE
cable inlet
water inlet
¾“
drain connection 12 mm (0,47 Inch)


