3-11
ENGINE
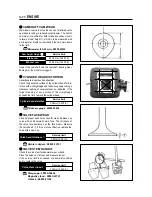
CAMSHAFT CAM WEAR
Worn-down cams are often the cause of mistimed valve
operation resulting in reduced output power. The limit of
cam wear is specified for both intake and exhaust cams
in terms of cam height
, which is to be measured with
a micrometer. Replace camshafts if found it worn down
to the limit.
Service limit
34.18 mm (1.3457 in)
33.55 mm (1.3209 in)
Cam height Height
Intake cam
Exhaust cam
Inspect the camshaft and the camshaft bearing wear,
damage, or the oil hole is clogged.
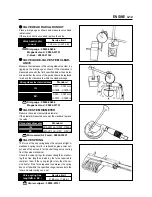
CYLINDER HEAD DISTORTION
Decarbonate in combustion chamber.
Check the gasketed surface of the cylinder head for dis-
tortion with a straightedge and thickness gauge, taking a
clearance reading at several places as indicated. If the
largest reading at any position of the straightedge
exceeds the limit, replace the cylinder head.
VALVE FACE WEAR
Visually inspect each valve face for wear. Replace any
valve with an abnormally worn face. The thickness of
the valve face decreases as the face wears. Measure
the valve head
. If it is out of specification, replace the
valve with a new one.
Service limit
0.05mm (0.002 in)
Cylinder head distortion
Service limit
0.5mm (0.02 in)
Valve head thickness
VALVE STEM RUNOUT
Check the valve stem for abnormal wear or bend.
Place the valve on V-blocks and measure runout.
If the service limit is exceeded or abnormal condition
exists, replace the valve.
Service limit
0.05mm (0.002 in)
Valve stem runout
Thickness gauge : 09900-20806
Micrometer (25~50 mm) : 09900-20202
Vernier calipers : 09900-20101
Dial gauge : 09900-20606
Magnetic stand : 09900-20701
V-block : 09900-21304


