INSTALLATION
4-14
HySpeed HT2000
Instruction Manual
19
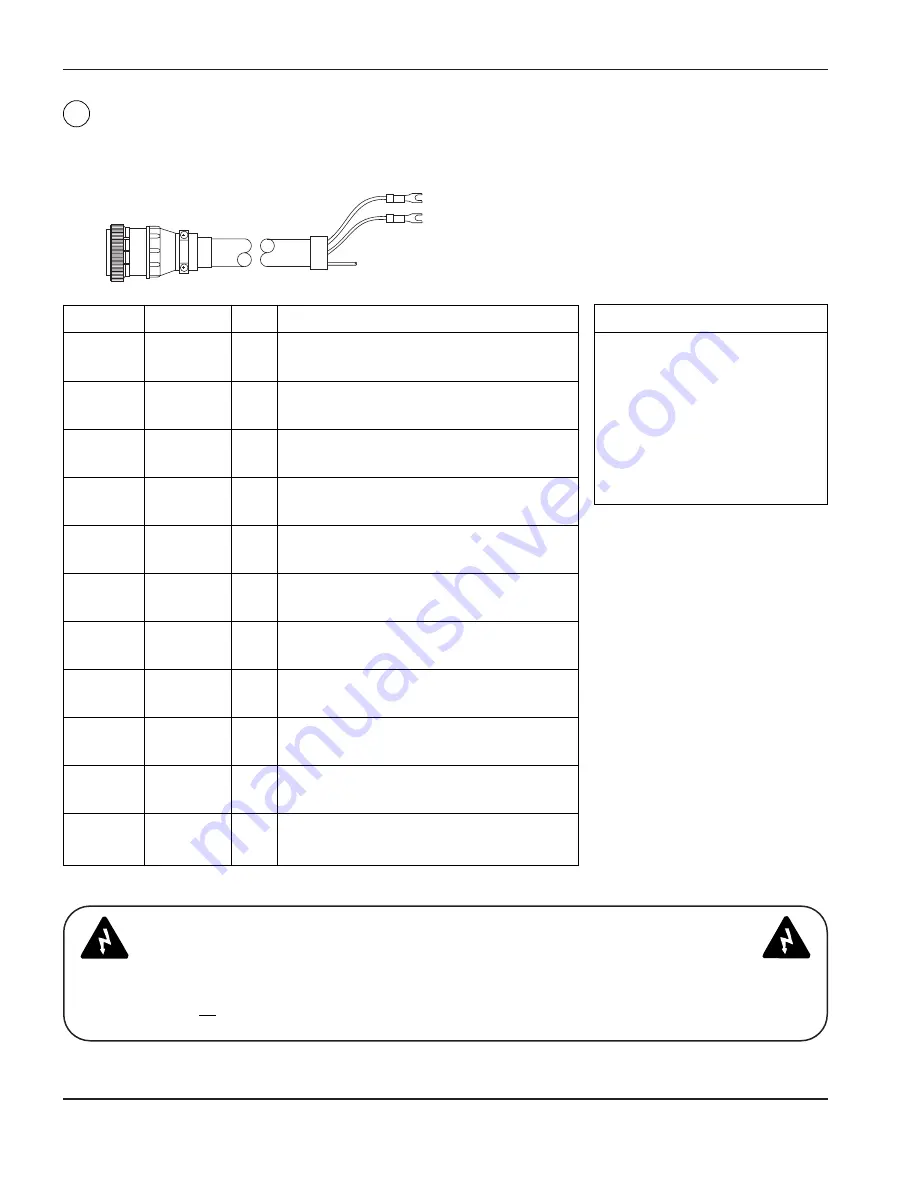
Machine I/O Interface Cable – PS to Machine Interface
Connect the plug end of the machine interface cable marked 1X6 to the receptacle on the rear of the power
supply marked MACHINE I/O 1X6 (Fig. 4-10).
* Signals are AC relays. DC relays available as an option from Hypertherm by ordering kit:128404
Figure 4-8
Machine I/O Interface Cable – PS to Machine Computer Interface
8
1X6
†WARNING
When installing or servicing the HT2000, AC or DC line voltages may be present on the UP,
DOWN and TRANSFER signals even if the power supply line disconnect switch is OFF. Make
certain that all line disconnect switches relating to the HT2000 system are OFF during
installation and when servicing.
From 1X6
Color
Lug
Signal
2
Yellow
2
Initial Height Sig. (OFF=Closed)
6
Black
6
Initial Height Com.
11
Shld
Shield
4
Orange
4
Auto Height Sig. (OFF=Closed)
8
Black
8
Auto Height Com.
13
Shld
Shield
34
Red
34
*†Lifter DOWN Load (DOWN=Closed)
29
Black
29
Lifter DOWN Line
23
Shld
Shield
35
Green
35
*†Lifter UP Load (UP=Closed)
30
Black
30
Lifter UP Line
24
Shld
Shield
36
Red
36
Upper Limit Switch ( OFF=Closed)
31
Blue
31
Upper Limit Switch
25
Shld
Shield
33
Red
33
Arc Voltage (1/50 Arc Voltage)
28
Yellow
28
Arc Voltage
27
Shld
Shield
9
Blue
9
Plasma START (START=Closed)
15
Black
15
Plasma START
14
Shld
Shield
37
Red
37
*†Arc Transfer (TRANSFER=Closed)
32
Green
32
Arc Transfer
26
Shld
Shield
1
White
1
Hold Ignition Sig. (HOLD=Closed)
5
Black
5
Hold Ignition Com.
10
Shld
Shield
3
Brown
3
Remote Power OFF (OFF= Momentary Closed)
7
Black
7
Remote Power OFF
12
Shld
Shield
21
White
21
Remote Power ON (ON=Momentary Closed)
22
Red
22
Remote Power ON
20
Shield
Shield
Part No.
Length
023841
6 ft (2 m)
023842
15 ft (4.6 m)
023843
25 ft (7.6 m)
023844
35 ft (10.6 m)
023845
50 ft (15 m)
023846
75 ft (23 m)
023847
100 ft (30.5 m)
023848
125 ft (38 m)
023849
150 ft (46 m)
023850
200 ft (61 m)
Summary of Contents for HT2000
Page 1: ...200 Volt Plasma Arc Cutting System Instruction Manual 802460 Revision 14 HySpeed HT2000 ...
Page 9: ......
Page 95: ...POST INSTALLATION 5 8 HySpeed HT2000 Instruction Manual 19 ...
Page 175: ...MAINTENANCE 8 30 HySpeed HT2000 Instruction Manual 22 ...
Page 235: ......
Page 236: ......
Page 237: ......
Page 238: ......
Page 239: ......
Page 240: ......
Page 241: ......
Page 242: ......
Page 243: ......
Page 244: ......
Page 245: ......
Page 246: ......
Page 247: ......
Page 248: ......
Page 249: ......
Page 250: ......
Page 251: ......
Page 252: ......
Page 253: ......
Page 254: ......
Page 255: ......
Page 257: ......
Page 259: ......
Page 261: ......
Page 262: ...Coolant Flow Diagram ...
Page 263: ......
Page 265: ...APPENDIX A a 2 HySpeed HT2000 Instruction Manual 20 ...
Page 267: ...b 2 HySpeed HT2000 Instruction Manual 19 ...
Page 268: ...HySpeed HT2000 Instruction Manual b 3 19 ...
Page 269: ...b 4 HySpeed HT2000 Instruction Manual 19 ...
Page 270: ...HySpeed HT2000 Instruction Manual b 5 19 ...
Page 272: ...HySpeed HT2000 Instruction Manual b 7 19 ...
Page 273: ...b 8 HySpeed HT2000 Instruction Manual 19 ...
Page 274: ...HySpeed HT2000 Instruction Manual b 9 19 ...
Page 275: ...b 10 HySpeed HT2000 Instruction Manual 19 ...
Page 279: ...APPENDIX D d 2 HySpeed HT2000 Instruction Manual 19 ...
Page 285: ...APPENDIX E e 6 HySpeed HT2000 Instruction Manual 19 ...


