HT4001
Instruction Manual
7-11
MAINTENANCE
11-96
WARNING
SHOCK HAZARD:
Always use caution when servicing a power supply when
plugged in and the covers are removed. Dangerous voltages exist within the
power supply which could cause injury or death.
INITIAL CHECKS
Before tracking down specific problems, do a visual check and verify proper voltages are
present at the power source, transformer(s) and power distribution board.
1.
Disconnect line power by turning main disconnect switch off.
2.
Using a Phillips head screwdriver, remove top plate, two side plates, front plate, and
rear plate of power unit.
3.
Inspect interior of power unit(s) for discoloration on PC boards, or other apparent
damage. If a component or module is obviously defective upon visual inspection,
remove and replace it before doing any testing. Refer to the
Parts List section to
identify parts and part numbers.
4.
If no damage is apparent, plug in the power supply unit(s), and apply power by
turning on the main disconnect switch.
5.
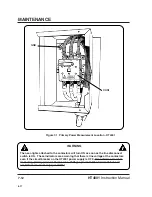
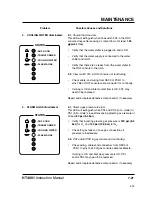
Measure the voltage at CON1 between L1, L2 and L3. Refer to Figure 7-1 for detail
of CON1. The voltage between any two of the three points at CON1 should be equal
to your supply line voltage. If there is a problem at this point, disconnect main power
and check connections, power cable, and fuses or circuit breaker at main power
disconnect box. Repair and/or replace defective component(s) if necessary.
For the 400 volt CE power supplies, measure the voltage between the U, V
and W terminals of TB5 in the EMI filter located on the top of the HT4001 power
supply. Refer to Appendix C. Also refer to the wiring diagram in
Section 8
, if
required. The voltage between any two of the three terminals should be equal to the
supply voltage. If there is a problem at this point, disconnect main power and check
connections, power cable, and fuses at line disconnect switch. Repair and/or replace
defective component(s) if necessary.
For the 200/220 - volt power supplies, measure the voltage between the L1, L2 and
L3 terminals of TB5 located on the top of the HT4001 power supply. Refer to
Appendix D. Also refer to the wiring diagram in
Section 8
, if required. The voltage
between any two of the three terminals should be equal to the supply voltage (200 or
220 VAC). If there is a problem at this point, disconnect main power and check
connections, power cable, and fuses at line disconnect switch. Repair and/or replace
defective component(s) if necessary.
Summary of Contents for HT4001
Page 1: ...Plasma Arc Cutting System Instruction Manual 802000 Revision 15 HT4001 EN50199 EN60974 1 ...
Page 239: ...e 2 ...
Page 240: ...e 3 ...
Page 241: ...e 4 ...
Page 242: ...e 5 ...
Page 244: ...e 7 ...
Page 245: ...e 8 ...
Page 246: ...e 9 ...
Page 247: ...e 10 ...
Page 257: ...KY ...
Page 258: ...KY ...
Page 259: ...KY ...
Page 260: ...KY ...
Page 261: ...KY ...
Page 262: ...KY ...
Page 263: ...KY ...
Page 264: ...KY ...
Page 268: ...KY ...
Page 269: ...KY ...
Page 270: ...KY ...

