Maintenance
5-56
HPR130XD Auto Gas –
806330
Automatic chopper and current sensor tests during power-up
Turn ON the system. When the preflow starts, the contactor will close and the system will automatically test the
chopper and current sensors. The system closes the contactor and turns on the chopper at 90% duty cycle. The
chopper will charge the surge capacitor on the I/O board (PCB 6). The current that charges the capacitor should be
between 10 amperes and 35 amperes. Error code 105 will display on the CNC screen if the current is < 10 amperes
or there is no feedback on current sensor 1 (CS1). Error code 103 will display on the CNC screen if the current is > 35
amperes.
Look at the error codes displayed on the CNC screen. If the error code shown is 003, the chopper and current sensors
passed the test and no further tests are required.
If error code number 103 or 105 is displayed, continue with the tests below.
troubleshooting low-current error code 105
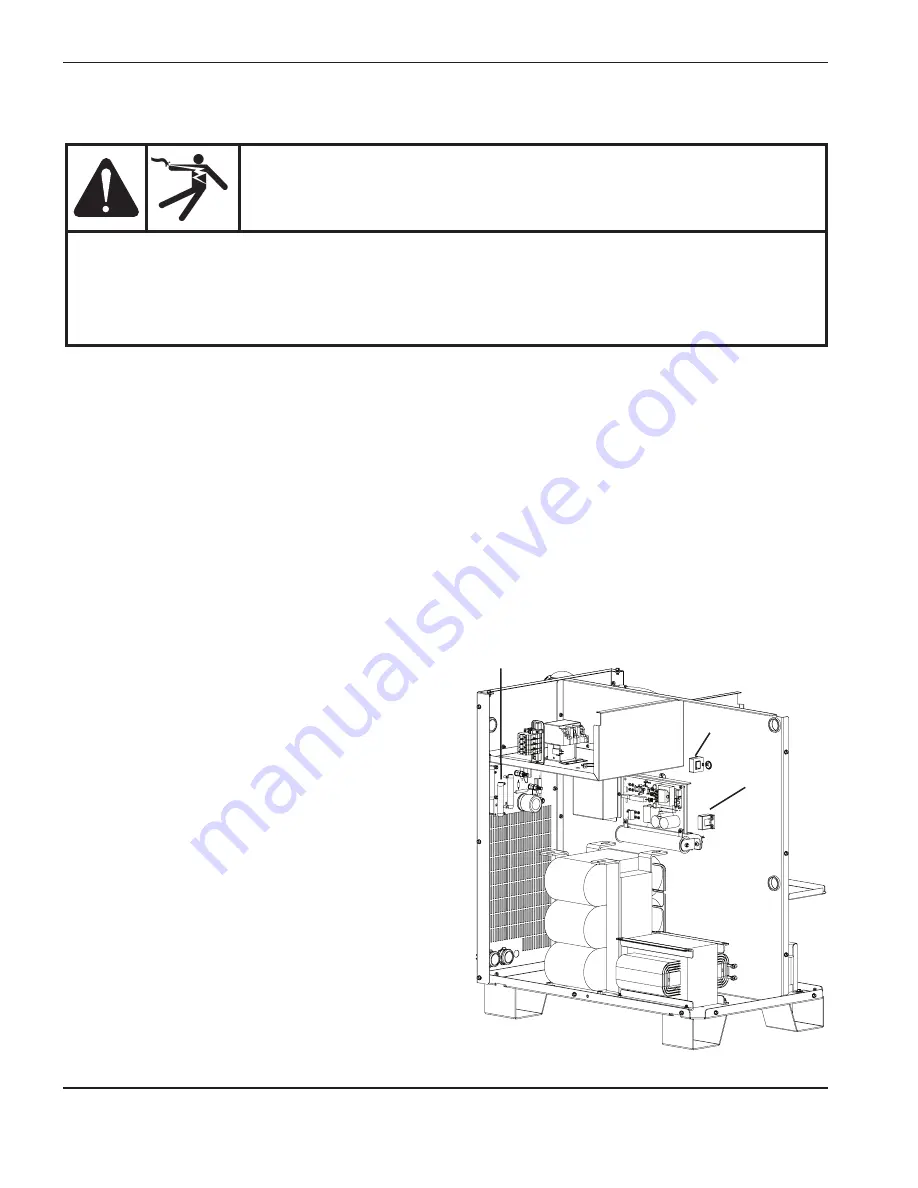
1. Verify that the current sensors (CS1 and CS3) and
cables are not damaged.
2. Exchange CS1 and CS3. Replace the faulty sensor if
the error code is not displayed again.
3. Use a meter to measure the resistance between wire
38 and wire 39 on PCB6. The value should increase
as the capacitor charges. Replace PCB6 if a constant
value is seen.
4. Check for loose wires or shorts from the chopper to
PCB6.
5. Check for 220 VAC to 1A, 1B, and 1C on the chopper
when the contactor closes.
chopper tests
CS1
CS3
I/O board
(PCB6)
wARNINg
SHock HAzARD
Use extreme care when working near the chopper modules. Each large electrolytic capacitor (blue-
cased cylinder) stores large amounts of energy in the form of electric voltage. Even if the power is
off, dangerous voltages exist at the capacitor terminals, on the chopper, and the diode heatsinks.
Never discharge any capacitor with a screwdriver or other implement; explosion, property damage
and/or personal injury will result.
Summary of Contents for HyPerformance HPR130XD
Page 1: ...HyPerformance Plasma HPR130XD Auto gas Instruction manual 806330 Revision 3 ...
Page 16: ...Table of Contents viii HPR130XD Auto Gas 806330 ...
Page 26: ...Specifications 2 2 HPR130XD Auto Gas 806330 ...
Page 38: ...Specifications 2 14 HPR130XD Auto Gas 806330 ...
Page 48: ...Installation 3 10 HPR130XD Auto Gas 806330 ...
Page 59: ...Installation HPR130XD Auto Gas 806330 3 21 1X1 J103 J300 Female Male 5 6 5 6 3X1 3X2 3X3 3X4 ...
Page 94: ...Installation 3 56 HPR130XD Auto Gas 806330 ...
Page 101: ...Operation HPR130XD Auto Gas 806330 Revision 2 4 7 Diagnostics screen ...
Page 102: ...Operation 4 8 HPR130XD Auto Gas 806330 Revision 2 Test screen ...
Page 103: ...Operation HPR130XD Auto Gas 806330 Revision 2 4 9 Cut chart screen ...
Page 152: ...Operation 4 58 HPR130XD Auto Gas 806330 Revision 2 ...
Page 236: ...7 4 HPR130XD Auto Gas 806330 Discrete output functionality ...
Page 294: ...Appendix B CNC Interface Protocol b 28 HPR130XD Auto Gas 806330 Revision 1 ...
Page 302: ...4 HPR130XD Auto Gas 806330 ...


