Powermax125
Service Manual 808070
191
9 – Power Supply Component Replacement
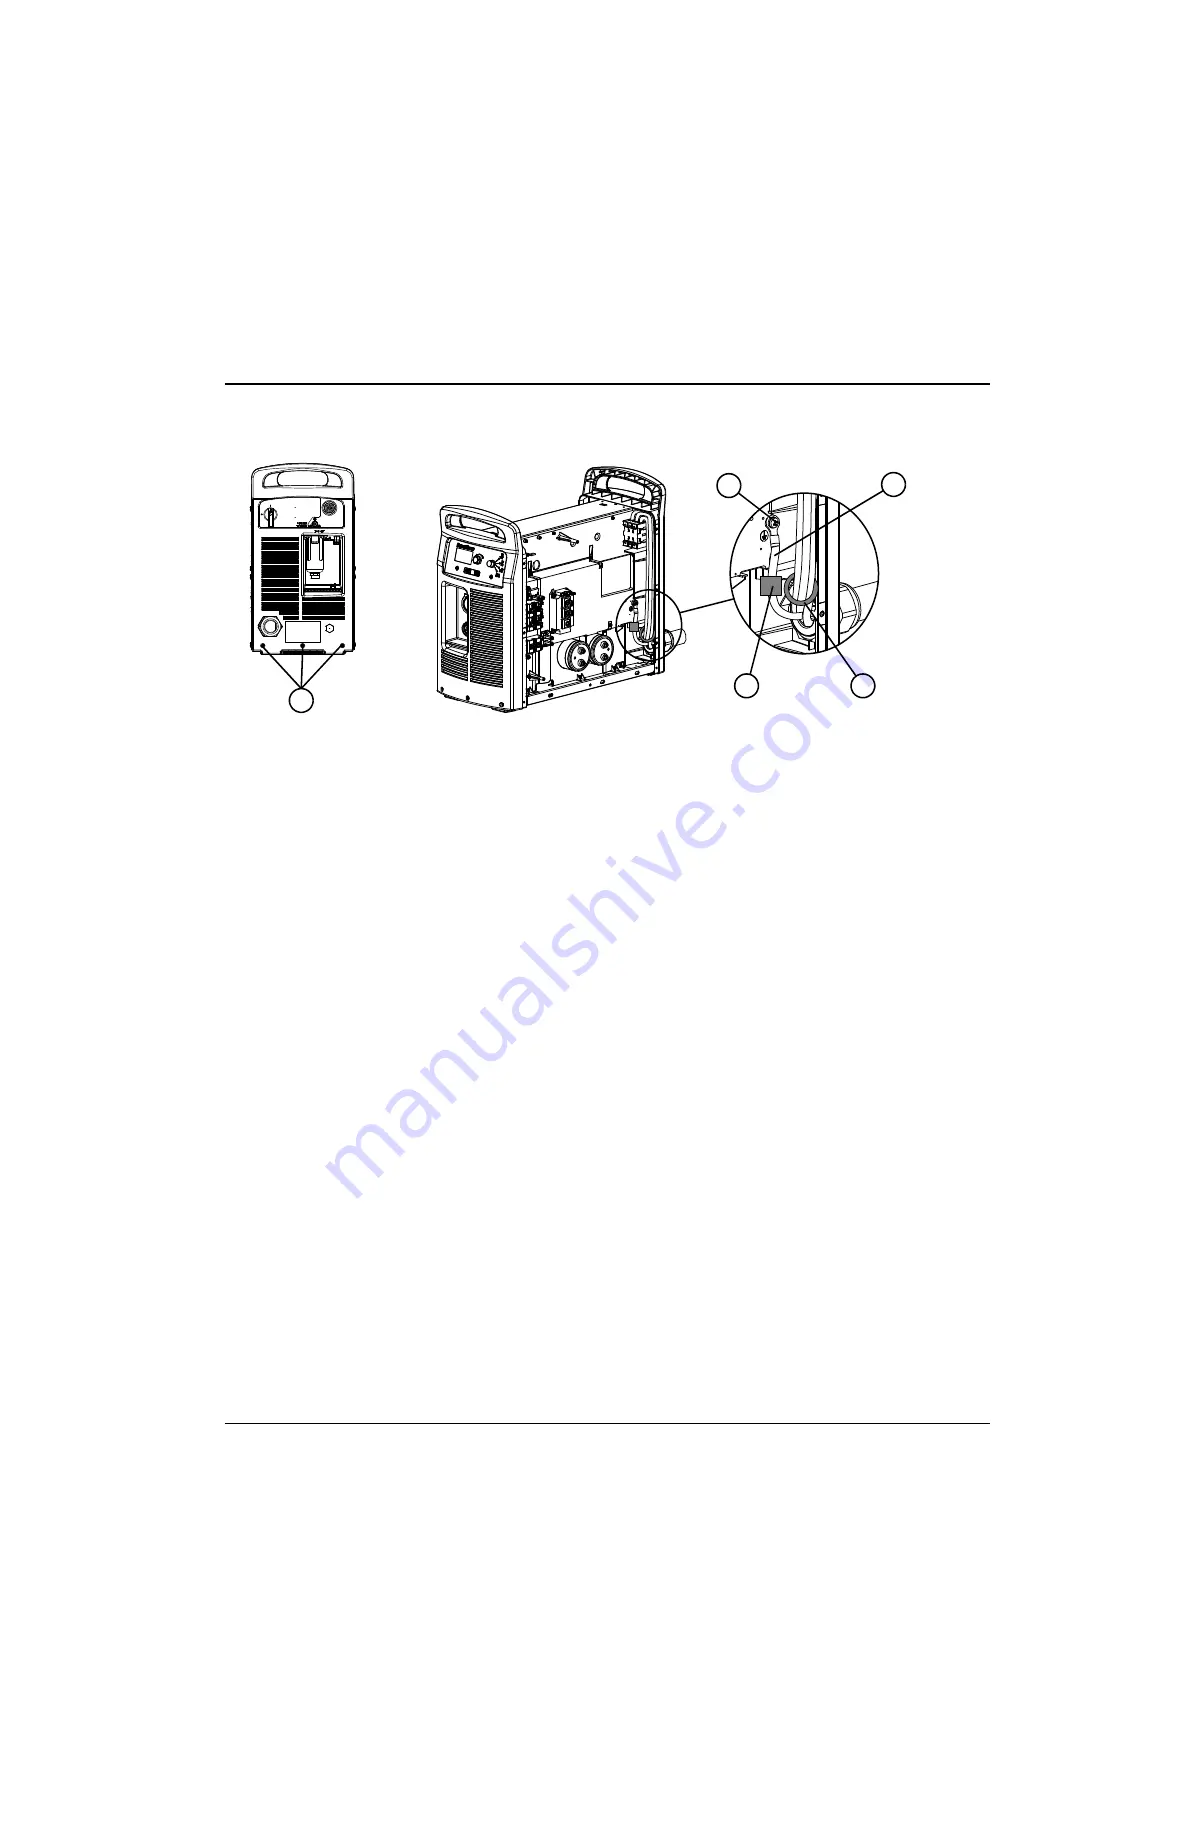
Figure 61
CE models have a ferrite core installed over the ground wire and over the power wires.
CSA models do not have ferrite cores. CCC models do not ship with a power cord; to
maintain CE certification, install power cord kit 228886.
4.
Slide the rear panel approximately 4.0 cm (1.5 inches) away from the power supply.
5.
Verify that power to the system has been turned OFF and disconnected. Loosen the set screws that secure the
3 power wires (L1, L2, L3) to the top of the power switch. (See
6.
Pull the wires straight up to remove them from the power switch.
7.
On the outside of the power supply, unscrew the power cord’s strain relief retention nut so that the wires move freely.
Slide the nut back along the power cord.
8.
CSA models:
Pull the wires through the strain relief from outside the power supply to remove the power cord.
CE models:
Pull the wires forward through the strain relief from inside the rear panel. (You cannot remove the wires
from outside the power supply because of the ferrite core installed on the 3 power wires.)
1
2
4
5
3
1
Rear panel mounting screws
2
Ground wire ferrite core (CE models)
3
Power wire ferrite core (CE models)
4
Ground wire
5
Screw


