© 2022 HyQuest Solutions
61
Configuration
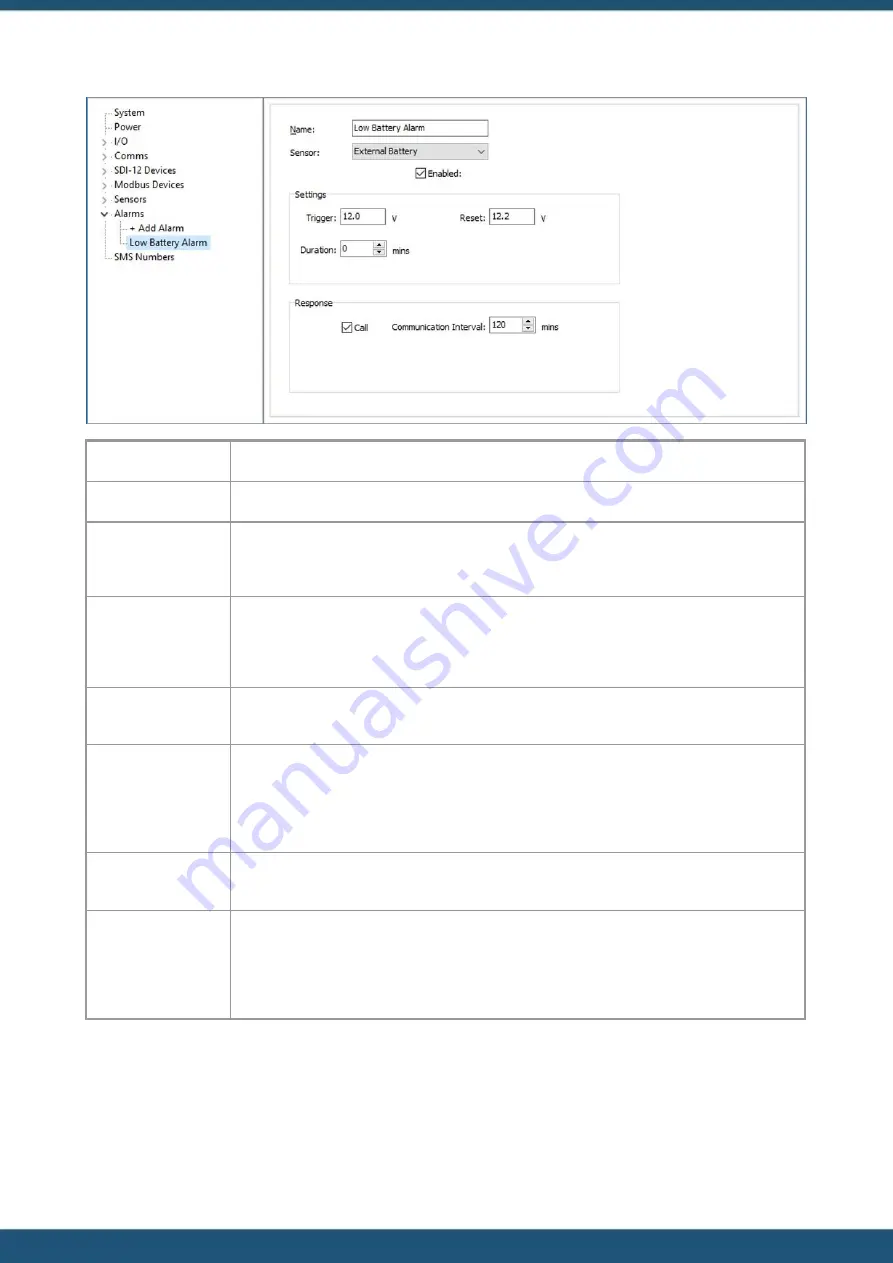
Name:
User friendly name of the alarm.
Sensor:
Choose the sensor which you want to activate the alarm for from the list.
Enable:
Tick the box in the Enable column to enable an alarm. If the
ENABLED
setting is unchecked, the
alarm will not have any effect on the logger operation. This is useful if the sensor driving the
alarm is not operating as expected.
Trigger:
Enter a value in engineering units that you want to use as the trigger point for the alarm.
When the scaled value crosses this threshold, the alarm will become active. The trigger
direction is determined by the reset level and whether it is less than the trigger (rising alarms
such as water level) or greater than the trigger (falling alarms such as battery voltage).
Reset:
Enter a value in engineering units that you want to use as the reset point for the alarm. When
the scaled value crosses this threshold when the alarm is active, it will be reset.
Duration:
This is the time in seconds to delay alarm activation. This can be used to implement alarm
hysteresis for analogue data sources that vary. If the data source is one of the internal
counters, then this time is used to totalise individual sample values. If the total over the given
alarm duration is above the trigger level then an alarm is generated. Typically, this feature is
used for rainfall alarms.
Call:
If this is checked (on by default) a call-in via the configured communications method will be
initiated as soon as the alarm becomes active.
Communications
Interval:
If this value is non-zero it can be used to increase the rate at which call-ins occur on scheduled
communication by over-riding the comms scheduler’s preconfigured normal and alarm
intervals. The comms scheduler will use the smallest non-zero interval value from its own or
those of any currently active alarms. This is useful for reporting data more often during an
event.


![Lambrecht power[cube] 30.95800.015000 Manual preview](http://thumbs.mh-extra.com/thumbs/lambrecht/power-cube-30-95800-015000/power-cube-30-95800-015000_manual_3388101-01.webp)


