l
External First
: When an audio accessory is
connected, the radio uses the external speaker;
otherwise, it uses the internal speaker.
l
Only Internal
: The radio uses only the internal
speaker.
l
Only External
: The radio uses only the external
speaker.
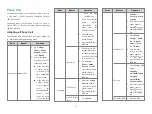
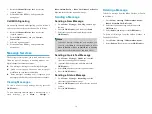
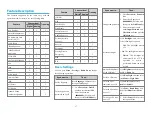
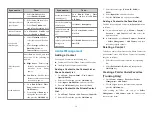
One Touch Call/Menu
The One Touch Call/Menu feature allows you to press the
preprogrammed
One Touch Call/Menu
key to quickly
access a service assigned by your dealer. The services
available for assignment are as follows:
Service
Type
Description
Voice and
Data
Services in
Conventional
Mode
Analog Channel:
Call to a 5-tone or 2-tone contact.
Digital Channel:
l
Group call, quick text or GPS message
to a group contact.
l
Private call, radio check, remote
monitor, radio enable, radio disable ,
quick text message, alert call, or GPS
message to a private contact.
l
All call to an all call contact.
Note: To initiate a one touch call on the
digital channel in conventional mode, you
need to press the
PTT
key after pressing
the preprogrammed
One Touch
Call/Menu
key.
Service
Type
Description
Voice and
Data
Services in
Trunking
Mode
l
Private
call,
emergency
call,
preemptive
call ,
text
or
status
message to a private contact.
l
Group call, broadcast call, emergency
call, preemptive
call, preemptive
broadcast call, emergency broadcast
call, text or status message to a group
contact.
l
All call to an all call contact.
Menu
Direct access to the designated menu.
Check with your dealer for specific
menus.
If the preprogrammed
One Touch Call/Menu
key is
a numeric key, you need to go to
Menu
>
Settings
>
Radio Set
>
Keypad Mode
, and then select
One
Touch Call/Menu
.
Scan
In conventional mode, the Scan feature allows you to
listen to activities on other channels, keeping track of
your team members. With this feature enabled, the radio
searches the scan list preset for the current channel and
stays on a channel with activities.
Turning the Scan Feature On or Off
To turn the Scan feature on or off, go to
Menu
>
Scan
>
Scan On/Off
, and then select
On
or
Off
.
With the Scan feature enabled, the radio displays
, and
the LED indicator slowly flashes orange. When detecting
activities on a channel, the radio stays on it, and the LED
indicator glows green.
If you do not want to listen to the activities on a
channel,
press
the
preprogrammed
Nuisance
Temporary Delete
key to temporarily remove the
channel from the scan list.
Adding a Channel to a Scan List
1. Go to
Menu
>
Scan
>
Scan List
, and then select the
required scan list.
2. Select
Edit/View
, and then select
Add CH
.
3. Select the required channel.
Setting a Priority Channel
You can set a channel on the scan list as priority channel
1 or 2, which will be scanned with priority than a non-
priority channel.
To set a priority channel, do as follows:
1. Go to
Menu
>
Scan
>
Scan List
, and then select the
required scan list.
2. Select
Edit/View
, and then select the required
channel.
3. Select
Edit Prio CH
>
Set PrioCH-1
/
Set PrioCH-2
.
20

