background image


29 

Method 

Operation 

Call Interface 

Initiate from the dial 
pad 

1. 


Tap 

  in the home screen to 

enter 

Contacts

, and then tap   

  to open the dial pad.   

2. 


Dial the desired private contact 

number, and tap 

  to 

initiate a full-duplex voice private 
call. 


Initiate from the dial 
records 

1. 


Tap 

  in the home screen to 

enter 

Contacts

, the dial records 

are displayed. 

2. 


Swipe up or down to find the 
private contact which you 
initiated a full-duplex voice 
private call before. 

3. 


Tap the contact and initiate a 
full-duplex voice private call. 

Ending a Full-duplex Voice Private Call 

Tap 

  to end the call. 

7.2.2


Half-duplex Voice Private Call 

Half-duplex voice private call refers to the call established between two terminals (P-PoC6000 client and 
P-PoC6000 client, P-PoC6000 client and SmartOne Dispatch). After the private call is established, only 
one party can speak at the same time. 

Answering a Half-duplex Voice Private Call 

Upon receiving a half-duplex voice private call, you need to tap 

  to answer. 


Tap 

  to reject the call. 

Summary of Contents for VM780

Page 1: ...Body Worn Camera USER MANUAL ...

Page 2: ...rld of Hytera and thank you for purchasing this product To derive optimum performance from the product please carefully read this manual before use This manual is applicable to the following product VM780 4G Body Worn Camera MPTT ...

Page 3: ...areas protect the exclusive rights of the Company with respect to its computer programs The purchase of this product shall not be deemed to grant either directly or by implication any rights to the purchaser regarding the Company s computer programs The Company s computer programs may not be copied modified distributed decompiled or reverse engineered in any manner without the prior written consen...

Page 4: ...y the qualified laboratory the product is in compliance with the essential requirements and other relevant provisions of the following directives 2006 66 EC 2011 65 EU 2012 19 EU 2014 53 EU Please note that the above information is applicable to EU countries only ...

Page 5: ...at all items listed below are received If any item is missing or damaged please contact your dealer Item Qty Item Qty Body Worn Camera 1 USB Cable 1 Battery 1 Power Adapter 1 Belt Clip 1 User Manual 1 Pictures listed in this manual are for reference only ...

Page 6: ...rned off lasts for two seconds Glows green The product is fully charged The product is being turned on Flashes orange rapidly The remaining capacity of the TF card is less than 2 GB lasts for three seconds Flashes red slowly Flashes once every second The product is recording a video Flashes once every five seconds The battery runs low Please recharge or replace the battery in time Flashes orange s...

Page 7: ...ot and lock the flip cover and slot cover as shown in the following figure 3 2 Attaching the Battery Use only the Hytera standard or optional battery Polarity reverse or use of other batteries may result in explosion and fire hazards Attach the battery according to the steps shown in the following figure To remove the battery turn off the product and reverse the attaching steps ...

Page 8: ...ttaching the Belt Clip Attach the belt clip according to the steps shown in the following figure To remove the belt clip reverse the attaching steps 3 4 Charging the Product To charge the product do as follows ...

Page 9: ...8 The LED indicator on the product tells its charging status see 2 2 LED Indicators for details ...

Page 10: ...d extend the standby time 1 Wipe down from the status bar to open the notification center and tap 2 Tap to enable the cellular network or tap to disable the cellular network 4 2 2 WLAN Connect to a WLAN Wireless Local Area Networks to visit the Internet or shared files from other network devices To use the WLAN do one of the following Enable WLAN through the shortcut switch a Swipe down from the s...

Page 11: ... If the network displays with a icon enter the password and tap Connect The product automatically saves WLAN information upon successful connection and automatically connects to the network when WLAN is switched on ...

Page 12: ...on Meaning Airplane mode is enabled WLAN connection is established Location information is enabled Cellular network is enabled BT feature is enabled No SIM card is inserted BT connection is established The battery power is full The battery is being charged 4 3 2 Notifications and Shortcuts New notifications display shortly on the top of screen or display constantly in the middle of screen till you...

Page 13: ...cut switches open settings and view or clear notifications 4 3 3 Sleep and Wakeup Sleep In power on mode press the On Off key to enter sleep mode You can also set the sleep time in Settings System Settings when the sleep time is up the product enters sleep mode automatically Wakeup When the screen goes off press any key to wake up the screen ...

Page 14: ...1 3 Airplane Mode To avoid signal interferences while you are on a plane please turn off the product or turn on the airplane mode In airplane mode the product disables data or WLAN network and you cannot use the voice video and data services If the airline company permits you can manually enable BT or WLAN feature Tap System Settings and toggle the following the airplane mode to enable it You can ...

Page 15: ... include Never 10s 20s and 30s 5 3 Sound 5 3 1 Volume Adjustment Tap System Settings and drag the slide blocks following media volume and ring volume in the Sound Settings to adjust volume 5 3 2 Ring Mode The product is set to ring mode by default You can adjust the ring volume according to actual needs 5 4 BT You can pair the product with other BT devices to transfer data through BT feature 1 Tap...

Page 16: ...to determine location Device only Use GPS to determine location You can also view the applications which have recently requested the location information 5 7 Date Time After connected to the network the product can synchronize the date time time zone and time format of the system automatically via the network Tap Date Time and tap the following Set Automatic time zone the product will use the time...

Page 17: ...o an event that led them to press the record button while post recording can add a period time of footage after the recording is deactivated Tap Pre recorded settings or Delay setting to enter the respective feature Then tap or following Pre record or Post rec to enable or disable the feature The feature is disabled The feature is enabled Optional You can set the pre or post recording time from 10...

Page 18: ...ain and loops the process Tap Split time setting and select from 5 min 10 min or 15 min 5 8 8 Antibanding When the product is used under indoor fluorescent lamp its LCD screen may have flickers during video recording or take photos with stripes because of the frequency disparity between the light sensor exposure and the local AC power To fix the flickers set the antibanding to Auto and it will adj...

Page 19: ...able it 5 10 Accounts Tap Accounts to view information such as user name user number unit name and unit number 5 11 About Device Tap About Device to view information such as software version device name device ID serial number storage capacity and available space ...

Page 20: ...udio recording the LCD screen displays the recording time During audio recording long press the Audio Recording key again to finish recording Key recording during audio recording press the Audio Recording key to mark the audio as key recording or unmark a key recording 6 3 Taking Photos Press the Photo Taking key to take a photo 6 4 Taking Photos during Video Recording During video recording press...

Page 21: ... will start key video recording and send an emergency alarm message to the control center you can set emergency contact for the control center see 7 1 4 3 Setting Call Options to seek for help Disabling Emergency Mode In emergency mode long press the Emergency key to disable emergency alarm The product will stop key video recording ...

Page 22: ... log in to the P PoC6000 server through MPTT client of P PoC6000 from the product 1 Tap to enter the login interface 2 Tap and set the IP address port number and domain name of the main server 3 Save the settings and return to the login interface 4 Type the user name and password and tap Login Obtain the user name and password from the administrator of your network management system NMS ...

Page 23: ...ing or deleting the dial records private contacts and group contacts in the Contacts The private contacts and group contacts are managed via the NMS The NMS pushes information of updated private contacts and group contacts to the MPTT From the group contacts and private contacts click a group number or private number to view the group call details including group number group type call video call ...

Page 24: ...iewing personal information setting call options setting video options viewing version information switching account and quitting Tap to enter Settings 7 1 4 1 Viewing User Status You can view the user status in Settings indicates user is online indicates user is offline 7 1 4 2 Viewing Personal Information Tap the user status icon and enter the user information interface You can view the user num...

Page 25: ...ergency call priority foaoroacsu mode emergency number and emergency group number 1 Tap Call options 2 Set the related parameters Parameter Meaning Setting Emergency call priority Priority of the emergency call initiated through the Set this parameter ...

Page 26: ...is set to a group call type then the emergency call is an emergency half duplex voice private call If only emergency group number is set and the priority is set to a group call type then the emergency call is a corresponding group call If only emergency group number is set and the priority is set to a private call type then the emergency call is an emergency voice group call according to actual ne...

Page 27: ...actual number Emergency group number The associated group number to which an emergency call is dialed by tapping in the home screen or by pressing the Emergency key It must be configured with the Emergency call priority Set this parameter according to actual number 3 Tap Save 7 1 4 4 Setting Video Options You can set the video information such as video resolution 1 Tap Video options 2 Set the vide...

Page 28: ...27 7 1 4 5 Viewing Version Information Tap Version information 7 1 4 6 Switching Account 1 Tap Switch account 2 Tap OK to return to the login interface 7 1 4 7 Quitting 1 Tap Quit ...

Page 29: ...rty see 7 1 4 3 Setting Call Options for details Foaoroacsu mode Upon receiving a call you need to tap to answer Tap to reject the call Non foaoroacsu mode Upon receiving a call you can answer the call without any operations Initiating a Full duplex Voice Private Call Method Operation Call Interface Initiate from the private contacts 1 Tap in the home screen to enter Contacts and then tap Privates...

Page 30: ...ou initiated a full duplex voice private call before 3 Tap the contact and initiate a full duplex voice private call Ending a Full duplex Voice Private Call Tap to end the call 7 2 2 Half duplex Voice Private Call Half duplex voice private call refers to the call established between two terminals P PoC6000 client and P PoC6000 client P PoC6000 client and SmartOne Dispatch After the private call is...

Page 31: ... half duplex voice private call The called party and the call duration are displayed in the interface Initiate from the dial records 1 Tap in the home screen to enter Contacts the dial records are displayed 2 Swipe up or down to find the private contact which you initiated a half duplex voice private call before 3 Tap the contact and initiate a half duplex voice private call Applying for or Releas...

Page 32: ...acts 1 Tap in the home screen to enter Contacts and then tap Groups 2 Swipe up or down to find the desired group contact or tap to search for the contact 3 Tap the contact and enter the group call details 4 Tap to initiate a voice group call The called party and the call duration are displayed in the interface Initiate from the dial pad 1 Tap in the home screen to enter Contacts and then tap to op...

Page 33: ...adcast call is established the members of the group can only listen and cannot talk 7 2 5 Emergency Voice Call Emergency voice call refers to the call initiated by the terminal P PoC6000 client or SmartOne Dispatch to a specified number private or group contact to seek for help from the control center It has the highest priority and can override other calls of lower priority Answering an Emergency...

Page 34: ...ontact 3 Tap the contact and enter the group call details 4 Set the Default call level as Emergency call 5 Tap to initiate an emergency voice group call Initiate from the private contacts 1 Tap in the home screen to enter Contacts and then tap Privates 2 Swipe up or down to find the desired private contact or tap to search for the contact 3 Tap the contact and enter the local call details 4 Set th...

Page 35: ... Video Private Call Video private call refers to the two way video call with or without voice established between two terminals P PoC6000 client and P PoC6000 client P PoC6000 client and SmartOne Dispatch SmartOne Dispatch and SmartOne Dispatch After the two way voice call with voice is established both parties can speak and see each other at the same time After the two way video call without voic...

Page 36: ...d enter the local call details 4 Set the Default video call as With sound or Without sound 5 Tap to initiate a video private call The called party call duration and video are displayed in the interface Initiate from the dial pad 1 Tap in the home screen to enter Contacts and then tap to open the dial pad 2 Dial the desired private contact number and tap to initiate a video private call Initiate fr...

Page 37: ...deo of the talk right party Answering a Video Group Call Upon receiving a video group call you can answer the call without any operations Initiating a Video Group Call Method Operation Call Interface Initiate from the group contacts 1 Tap in the home screen to enter Contacts and then tap Groups 2 Swipe up or down to find the desired group contact or tap to search for the contact 3 Tap the contact ...

Page 38: ...old the PTT key to apply for talk right and speak release the PTT key to release talk right Ending a Video Group Call Tap to end the call 7 3 3 Video Pulling By video polling the SmartOne Dispatch initiates a one way video session to the P PoC6000 client and pulls the video of the P PoC6000 client to the SmartOne Dispatch 7 3 4 Video Forwarding Forwarding Video to Group By forwarding video to grou...

Page 39: ...he SmartOne Dispatch to the terminals in the group When the video is pushed to the group the members in the group can only see the video pushed by the SmartOne Dispatch and cannot apply for talk right Pushing Video to Terminal By pushing video to terminal the SmartOne Dispatch initiates a one way video session without voice to a terminal P PoC6000 client or SmartOne Dispatch and push the local vid...

Page 40: ...up contact or tap to search for the contact 3 Tap the contact and enter the group call details 4 Set the Default call level as Emergency call 5 Tap to initiate an emergency video group call Initiate from the private contacts 6 Tap in the home screen to enter Contacts and then tap Privates 7 Swipe up or down to find the desired private contact or tap to search for the contact 8 Tap the contact and ...

Page 41: ...o apply for talk right and speak release the PTT key to release talk right Ending an Emergency Video Call Tap to end the call 7 3 7 Real time Uploading This feature allows the BWC to upload the photos or videos to the designated dispatcher in real time 1 Wipe left from the home page the following interface appears 2 Tap and the following interface appears ...

Page 42: ...mode and then tap to record a video Tap to switch to photo taking mode and then tap to take a photo 4 In the following interface tap to upload the photo or video tap to cancel the uploading 7 4 SMS MMS Short message service SMS is a type of data service SMS is divided into text message and status message ...

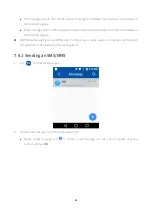
Page 43: ...minals and between a terminal and a group Multimedia messaging service MMS refers to the pictures videos audios or other files sent between two terminals or between a terminal and a group 7 4 1 Sending an SMS MMS 1 Tap to enter the messages 2 Create a new message or enter an existed session Create a new message tap to create a new message you can select a private or group contact and tap OK ...

Page 44: ...nt in the text box and tap to send text message or tap and select from Picture Video file Other file Status or Audio file to choose corresponding files and tap Send to send the multimedia content 7 4 2 Viewing an SMS MMS 1 Tap to enter the messages 2 Tap an unread message to view it ...

Page 45: ...elete or multi select message contents set sessions as top or cancel and mark messages as unread or read 7 4 3 1 Managing Contents 1 Tap to enter the messages 2 Tap a session 3 Long press a content and select from Transform Delete or Multi select ...

Page 46: ...r the messages 2 Long press a session and select from Set Top Cancel Top Mark as Unread Mark as Read or Delete 7 5 Other Services 7 5 1 Monitoring The SmartOne Dispatch can monitor a specified P PoC6000 client or group When the P PoC6000 client ...

Page 47: ...tch can revive a stunned P PoC6000 client and restore its features A revived P PoC6000 client can perform services normally 7 5 6 Positioning The location server subscribes the location information of the P PoC6000 client and the P PoC6000 client reports its location information to the location server in real time and then the SmartOne Dispatch subscribes the location information of the P PoC6000 ...

Page 48: ...eos Audios Photos 1 Tap in the home screen enter the password 123456 as initial password and tap OK 2 Tap Video Audio or Picture to enter the playback list of corresponding media 3 Tap the video audio or photo to play back ...

Page 49: ... videos to your PC For details on the operations refer to the BWC Manager Operation Guide in the BWC Manager folder To connect the product with your PC do as follows If you have purchased the multi unit charger you can also perform data acquisition through the charger For details refer to the related user manual ...

Page 50: ...uct cannot record video or audio The TF card is full Switch to disk mode and delete all data from the TF card after exporting them The product cannot take photo The product cannot pre record or extend record the video The pre or extend recording feature is not enabled Enable the feature The product does not turn on the IR LED automatically when recording video in dark environment The IR LED featur...

Page 51: ...50 Phenomena Analysis Solution off If the above solutions cannot solve your problems or you may have some other queries please contact us or your local dealer for more technical support ...

Page 52: ... Attach the USB port cover when the USB port is not in use Product Cleaning Power off the product before cleaning Make sure the product is completely dry before use Clean up the dust and fine particles on the product s surface with a clean and dry lint free cloth or a brush regularly Use neutral cleanser and a non woven fabric to clean the keys and surface after long time use Do not use chemical p...

Page 53: ...e the accessories specified by the Company only otherwise we shall not be liable for any losses or damages arising out of the use of any unauthorized accessories Contact your local dealer for the optional accessories of the product ...

Page 54: ... Communications Corporation Limited 2019 Hytera Communications Corporation Limited All Rights Reserved Address Hytera Tower Hi Tech Industrial Park North 9108 Beihuan Road Nanshan District Shenzhen People s Republic of China Postcode 518057 http www hytera com ...

Reviews: