


HYUNDAI Video Door Phone
| HA-201 / HAC-201
14|15
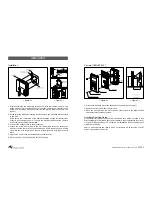
OPERATIONS
How to use buttons & adjustment on the unit
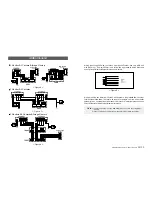
Communicating Function
1. A visitor presses the
“Call”
button on the outside camera unit.
The monitor will sound a “chime” tone two times to announce that a visitor is at
the door. (The picture on the monitor screen will appear)
2. Lift the handset to speak to the visitor.
3. Hang up the handset to terminate the conversation or if more than 30seconds
elapses after you lift the handset, the image on the monitor screen will
disappear.
4. If you install more than one monitor, each monitor will sound a “chime” tone two
times respectively after a visitor presses the
“Call”
button on the outside camera
unit. (The same picture on each monitor screen will appear). If you lift the
handset or master monitor for response, the image on the secondary monitor
will turn off after 30 seconds automatically.
5. The picture on the monitor screen will be replaced after another visitor presses
the
“Call”
button of the secondary camera while you speak to previous caller at
the master camera.
If you press
“Monitor”
button ( ) again, your call returns to the previous caller at
the master camera.
Monitoring Function
1. Press
“Monitor”
button ( ) to see the camera viewing area.
2. If you install more than two cameras, it will function in the following way :
Press
“Monitor”
button to see the master camera viewing area and then press
“Monitor”
button again to see the secondary camera viewing area.
3. To turn off the monitor screen, hang up the handset or press
“Volume”
button ( )
Operating the Electric Door Release
1. After speaking with the visitor (and if you have installed an electronic door
locking system), you can press the
“Door release”
button(
) to electronically
unlock the door.
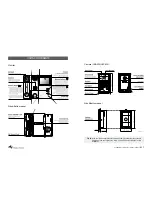
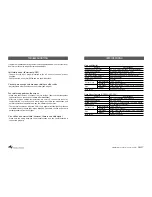
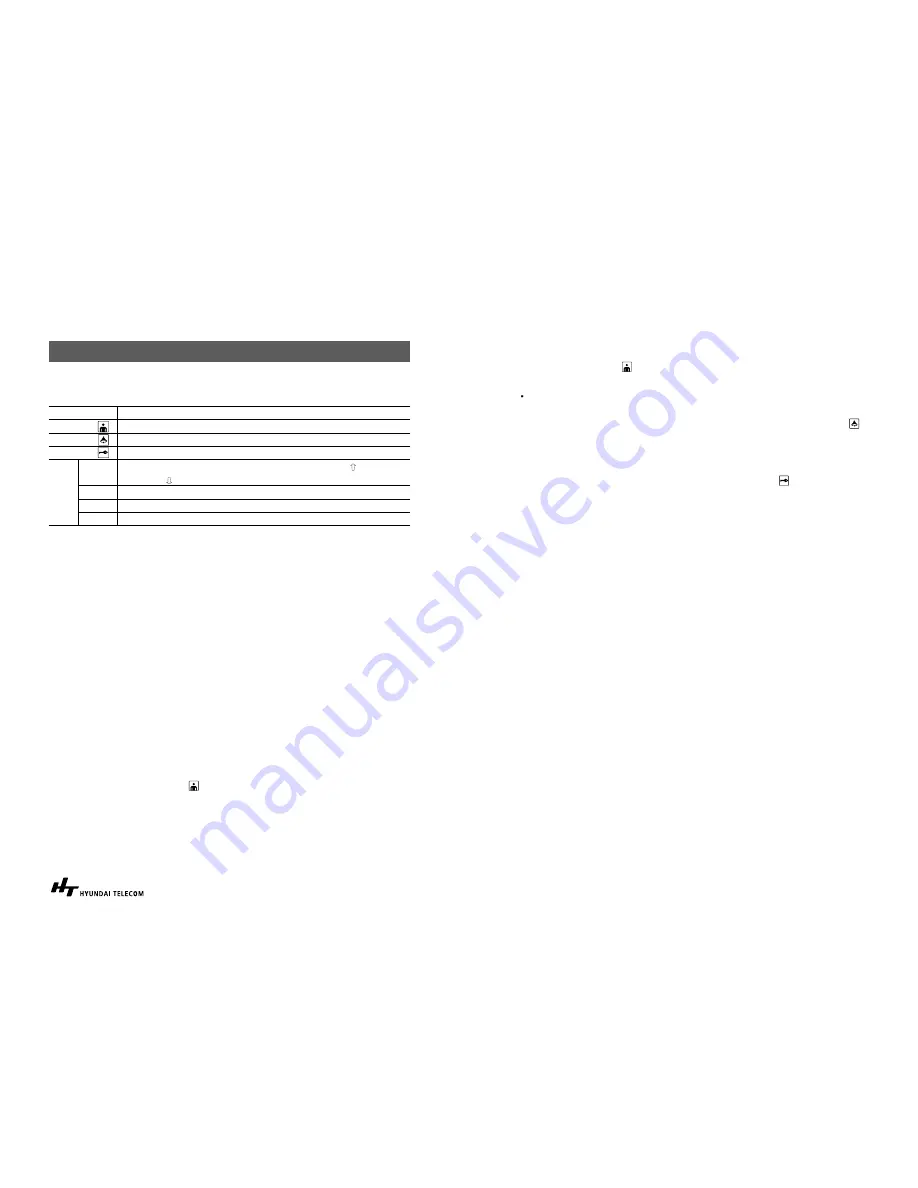
BUTTON
DESCRIPTION
Monitor
Turn on screen, switch cameras
Volume
Volume adjustment, Turn off screen
Door Door
release
Time
Time Adjustment (Enter or Move: Use Time button,
:Use Record
button,
:Use Review button)
Rec
Record manually.
Review
Review recorded pictures
Away
Set or Reset “Absence” mode or quit the review
HVM-
200B/C
Summary of Contents for HA-201
Page 12: ...Memo ...


