background image

Page 27 

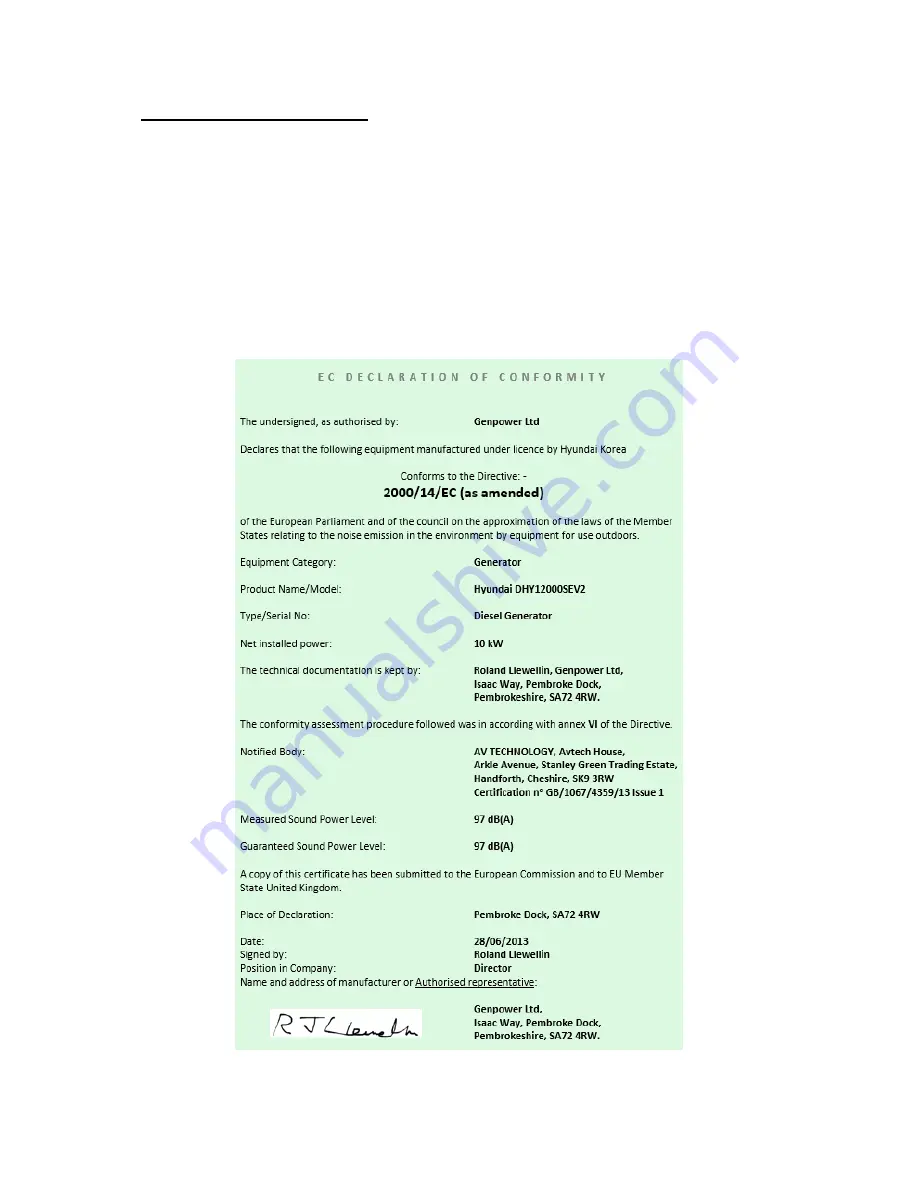
13. DECLARATIONS OF CONFORMITY

13.1.


Genpower Ltd confirms that these Hyundai products conform to the following CE 

Directives; 

13.1.1.


2006/42/EC Machinery Directive 

13.1.2.


2004/108/EC EMC Directive 

13.1.3.


2000/14/EC Noise Emissions Directive 

13.1.4.


97/68/EC NRMM Emissions Directive 

13.1.5.


2006/95/EC Low Voltage Directive 

Summary of Contents for DHY12000SEV2

Page 1: ...DIESEL GENERATOR Model DHY12000SEV2 User Manual ...

Page 2: ...REPARATION for STARTING 11 14 4 OPERATING THE GENERATOR 15 16 5 LOAD 16 17 6 STOPPING THE MACHINE 17 18 7 PERIODIC MAINTENANCE 18 21 8 LONG TERM STORAGE 22 9 TROUBLE SHOOTING 23 10 SPECIFICATIONS 24 11 SERVICE RECORD SHEET 25 12 GENPOWER CONTACT DETAILS 26 13 DECLARATIONS OF CONFORMITY 27 ...

Page 3: ...d person s to operate this machine 1 1 3 All due care and diligence should be taken by the operator for the safety of and with regard to those around whilst using the machine to include but not limited to 1 1 3 1 Elderly children pets livestock and property 1 2 Some or all of the following PPE Warning Signs and symbols may appear throughout this manual and you must adhere to their warning s Failur...

Page 4: ...windows are open 1 3 4 If you think you or someone around you has been affected by carbon monoxide poisoning 1 3 4 1 Get fresh air immediately 1 3 4 2 Open doors and windows turn off machine and leave the affected area 1 3 4 3 See your doctor immediately or go to hospital let them know that you suspect carbon monoxide poisoning 1 3 5 DO NOT use in an enclosed area or a moving vehicle 1 4 General f...

Page 5: ...otection 1 4 9 4 Protective clothing 1 4 9 5 Respiratory protective equipment should be used when in an unventilated area 1 4 9 6 When defueling always use a propriety fuel retriever 1 4 9 7 Always carry fuel in the correct and clearly marked container 1 4 10 Electrical Safety 1 4 10 1 Electricity can kill never work on LIVE ENERGISED equipment 1 4 10 2 Identify electrical isolation method and alw...

Page 6: ... to the fuel tank whilst the engine is running Wipe away any spilt fuel or oil with a clean cloth before operating Keep explosives and any other flammable products away from the machine at all times 1 5 1 2 To prevent fire and to provide adequate ventilation keep the generator at least one metre away from buildings and other equipment during operation 1 5 1 3 Operate the generator on level ground ...

Page 7: ... 5 4 6 Do not connect tools or other appliances to the generator before it has been started 1 5 4 7 If equipment is connected starting the generator may cause sudden movements of the equipment resulting in accidents or injuries It may also damage the alternator DO NOT Connect the generator to Mains AC sockets in your building commonly known as back feeding it is extremely dangerous and illegal Mos...

Page 8: ...Page 8 2 MACHINE LAYOUT 2 1 Main Unit 2 2 Inside Main Unit ...

Page 9: ...comes active when the Module switch on the Control panel is turned ON 2 4 2 It can where present display the following faults 2 4 2 1 Low Oil pressure 2 4 2 2 High Temperature 2 4 2 3 Over Speed 2 4 2 4 Engine Fault 2 4 2 5 High Low Volts and 2 4 2 6 Emergency STOP button activated ...

Page 10: ...e only becomes active when the Module switch on the Control panel is turned ON 2 5 2 After each successive press of the MENU button the Module will display the following information 2 5 2 1 Volts 2 5 2 2 Frequency 2 5 2 3 Hours RUN and 2 5 2 4 DC Battery Voltage ...

Page 11: ...lly be very dangerous Diesel can expand in hot weather and overflow 3 1 1 5 Always leave a 25mm gap above the fuel level Always check the engine oil level with the generator on a flat level surface before starting or refilling the machine If an insufficient amount of engine oil is used damage to the engine may result Do not overfill the engine with oil This generator is equipped with a low oil pre...

Page 12: ... and failure of other moving components increases significantly The generator lifespan will be greatly reduced if oil level and oil changes are reduced 3 2 3 Remove dipstick and check engine oil level 3 2 4 If oil level is below the lower level line refill with SAE API CH 4 CF SJ SL diesel engine oil on dipstick or to the top of filler neck N B do not screw oil filler in the oil filler cap when ch...

Page 13: ...ces connected to it 3 5 Running in periods of Operation 3 5 1 The first 20 hours are the break in period of the engine For this reason it is important to follow the following instructions during this period 3 5 1 1 Warm up the engine 5 minutes after the initial starting before applying load 3 5 1 2 Avoid applying loads above 3kw during the first 20 hours of operation 3 5 1 3 It is important to rep...

Page 14: ...and 13 6v 3 6 1 3 The battery will be re charged whilst the engine is running 3 6 1 4 Make sure battery is free from damage and is not leaking If battery shows signs of damage or leaking DO NOT continue to use Instead replace battery immediately 3 6 1 5 Make sure that all battery acid spills are correctly cleaned up straight away 3 6 1 6 The battery should be stored in a charged condition 3 6 1 7 ...

Page 15: ...STOP switch is out turn anti clockwise 4 1 3 Turn the Module Switch to ON the display and the two gauges will light up 4 1 4 Press the green RUN button the machine will begin to crank and will start 4 1 5 If the fuel has been changed or run out The starting method will be to press the RUN button and when machine begins to crank press the red STOP button repeat this three times Then press green RUN...

Page 16: ...ly air compressors and pressure washers take up to 4 times the rated wattage to start their motors For example a 3hp 2200w 2 2kw air compressor can take up to 8800w 8 8kw to start it Do not use floodlights together with other appliances 5 1 230 Volt AC use 5 1 1 With engine running switch ON the main breaker switch 5 1 1 1 Check the Voltage reading when in Voltage Mode see 2 5 Control Module Funct...

Page 17: ...rescent Lamp Fluorescent Lamp 80 vA 40 to 60 vA Motor Driven Equipment x 3 5 x 1 to 2 Refrigerator Electric fan Compressor or grinder Refrigerator 150 watts 450 to 750 vA 150 to 30 vA 5 2 12v DC use Connect the positive and negative charging lead clips to the correct poles of the battery If you try to charge a large capacity battery which is at a low voltage excessive current flow may occur This m...

Page 18: ...uld be carried out by a suitable qualified person 7 1 1 1 If you need technical advice please contact Genpower Item Daily First Month or 20 hours Six Months or 250 hours Six Months or 500 hours Every Year or 1000 hours Check and refill with diesel Change engine oil First Time Check and refill engine oil Check for oil leakage Check and tighten fastening parts Replace engine oil filter Replace air c...

Page 19: ...her debris enter oil or crankcase 7 2 1 Loosen the Oil Filler Cap 7 2 2 Remove the Oil Drain Plug and drain the old oil while the engine is still warm 7 2 3 Fit new copper washer as required 7 2 4 After draining re tighten the drain plug and refill with the recommended oil API CH 4 CF SJ SL diesel engine oil or higher grade 7 2 5 Clear up any spillages 7 2 6 Tighten the Oil Filler Cap ...

Page 20: ... dust from housing using a low pressure air line Replace the air filter if the engine output decreases or excessive exhaust smoke is noticed Never run the generator without the air filter otherwise rapid engine wear will result 7 4 1 Open access door to right of control panel 7 4 2 Air filter is mounted low and to the left 7 4 3 Undo the two clips and remove the air filter cover and take out the a...

Page 21: ...can give off hydrogen gas which can be highly explosive Do not smoke or allow flames or sparks near the battery especially during charging Wear correct PPE minimum of gloves and overalls 7 7 1 When you first install the battery ensure that the battery s polarity is the same as the generator s positive and negative leads Red to positive black to negative 7 7 2 Check the voltage is above 12 3V if no...

Page 22: ...stop 8 1 2 Stop the engine 8 1 3 Drain the engine oil whilst the engine is still warm and refill with fresh oil 8 1 4 Turn the engine for 2 3 seconds with the decompression lever set at the non compression position and the starting key set at the START position Do not start the engine 8 1 5 Wipe off the oil and dirt from the engine and store in a dry place 8 1 6 Dis connect the battery and store i...

Page 23: ...uel Remove the injector pump and have it tested Check the engine oil level The specified oil level should be to the upper lever The injector has severe carbon build up Clean the injector The generator is not producing power Main breaker switch has not been turned ON Turn the main breaker to the ON position The contact in the socket is not good Make sure plugs are fully inserted into sockets The ra...

Page 24: ...er bore x stroke mm 80 x 79 Displacement cc 794 Compression Ratio 23 1 Rated Power HP RPM 16 5 3000 Ignition System Compression Ignition Cooling System Water Cooled Lubrication System Pressure Splash Starting Method Electric Start Fuel Diesel Fuel Tank Capacity 45 Litres Lubrication Oil SAE15W 40 API CH 4 CF SJ SL diesel engine oil or higher grade Lubrication Oil Capacity Litres 2 24 Starting Moto...

Page 25: ...Page 25 11 SERVICE RECORD SHEET Date Hours Maintenance undertaken Name ...

Page 26: ...Postal address Genpower Limited Isaac Way Pembroke Dock Pembrokeshire SA72 4RW UK 12 2 Telephone and Fax contact numbers Office 44 0 1646 687880 12 3 Email contact Technical service genpower co uk 12 4 Web site www hyundaipowerequipment co uk ...

Page 27: ...s that these Hyundai products conform to the following CE Directives 13 1 1 2006 42 EC Machinery Directive 13 1 2 2004 108 EC EMC Directive 13 1 3 2000 14 EC Noise Emissions Directive 13 1 4 97 68 EC NRMM Emissions Directive 13 1 5 2006 95 EC Low Voltage Directive ...

Page 28: ...www hyundaipowerequipment co uk GENPOWER LTD Isaac Way London Road Pembroke Dock UNITED KINGDOM SA72 4RW T 44 0 1646 687 880 F 44 0 1646 686 198 E info hyundaipowerequipment co uk ...

Reviews: